
Lawn
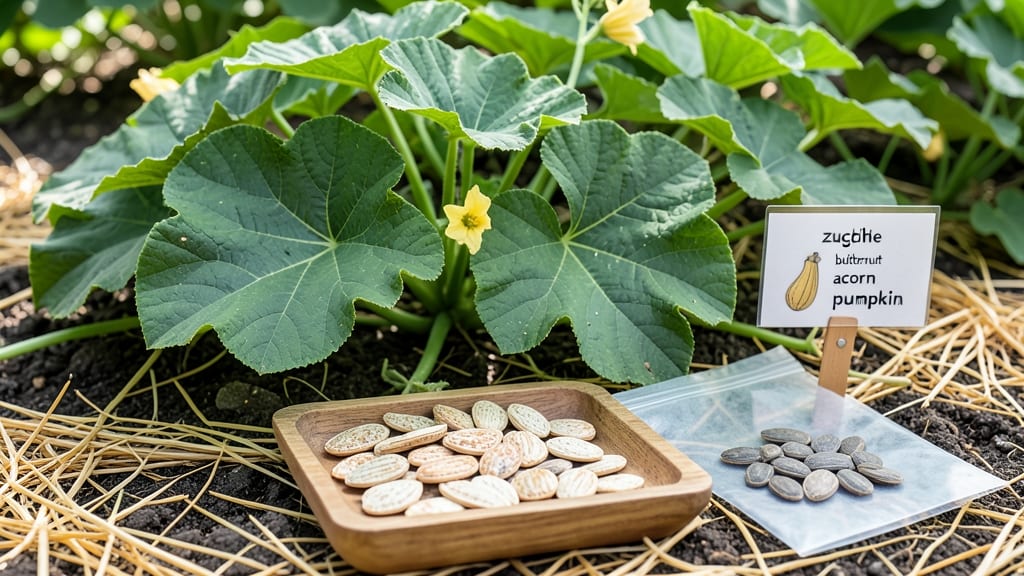
Mastering squash seed identification means the difference between a thriving vine and wasted effort. 🌱 The moment I learned to spot viable seeds—by their shape, color, and even tiny markings—I cut my seedling failures by half.
A plump, creamy-white acorn squash seed isn’t just different from a flat, net-textured butternut seed; it tells you exactly how deep to plant, how much space to give, and when to expect those first squash-shaped leaves.
Start by sorting seeds into three categories: smooth and plump (like zucchini), ridged or net-textured (like pumpkins), and tiny, oval (like winter squash). Color clues matter too—white or cream often means faster germination, while dark brown or black seeds can take longer.
If the seed feels hollow when tapped or has cracks, toss it; those won’t sprout. And yes, that tiny dimple? That’s where the root starts—never plant seeds dimple-down.
Once you’ve sorted them, you’ll know exactly what to expect: bush varieties (like zucchini) need less space, while vining types (like spaghetti squash) will sprawl 10+ feet.
Planting depth follows the seed’s size—twice as deep as the seed’s width—and sunlight needs shift from full sun for summer squash to partial shade for winter varieties.
By harvest time, you’ll spot the difference in growth habits: zucchini produces fast, butternut takes months, and acorn needs patience for that signature bumpy shape.
Pro tip: Save seeds from your best squash, label them with the variety, and store them in a cool, dry place. Next season, you’ll recognize them instantly—and your garden will thank you.
For variety-specific growing tips, check out our guides on zucchini vs. summer squash or how to grow pumpkins from seed.
📚 In This Guide
- What you need
- Instructions
- Tips and common mistakes
- Wrapping up and next steps
What you need
- ● Fresh or dried squash seeds: 1–2 squash varieties (e.g., butternut, acorn, or zucchini) to examine. Pro tip: 💡 Use seeds from a recently harvested squash for the best results!
- ● Magnifying glass or hand lens: 1–2x magnification (helps spot tiny details like seed coatings or cracks).
- ● White or light-colored tray or plate: 1 (for contrast—dark seeds stand out better!).
- ● Paper towels or coffee filters: 1–2 sheets (for moisture tests if needed).
- ● Water: Small bowl or spray bottle (for quick hydration checks).
- ● Ruler or measuring tape: 1 (to gauge seed size, if comparing varieties).
- ● Notebook or phone: 1 (to jot down observations like color, shape, or damage).
- ● Seed catalog or reference guide: 1 (for cross-referencing with known squash seed traits).
- ● Digital scale: 1 (to weigh seeds for density checks—viable seeds are often heavier!).
- ● Blacklight or UV flashlight: 1 (some seed coatings fluoresce under UV light, revealing hidden details!).
- ● Seed storage containers: 1–2 (if you plan to save viable seeds for planting later).
Step-by-Step visual guide to identifying viable squash seeds
Here's how to tell which seeds will sprout and which to toss—no guesswork involved.
🌱 Step 1: Examine Seed Shape and Smoothness
Start by holding a seed between your thumb and forefinger. Viable squash seeds are plump, symmetrical, and smooth to the touch. Run your fingernail over the surface—it should glide effortlessly without catching on rough spots. A good seed feels like a tiny, polished marble, with a slightly flattened side where it attached to the fruit.
Watch for dented, shriveled, or irregularly shaped seeds—these are dead giveaways. If a seed feels hollow when tapped gently against your palm, it's empty inside and won't germinate. I like to sort seeds into two piles right away: one for smooth, full-looking seeds and another for anything questionable.
🌿 Step 2: Test Seed Weight and Density
Drop a seed into your palm and let it rest there. Viable squash seeds have substantial weight for their size—they shouldn't feel light or papery. Pick up a seed from each pile and compare their heft; a good seed will feel noticeably heavier than a dried-out one. For extra accuracy, try the float test: place seeds in a bowl of water. Viable seeds sink immediately, while hollow or spoiled ones float.
This method works best with fresh seeds, but even older seeds (up to 5 years) will sink if they're still good. If you're dealing with a mix of old and new seeds, the float test helps separate the wheat from the chaff quickly. I always do this before planting—it saves hours of waiting for seeds that won't sprout.
💧 Step 3: Inspect for Physical Damage or Discoloration
Hold each seed up to a bright light or place it on a white surface to check for cracks, mold, or unusual coloration. Healthy squash seeds are a uniform cream, tan, or light brown color, depending on the variety. Any seed showing dark spots, fuzzy growth, or an off-white hue should be discarded immediately—these are signs of mold or fungal infection.
Look closely at the seed's edges. A viable seed has a smooth, slightly shiny edge where it was attached to the squash. If you see ragged, chewed, or discolored edges, the seed was likely damaged during harvest or storage. I keep a magnifying glass handy for this step—some damage is only visible at close range.
⏰ Step 4: Check for Moisture Content and Odor
Squeeze a seed gently between your fingers. A viable seed should feel slightly firm but not brittle. If it crumbles or feels dry and powdery, it's lost its moisture content and won't germinate. For seeds that feel borderline, place them in a sealed container with a damp paper towel for 24 hours. If they absorb moisture and plump up, they're still good.
Give each seed a quick sniff—this might sound odd, but musty, sour, or fermented smells are red flags. Fresh squash seeds have a neutral, slightly earthy aroma. If a seed smells like vinegar or rotting fruit, it's spoiled and should be tossed. This step is especially important for seeds stored in humid environments or those that sat too long in the squash before drying.
☀️ Step 5: Verify Germination Potential with the Paper Towel Test
Place 10-15 seeds between two damp paper towels in a sealed plastic bag. Store them in a warm, dark place (like on top of your fridge) and check daily for cracks or sprouts. Viable seeds should show tiny white roots within 3-7 days. If half or more of your test seeds sprout, the rest of the batch is likely good to plant.
This test gives you the most accurate results, but it takes time. I usually do this with seeds I'm unsure about or when I need to confirm viability for a large batch. If none of your seeds sprout after 10 days, they're likely past their prime. Keep in mind that even "good" seeds may take longer to germinate if they're older than 2 years.
Tips & tricks for perfect squash seed identification
These simple tricks will help you confidently separate viable seeds from those that won't sprout.
Visual Assessment Upgrade: For Step 1, use a bright white surface like a piece of paper or a light-colored plate to examine seeds. The contrast makes it easier to spot subtle discoloration or damage. I've found that using a magnifying glass (even a cheap jewelry loupe) reveals imperfections you'd miss with the naked eye, especially on older seeds.
Float Test Precision: In Step 2, the float test is foolproof—but there's a trick to make it even more reliable. Use lukewarm water instead of cold, as it helps reveal any tiny air pockets in seeds that might otherwise sink. Also, stir the water gently before dropping seeds in to prevent them from sticking together. This ensures each seed gets properly tested individually.
Moisture Revival Technique: When testing borderline seeds in Step 4, place them in a sealed container with a damp paper towel for the full 24 hours. Check them periodically—the moment they start to plump up is your confirmation they're still viable. I've revived seeds that looked completely dried out using this method, saving me from wasting entire batches.
Paper Towel Test Optimization: For Step 5, place your damp paper towels in a plastic bag but leave it slightly open (about 1 inch) to allow for minimal airflow. This prevents mold growth while still maintaining humidity. Also, use two layers of paper towels instead of one—the extra thickness keeps seeds more consistently moist during the test.
Pro Tips for Squash Seed Identification
- These simple tricks will help you confidently separate viable seeds from those that won't sprout.
- Visual Assessment Upgrade: For Step 1, use a bright white surface like a piece of paper or a light-colored plate to e...
- Float Test Precision: In Step 2, the float test is foolproof—but there's a trick to make it even more reliable. Use l...
Frequently asked questions
How do I know if squash seeds are still viable for planting?
Fresh, viable squash seeds are plump, firm, and sink in water. If they float, they’re likely spoiled. Test seeds by soaking them in warm water for 24 hours—if they sprout, they’re good to plant! Store-bought seeds usually have a viability window of 1–3 years if kept dry and cool.
What’s the best time to harvest squash seeds from the fruit?
Harvest seeds when the squash is fully mature but still firm (not overripe). Scoop out the seeds along with the gel-like pulp, rinse them thoroughly, and let them ferment in water for 3–5 days. This process helps remove the pulp naturally. After fermentation, dry the seeds completely before storage.
Can I use squash seeds from store-bought squash for planting?
Yes, but only if the squash was grown from heirloom or open-pollinated varieties. Hybrid squash seeds may not produce true-to-type fruit. Always check labels or ask the seller if you’re unsure. Store-bought squash is often treated to prevent sprouting, so viability isn’t guaranteed.
Why are some of my squash seeds moldy or discolored?
Mold or discoloration usually means the seeds were exposed to moisture, heat, or poor storage. Clean seeds thoroughly with a 10% bleach solution (1 part bleach to 9 parts water) to kill mold spores, then dry them completely in a well-ventilated area. Avoid storing seeds in humid or warm environments.
How should I store squash seeds long-term?
Store seeds in an airtight container (like a glass jar) with a desiccant packet to absorb moisture. Keep them in a cool, dark place (like a fridge or freezer) for maximum longevity. Label the container with the date—properly stored seeds can last 5–10 years, though germination rates decrease over time.
Wrapping up and next steps
Mastering squash seed identification is your first step toward a thriving garden! By now, you’ve learned how to spot viable seeds—plump, firm, and rich in color—and recognize those that won’t sprout. With practice, this skill will save you time, money, and frustration. 🌱
Ready to take the next step? Test a few seeds in a small pot or seed tray—it’s the best way to confirm your expertise! Happy gardening, and may your squash plants grow big and bold this season.