
Lawn
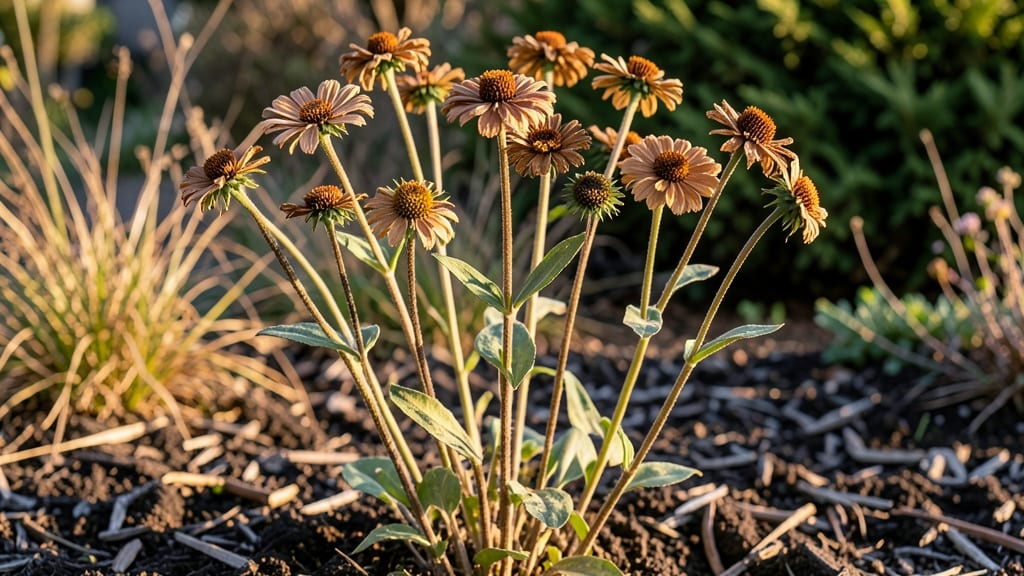
Saving zinnia seed heads means next summer’s blooms start with a simple fall ritual. 🌻 These papery seed pods hold the promise of vibrant zinnias returning—if you harvest and store them right.
I’ve learned that skipping this step means buying seeds every year, but doing it right gives you free, homegrown blooms that match your garden’s exact colors.
The process is simpler than it sounds: wait until the seed heads turn brown and crispy (usually after frost), then snip them carefully. Store them in a cool, dry place, and they’ll stay viable for years.
You’ll end up with seeds that produce zinnias just like the ones you grew—same height, same color, and sometimes even better.
Beyond seeds, dried zinnia heads add rustic charm to winter arrangements or become natural fillers in dried bouquets. Their papery texture contrasts beautifully with evergreens, and they hold their shape for months. Plus, leaving a few seed heads on the stems adds winter interest to your garden beds.
Harvesting at the right time prevents pests from getting to your seeds, and storing them properly ensures high germination rates. Whether you’re saving seeds for next year’s garden or using them for crafts, these seed heads are one of the most underrated parts of growing zinnias.
Let’s make the most of them!
📚 In This Guide
- What you need
- Instructions
- Tips and common mistakes
- Wrapping up and next steps
What you need
- ● Zinnia seed heads: Fully mature, dried heads (brown and papery) from healthy zinnias. Aim for at least 5–10 heads per variety for reliable storage.
- ● Scissors or pruning shears: Sharp, clean tools to snip stems (sterilize with rubbing alcohol if reusing).
- ● Paper bags (brown lunch bags or kraft paper): One per variety (e.g., 3–5 bags if saving multiple colors). Poke small holes in the bottom for airflow.
- ● Labeling supplies: Masking tape or plant tags
- ● Permanent marker (e.g., Sharpie)
- ○ Optional: Printed labels with variety names/years
- ● Drying location: A dry, well-ventilated spot indoors (e.g., basement, garage, or covered porch). Avoid direct sunlight or humidity.
- ● Air-tight containers: Small jars, envelopes, or resealable bags (e.g., quart-sized mason jars or 3x5” seed envelopes) for long-term storage.
- ● Desiccant packets: Place 1–2 in storage containers to absorb moisture (great for humid climates).
- ● Fine mesh bags: For extra protection against pests (e.g., 1–2 quart-sized mesh produce bags).
- ● Digital scale: Weigh seeds post-drying to ensure viability (aim for 0.5–1 oz per variety).
- ● Notebook: Track varieties, harvest dates, and germination notes for future reference!
How to preserve zinnia seed heads for next season’s garden
Here’s the simple method I use every fall to save zinnia seeds—no fancy tools, just patience and timing.
🌱 Step 1: Select and Harvest Mature Seed Heads
Wait until late fall after the first frost, when zinnia stalks turn completely brown and crispy. This ensures seeds have fully matured inside. I snip entire stems with clean pruners, leaving about 1-2 inches of stem attached to each seed head.
Don’t rush this step—green or partially brown heads won’t yield viable seeds. If you harvest too early, you’ll end up with seeds that won’t sprout next spring. Bundle the harvested heads in small groups and hang them upside down in a dry, well-ventilated spot like a garage or shed.
💧 Step 2: Dry Seed Heads Thoroughly
Let the seed heads dry for 2-3 weeks until they’re completely brittle. You’ll know they’re ready when the stems snap easily and the seed heads rattle with seeds when shaken gently. I place them near a window where indirect light keeps them dry but doesn’t overheat.
Check weekly for mold or pests—if you see any, discard those heads immediately. A small paper bag over each bundle helps catch falling seeds while allowing airflow. Avoid plastic bags; they trap moisture and ruin seeds.
☀️ Step 3: Extract and Clean the Seeds
Once fully dry, rub the seed heads between your hands over a clean sheet of newspaper or a tray. Zinnia seeds are large and easy to spot—they’ll fall out while chaff and debris stays behind. I spread the seeds on a baking sheet and let them air-dry for another 24 hours to ensure any lingering moisture evaporates.
For extra clean seeds, sift them through a fine mesh strainer to remove remaining plant debris. Store only the plump, dark seeds—discard any that look shriveled or discolored. These won’t germinate well.
🪴 Step 4: Store Seeds Properly for Viability
Transfer clean seeds into a labeled paper envelope or small glass jar. I add a silica gel packet to absorb any residual moisture, then seal the container tightly. Store in a cool, dark place like a pantry or refrigerator—zinnia seeds stay viable for 3-5 years under these conditions.
Label each container with the zinnia variety and the year harvested. Next spring, test a few seeds by planting them in a small pot to confirm germination before sowing your entire batch. This saves time and ensures you’re not wasting seeds that may have lost viability.
⏰ Step 5: Plant Saved Seeds in Spring
Start seeds indoors 6-8 weeks before your last frost date using a seed-starting mix. Plant seeds ¼ inch deep and keep the soil consistently moist until germination, which typically occurs in 7-14 days at 70-75°F. Thin seedlings to 3-4 inches apart once they develop their first true leaves.
Hardening off seedlings for 7-10 days before transplanting outdoors helps them adjust to outdoor conditions. Watch for leggy growth—a sign they need more light—and provide support if stems get top-heavy. With proper care, your saved seeds will produce vibrant blooms just like the original plants.
Tips & tricks for perfect zinnia seed preservation
Saving zinnia seeds for next season doesn't have to be a guess—these simple strategies ensure you'll have vibrant blooms year after year.
Timing is Everything: The late fall timing in Step 1 is critical because frost triggers the natural drying process. If you miss this window, seeds may not fully mature. I always check for completely brown, crispy stalks—this is your cue that seeds are ready. If temperatures drop unexpectedly, bring your cuttings indoors to finish drying near a sunny window.
Drying Secrets: During the 2-3 week drying period in Step 2, I recommend placing seed heads in a location with good airflow but no direct sunlight. A mesh laundry bag works perfectly—it allows airflow while keeping seeds contained. If your climate is particularly humid, add a small fan on low to speed up drying without damaging the delicate heads.
Seed Selection: When cleaning seeds in Step 3, focus on selecting only the plump, dark seeds—they're the most likely to germinate. I use a fine mesh strainer to remove chaff, but you can also spread seeds on a baking sheet and gently blow away debris with a straw. The 24-hour final air-dry helps prevent mold during storage.
Storage Wisdom: For long-term viability, I store seeds in small glass jars with silica gel packets rather than paper envelopes. The cool, dark pantry maintains ideal conditions, but if you notice any moisture condensation on the jar, transfer seeds to a new container immediately. Labeling with the variety and year harvested saves headaches come spring.
Pro Tips for Zinnia Seed Heads
- Saving zinnia seeds for next season doesn't have to be a guess—these simple strategies ensure you'll have vibrant blo...
- Timing is Everything: The late fall timing in Step 1 is critical because frost triggers the natural drying process. I...
- Drying Secrets: During the 2-3 week drying period in Step 2, I recommend placing seed heads in a location with good a...
Frequently asked questions
Got questions about saving zinnia seed heads for next season? You’re not alone! Here are some common queries—and their easy answers—to help you master the process.
When is the best time to harvest zinnia seed heads?
Harvest seed heads when they’re fully brown and dry but before they shatter or release seeds naturally. This usually happens in late summer to early fall, depending on your climate. Wait until the first frost if you’re in a cooler zone—just don’t let them freeze on the plant!
How long do zinnia seeds stay viable when stored?
Properly dried and stored zinnia seeds can last 2–3 years with good germination rates. Store them in a cool, dark place (like a sealed jar in the fridge) to extend their shelf life. Check for moisture or pests annually to keep them fresh.
Can I save seeds from hybrid zinnias?
Most hybrid zinnias (like those labeled "F1") won’t produce true-to-type seeds. For reliable blooms, stick to heirloom or open-pollinated varieties. Look for seed packets marked "non-hybrid" or "OG" (original generation) for the best results.
What should I do if my seed heads get moldy or buggy?
If you spot mold or pests (like aphids or beetles), isolate the seed heads immediately. Clean them with a soft brush or rinse gently, then dry them thoroughly in a well-ventilated area. Discard any severely damaged seeds—better safe than sorry!
Are there alternatives to drying seed heads indoors?
Yes! If you’re short on space, try these tricks:
- Paper bag method: Place seed heads in a breathable paper bag and hang it upside down in a dry, shaded spot.
- Screen drying: Use a mesh screen or old window screen to elevate heads for airflow.
- Outdoor drying: Tie heads in small bundles and hang them in a garage or shed (away from direct sun).
Wrapping up and next steps
Zinnia seed heads are a gardener’s secret weapon for next-season success—easy to harvest, dry, and store! With just a little patience, you’ll enjoy free, homegrown blooms that rival store-bought seeds.
Whether you’re a seasoned green thumb or a beginner, this simple process turns dead flowers into a gift for your future garden.
Now that you’re armed with the know-how, grab those dried seed heads and get storing! 🌱 Next up, plan your spring layout—your zinnias will thank you with bold, cheerful blooms all season long.