
Propagation
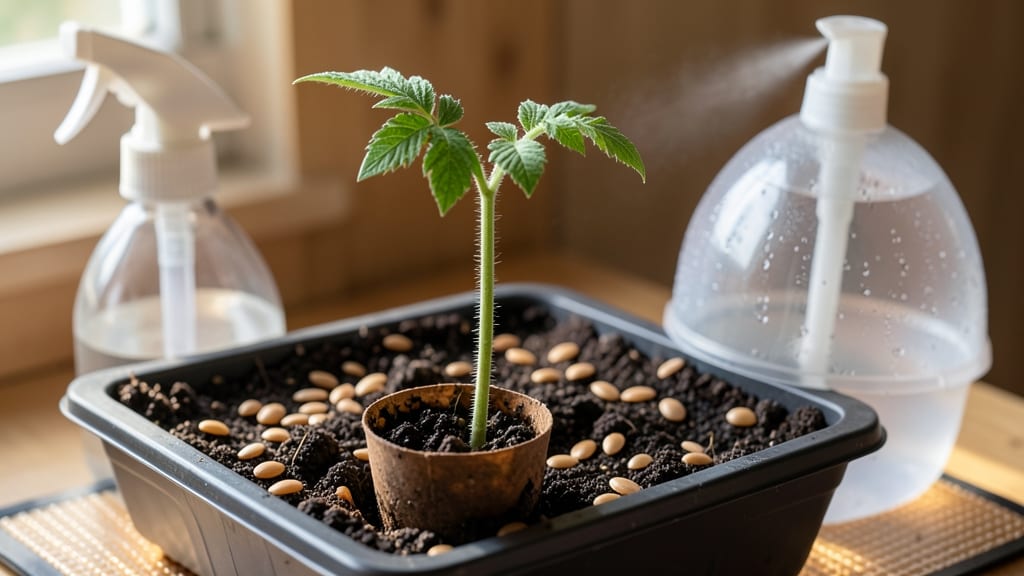
Tomato seed germination starts with a damp paper towel and a warm spot—no fancy equipment needed. 🌱 I’ve watched seeds crack open in just 7 days using this method, and the trick isn’t complicated: it’s about warmth, moisture, and patience.
The first tiny root breaks through the seed coat like a tiny green miracle, and that’s when the real magic begins.
You’ll need a few simple supplies: tomato seeds (heirlooms or hybrids work equally well), a clean paper towel, a plastic bag, and a warm place like on top of the fridge.
The soil-free method lets you monitor progress without risking mold, and once those first sprouts appear, you’ll transplant them into soil with confidence. By day 7, you’ll have sturdy seedlings with true leaves ready for their first pots.
The key is keeping conditions consistent—no drying out, no chilling—and the payoff is seedlings that outpace store-bought transplants. No more wilting or leggy growth; just strong, healthy starts. This method works year-round, whether you’re starting early indoors or extending your season.
Once you’ve mastered the basics, you can experiment with different varieties and timing. Here’s how to get those seeds sprouting reliably every time.
📚 In This Guide
- What you need
- Instructions
- Tips and common mistakes
- Wrapping up and next steps
What you need
- ● Tomato seeds: 10–20 fresh, high-quality seeds (organic or heirloom varieties work best). Pro tip: 💡 Check the seed packet for germination rates—aim for 85%+ for best results!
- ● Seed-starting mix: 1–2 cups of sterile, seed-specific potting soil (avoid garden soil—it’s too dense!). Look for a mix labeled "peat-free" if sustainability is a priority.
- ● Containers: Option 1: Seed trays (with drainage holes) or biodegradable pots (3–4 inches deep).
- ● Option 2: Recycled containers like egg cartons or plastic cups (poke holes in the bottom!).
- ● Water: Room-temperature, filtered water (chlorine-free) or a spray bottle for gentle hydration.
- ○ Heat source (optional but helpful): A seedling heat mat (set to 70–85°F) to speed up germination.
- ● Or, place containers on top of a refrigerator or in a sunny windowsill.
- ● Spray bottle (for misting seeds without disturbing them).
- ● Tweezers or pencil (to gently press seeds into soil).
- ● Plastic wrap or humidity dome (to create a mini greenhouse effect).
- ● Grow lights or sunny windowsill (12–16 hours of light daily after sprouting).
- ● Labels & markers (to track seed varieties and planting dates).
- ● A clean workspace (wipe down surfaces with rubbing alcohol to prevent mold).
- ● Patience & consistency—tomato seeds need warmth and moisture to germinate in 5–10 days!
- ● Last-minute tip: Soak seeds in water for 4–6 hours before planting to jumpstart germination. ✨ Works like magic!
Step-by-Step instructions for stress-free tomato seed germination
Here's the method I rely on to get sturdy tomato seedlings in just a week—no fancy equipment needed.
🌱 Step 1: Prep Seeds and Containers for Optimal Germination
Start by soaking your tomato seeds in lukewarm water for 12 hours. This softens the outer coating and speeds up germination. I use a small bowl and cover it with a damp paper towel to keep them hydrated while they soak. After soaking, gently pat them dry with another paper towel—this prevents mold from forming later.
Fill your seed-starting containers with moistened seed-starting mix (not regular garden soil). Press it down lightly so it's firm but not compacted. You want the mix to hold moisture without becoming soggy. Create small holes about ¼ inch deep—just enough to nestle each seed comfortably. I like to use a pencil or toothpick to make these planting holes neatly.
💧 Step 2: Plant and Maintain Ideal Moisture
Place 1-2 seeds per hole, spacing them about ½ inch apart if planting multiple in one container. Cover them lightly with more of the moist mix—just enough to hide the seeds but not bury them too deeply. Press down gently with your finger to ensure good seed-to-soil contact, which helps with even germination.
Water the surface lightly with a spray bottle until the mix looks evenly damp. The key here is to keep the soil consistently moist but not waterlogged. I place the container in a shallow tray filled with ½ inch of water to create a humid environment. This method keeps the seeds hydrated without overwatering, which can cause them to rot.
☀️ Step 3: Provide Warmth and Light for Fast Sprouting
Tomato seeds germinate best in 75-85°F soil. I place my seed trays on a seedling heat mat, which keeps the soil warm and speeds up germination. If you don’t have a heat mat, place the tray in a warm spot like the top of your fridge or near a sunny window (but not in direct sunlight yet). You should see tiny sprouts in 5-7 days.
Once the first sprouts appear, move the tray to a location with bright, indirect light. Avoid direct sunlight at this stage—it can scorch the delicate seedlings. If your seedlings start to stretch toward the light (a sign they’re not getting enough), move them closer to the light source or add a grow light. You’ll know they’re happy when they have sturdy stems and deep green leaves.
⏰ Step 4: Monitor and Care for New Seedlings
After the seeds sprout, remove any weak or leggy seedlings, leaving only the strongest one per container. This prevents overcrowding and ensures your remaining plant gets enough nutrients. Water the seedlings gently at the base, avoiding the leaves to prevent disease. You’ll know it’s time to water again when the top ½ inch of soil feels dry.
Keep the seedlings in a warm spot with 14-16 hours of light daily. If you’re using a grow light, raise it as the seedlings grow to maintain a 2-4 inch distance from the tops. Watch for signs of stress like yellowing leaves or slow growth—these usually mean the seedlings need more light or better airflow. With consistent care, your tomato seedlings will be ready for transplanting in about 4-6 weeks.
Tips & tricks for stress-free tomato seed sprouting
Here's what I've learned after nurturing hundreds of tomato seedlings—these little tricks make all the difference between wimpy sprouts and sturdy plants.
Soaking Secret: When soaking seeds for those critical 12 hours, use a small bowl with just enough lukewarm water to cover them completely. I add a damp paper towel over the top to create a mini greenhouse effect—this keeps moisture locked in while preventing mold. After soaking, pat them dry thoroughly; damp seeds are more prone to rot when planted.
Planting Precision: In Step 1, those ¼-inch deep holes should be just deep enough to nestle the seeds comfortably. I find using a pencil or toothpick makes perfectly sized holes without compacting the seed-starting mix. Press gently but firmly around each seed to ensure good soil contact—this helps roots anchor immediately when they sprout.
Lighting Strategy: For the 14-16 hours of light daily, I position my seedlings under a simple LED grow light about 2-3 inches away. If using natural light, rotate the tray daily so all seedlings get even exposure. Watch for seedlings stretching toward light (called "legginess")—this means they need more light or a closer light source to develop strong stems.
Humidity Hack: The shallow tray with ½ inch of water creates perfect humidity, but be careful not to let the bottom of the container sit directly in water—this can cause root rot. I place a small piece of plastic wrap over the top of the container for extra humidity during the first few days after planting, then remove it once sprouts appear.
Pro Tips for Tomato Seed Germination
- Here's what I've learned after nurturing hundreds of tomato seedlings—these little tricks make all the difference bet...
- Soaking Secret: When soaking seeds for those critical 12 hours, use a small bowl with just enough lukewarm water to c...
- Planting Precision: In Step 1, those ¼-inch deep holes should be just deep enough to nestle the seeds comfortably. I ...
Frequently asked questions
Got questions about getting your tomato seeds to sprout like a pro? You’re not alone! Here are some of the most common queries—plus quick, actionable answers to keep your germination game strong.
How long should I wait before seeing tomato seed sprouts?
Most tomato seeds sprout within 5–10 days under ideal conditions (warmth, moisture, and darkness). If your setup is perfect but nothing emerges after 14 days, the seeds may be old or non-viable. Try testing a few in a damp paper towel—if they don’t crack in 3–5 days, they’re likely duds.
Can I speed up germination with heat?
Tomato seeds love warmth—aim for 75–85°F (24–29°C). Place your seed tray on a seedling heat mat or nestle it near a sunny window (but not in direct light yet). Pro tip: A DIY solution is to tuck the tray inside a clear plastic bag with a warm lightbulb nearby—just monitor for condensation!
What’s the best way to keep seeds moist without drowning them?
Moisture is key, but soggy soil = rot. Use a spray bottle to mist the soil lightly until it’s damp (like a wrung-out sponge). A clear lid or plastic wrap helps retain humidity, but remove it daily to prevent mold. Overwatering is the #1 killer—stick your finger in the soil; if the top inch feels damp, wait another day.
Can I use store-bought tomato seeds straight from the packet?
Yes! Just rinse them in warm water to remove any residue (like preservatives or fungicides) that might slow germination. For heirloom or organic seeds, a 5-minute soak in hydrogen peroxide (1 part to 10 parts water) can boost viability. No need to scarify (nick the seed)—tomato seeds germinate easily without prep!
What if my seeds won’t germinate—did I mess up?
Not necessarily! Double-check these fixes:
- Freshness: Seeds older than 1–2 years may fail—test a few.
- Depth: Plant seeds ¼ inch deep max (too deep = struggle to surface).
- Light: Keep them dark until sprouts appear (1–2 inches tall).
- Soil temp: Cold soil (<60°F/15°C) stalls growth—move to a warmer spot.
Wrapping up and next steps
Germinating tomato seeds in just 7 days is totally doable with the right prep and patience! By keeping your seeds warm, moist, and consistent, you’ll soon be watching those tiny sprouts burst through the soil—proof that even beginners can grow their own thriving tomato plants. 🌱
Now that you’re armed with the know-how, take the next step: grab those seeds and give it a try! Whether you’re growing for fresh salads or just the joy of nurturing life, your green thumb is closer than you think. Happy planting! 🌱✨