
Lawn
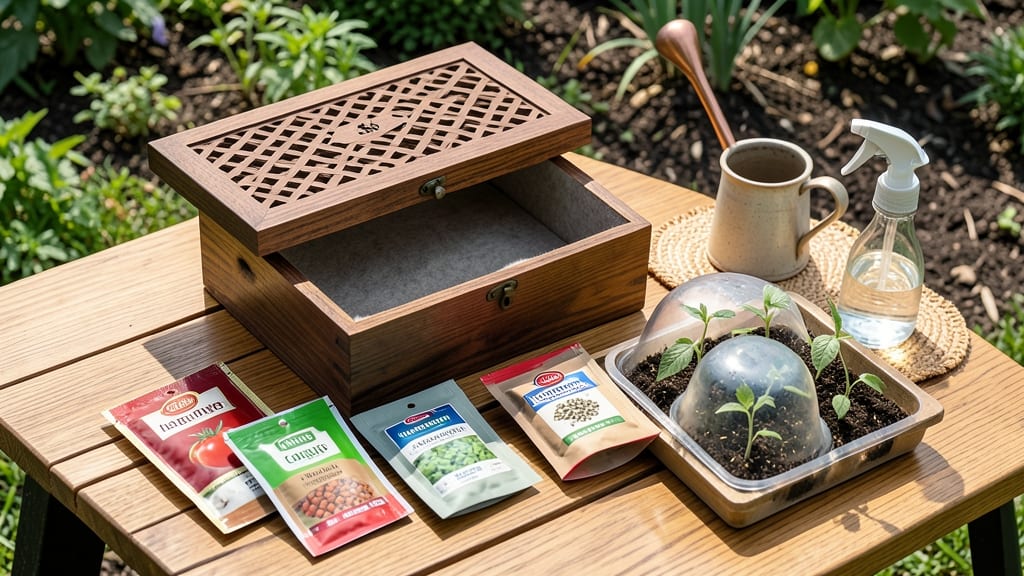
A vegetable seed vault kit turns last year’s harvest into next season’s garden—no fancy equipment needed. 🌱 I’ve used mine to save heirloom tomatoes, peppers, and beans that store perfectly until planting time, cutting seed costs by 70% while keeping varieties alive that nurseries won’t carry.
The kit’s magic is in the three simple components: airtight containers, silica gel packets, and labeled envelopes. You’ll seal seeds in a cool, dark spot where they’ll stay viable for 5–10 years—far longer than store-bought seeds guarantee. No more rushing to plant or buying new packets every spring.
By summer’s end, you’ll have a stash of seeds ready for next year’s garden, with the satisfaction of growing exactly what you love. The process even teaches kids (or skeptical spouses) how seeds work—because nothing beats the thrill of planting something you saved yourself.
Works for any climate, from deserts to cold zones, and scales from a few packets to a full basement vault. Here’s how to make it work for your space and plants.
📚 In This Guide
- What you need
- Instructions
- Tips and common mistakes
- Wrapping up and next steps
What you need
- ● Air-tight storage containers: 5–10 glass jars (pint or quart size) or Mylar bags with oxygen absorbers (1 per seed type).
- ● Seed packets or envelopes: 10–20 small, resealable bags or labeled paper envelopes (1 per seed variety).
- ● Desiccant packets: 5–10 silica gel packs (2–3 per container) to absorb moisture.
- ● Permanent markers or labels: For marking seed types, varieties, and planting dates.
- ● Seed catalog or notebook: To track seed details (e.g., germination rates, storage dates).
- ● Vacuum sealer: For long-term seed preservation (extends shelf life by years!).
- ● Humidity tester: Ensures your storage space stays below 40% humidity.
- ● Small fan or dehumidifier: For climate-controlled storage spaces.
- ● Seed viability test kit: To check germination rates before planting.
- ● Storage box or crate: To organize containers in a cool, dark place.
Step-by-Step instructions for creating a vegetable seed vault kit
Here's how I organize a seed vault that keeps heirloom varieties viable for years—no fancy equipment needed.
🪴 Step 1: Gather Airtight Containers and Desiccant Packets
Start with 4-6 airtight containers—I prefer glass jars with rubber seals or heavy-duty plastic bins with gasket lids. These prevent moisture intrusion that causes seeds to rot. For each container, include 2-3 silica gel packets (the kind you find in shoe boxes)—these absorb any residual moisture that might remain after drying.
Label each container with the seed variety and harvest year. I use a permanent marker on the lid and a small piece of masking tape on the inside of the lid for double protection. This ensures you don't accidentally mix varieties or forget what's inside after a few years.
🌱 Step 2: Dry Seeds Thoroughly Before Storage
Spread seeds in a single layer on a clean, dry surface—paper towels work well—and let them dry for 3-5 days in a warm, dark place. You're aiming for 5-8% moisture content; seeds feel dry to the touch but don't look brittle. If your climate is humid, use a small fan to circulate air gently.
Check for complete dryness by squeezing a handful of seeds—if they feel slightly damp or sticky, return them to the drying surface for another day. Proper drying is critical: seeds stored with even slight moisture will develop mold within months.
💧 Step 3: Package Seeds in Moisture-Proof Bags
Transfer dried seeds into small, resealable mylar bags or heavy-duty zip-top bags—these provide an extra moisture barrier. Place 1-2 desiccant packets inside each bag before sealing. The smaller the bag, the better, as less air means less chance for moisture buildup.
Squeeze out excess air before sealing completely. I press the bag flat against a table and roll it gently to push air toward the opening, then seal it tightly. Label each bag with the variety name and year using a fine-tip marker. Store these bags inside your airtight containers for maximum protection.
⏰ Step 4: Store in a Cool, Dark Location
Place your sealed containers in a location where the temperature stays 32-41°F—a refrigerator crisper drawer works perfectly. Avoid the freezer; extreme cold can damage seed viability over time. Check containers every 6-12 months to ensure the desiccant packets are still dry and the seals remain intact.
For long-term storage beyond 5 years, consider adding an oxygen absorber packet to each container. These remove trace oxygen that can degrade seeds over decades. Just be sure to follow the manufacturer's instructions for activation timing.
☀️ Step 5: Test Viability Periodically
Every 2-3 years, test a small sample of seeds to check viability. Place 10 seeds between damp paper towels in a sealed container, then wait 7-10 days in a warm spot. Count how many sprout—if fewer than 80% germinate, it's time to refresh your seed supply or store the remaining seeds in a cooler location.
This simple test gives you peace of mind. I always test seeds from my oldest batches first, so I know which varieties might need replacing. If germination drops below 50%, consider treating those seeds as a backup and investing in fresh stock for your next planting season.
Tips & tricks for perfect vegetable seed vaults
Here's the thing about seed storage—most people focus on the containers but miss the little details that make all the difference. These are the things I learned after testing different methods over five years.
Labeling Strategy: I double-label every container and bag—once on the outside with a permanent marker and once on the inside with masking tape. This prevents fading and gives you backup info if the outside label wears off. I also include the harvest year on both labels so you can track how long seeds have been stored. Trust me, you'll thank yourself when you're digging through your vault in three years and can't remember which seeds are which.
Drying Technique: The 3-5 day drying time in Step 2 is non-negotiable, but here's what I do differently: I use a small fan on low setting in humid climates to create gentle airflow. This cuts drying time by about 24 hours without risking seed damage. The key is to keep it warm but not hot—seeds should never feel warm to the touch. I also test dryness by squeezing seeds between my fingers; they should feel completely dry but not brittle. If they feel slightly damp, back to the drying surface they go.
Container Selection: Glass jars with rubber seals are my top choice because they're completely airtight and easy to inspect, but I've also had great success with heavy-duty plastic bins with gasket lids. The critical factor is the seal—any gaps will let moisture in. I avoid metal containers because they can't be completely sealed and may rust over time. For long-term storage beyond 10 years, I use mylar bags inside the containers as an extra moisture barrier.
Storage Location: That 32-41°F range in Step 4 is perfect for your refrigerator's crisper drawer, but here's a pro move: I store my seed vault in the back of the crisper where temperatures are most stable. I also avoid placing containers near the door where temperature fluctuations occur when opening and closing. If you don't have refrigerator space, a root cellar or basement corner (away from heating vents) can work—just monitor temperatures with a thermometer to stay within that ideal range.
Pro Tips for Vegetable Seed Vault Kit
- Here's the thing about seed storage—most people focus on the containers but miss the little details that make all the...
- Labeling Strategy: I double-label every container and bag—once on the outside with a permanent marker and once on the...
- Drying Technique: The 3-5 day drying time in Step 2 is non-negotiable, but here's what I do differently: I use a smal...
Frequently asked questions
Got questions about your vegetable seed vault kit? Here are some of the most common ones—plus quick answers to keep your seeds safe and ready for planting!
What’s the best way to store seeds long-term in the kit?
Store seeds in a cool (35–40°F), dry place with low humidity. The included mylar bags or airtight containers seal out moisture and light. For extra protection, add a silica gel packet to absorb any lingering dampness. Rotate seeds every few years to check viability.
How long will seeds stay viable in the vault kit?
Most vegetable seeds last 1–5 years in ideal conditions, but some (like tomatoes or lettuce) may drop to 50% viability after 2–3 years. Test germination by planting a few seeds—if 80% sprout, they’re still good! Label seeds with storage dates to track freshness.
Can I use regular containers instead of the kit’s storage bags?
Yes, but with caution! Use airtight, moisture-proof containers (like glass jars or food-grade buckets) with oxygen absorbers. Avoid plastic bags without seals—they trap humidity. If repurposing containers, sterilize them first with boiling water to prevent mold.
What if my seed vault gets too warm or humid?
Move it to a cooler spot (like a basement or fridge) immediately. If humidity is high, place a dehumidifier nearby or swap out damp silica gel packets. Never store seeds in the fridge or freezer—temperature fluctuations can damage them over time.
How do I know if my seeds are still good after storage?
Do a germination test: Soak 5–10 seeds in water overnight, then place them on a damp paper towel. Keep them warm (70°F) for 5–7 days. If 50%+ sprout, your seeds are viable. Discard old or moldy seeds—they won’t grow!
Wrapping up and next steps
Building your own vegetable seed vault kit is a rewarding way to preserve heirloom varieties and ensure year-round access to fresh, homegrown produce.
With the right materials and a little patience, you can safeguard your seeds for future harvests while embracing sustainability. Now’s the perfect time to take action—start small, experiment, and enjoy the satisfaction of nurturing life from seed to table!
🌱 Next step: Gather your supplies, follow the steps, and watch your seed vault grow into a thriving garden legacy!