
Lawn
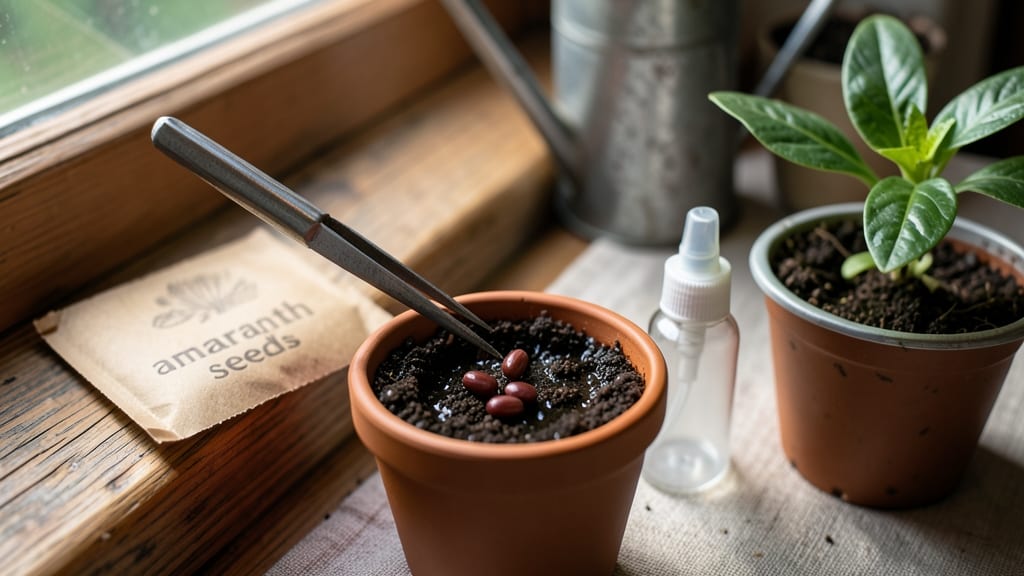
Planting amaranth seeds reveals a secret weapon for effortless harvesting—those zero-twist pods make collecting seeds as simple as shaking a plant. 🌱 I learned the hard way that skipping soil prep or planting too deep turns these fast growers into stubborn weeds, but once you nail the basics, amaranth rewards you with 3-foot-tall plants packed with edible leaves and seeds.
The magic happens in warm soil after your last frost, when temperatures stay above 70°F. Scatter seeds ½-inch deep, 12 inches apart, and watch them sprout in just 5-7 days—no fussing with trays or delicate seedlings.
Amaranth thrives in full sun, tolerates poor soil, and even handles drought once established, making it perfect for beginners who want low-maintenance results.
By mid-summer, you’ll be harvesting tender greens or watching those iconic red, gold, or green seed pods form. The best part? Those pods stay upright without twisting, so collecting seeds is as easy as plucking them straight off the stalk.
No pruning, no bending—just effortless harvests that keep coming until frost.
Whether you’re growing for grain, leafy greens, or vibrant ornamental plants, amaranth adapts to your needs. Start with a handful of seeds, and you’ll have enough for salads, seeds for next year, or even bird feeders. Ready to grow plants that practically harvest themselves?
📚 In This Guide
- What you need
- Instructions
- Tips and common mistakes
- Wrapping up and next steps
What you need
- ● High-quality amaranth seeds – Opt for zero-twist pod varieties like ‘Red Garnet’ or ‘Love Lies Bleeding’. You’ll need about 1-2 pounds (450-900g) for a small garden plot (10x10 feet).
- ● Well-draining soil – Amaranth thrives in loamy, slightly acidic soil (pH 6.0-7.5). If your soil is heavy clay or sandy, mix in 2-3 inches (5-7.5 cm) of compost.
- ● Fertilizer – Use a balanced, organic fertilizer (10-10-10 or 5-5-5) or compost tea. Apply ½ cup per 10 feet of row at planting time.
- ● Watering can or hose with a gentle spray nozzle – Amaranth seeds need consistent moisture but hate soggy soil.
- ● Garden trowel or transplanting spade – For digging holes or creating furrows.
- ● Rake or hoe – To loosen soil and remove weeds.
- ● Measuring tape or ruler – For spacing seeds 12-18 inches (30-45 cm) apart in rows.
- ○ Garden twine or stakes (optional but helpful) – To mark rows if you’re new to spacing.
- ● Row covers or shade cloth – Protects young seedlings from pests or harsh sun.
- ● Mulch (straw or grass clippings) – Retains moisture and suppresses weeds.
- ● Pruning shears – For harvesting pods or trimming excess growth.
- ● Seedling trays (if starting indoors) – Use biodegradable pots to avoid transplant shock.
Step-by-Step guide to growing amaranth with zero-twist pods
Here’s how to grow vibrant, twist-free amaranth plants that practically harvest themselves.
🌱 Step 1: Choose the Right Variety and Prepare the Soil
Amaranth thrives in loose, well-draining soil with a pH between 6.0-7.5. Work 2-3 inches of compost into the top layer of your garden bed or container mix to boost nutrients—amaranth is a heavy feeder and rewards rich soil with lush growth. I like to add a handful of aged manure or worm castings for extra fertility, especially if your soil feels dense or clay-heavy.
Smooth out the soil surface and create shallow ½-inch deep furrows spaced 12-18 inches apart. This spacing prevents overcrowding, which leads to weak stems and tangled pods. If you’re using zero-twist pods, plant them directly in the furrows—no need for seedling prep. These pods are pre-treated to discourage natural twisting, making harvesting a breeze.
☀️ Step 2: Plant Seeds or Pods at the Right Time and Depth
Wait until the soil is at least 60°F before planting, as cold soil slows germination. Drop 1-2 seeds per hill (or 1 zero-twist pod) into each furrow, spacing them 6-8 inches apart. Cover lightly with ¼ inch of soil—burying them deeper delays sprouting because they need light to germinate. Gently pat the soil to secure the seeds without compacting it too tightly.
Water the area lightly but thoroughly right after planting to settle the soil around the seeds. Avoid soaking the ground, which can wash seeds deeper or create muddy pockets. You’ll see first sprouts in 7-14 days, depending on warmth. If your climate is hot and dry, mulch the area with 1 inch of straw to retain moisture and keep weeds at bay.
💧 Step 3: Water and Fertilize for Lush Growth
Keep the soil consistently moist but not soggy—amaranth wilted leaves signal underwatering, while yellowing or drooping stems mean overwatering. Water at the base of plants in the morning to reduce fungal risks. Once seedlings reach 4-6 inches tall, switch to deep watering every 2-3 days (check the top 1-2 inches of soil—it should feel dry to the touch before watering again).
Feed plants with a balanced, water-soluble fertilizer (10-10-10) when they’re 6 inches tall, then again 4-6 weeks later. Zero-twist pods don’t need extra support, but a side-dressing of compost mid-season gives them a growth boost. Avoid high-nitrogen fertilizers—they produce leafy growth at the expense of pods. Watch for bright green, glossy leaves as a sign your plants are thriving.
✂️ Step 4: Harvest Pods Before They Twist
With zero-twist pods, you can harvest 30-40 days after planting, when the seed heads are halfway mature but before they fully dry on the plant. Snap off entire seed heads by hand—no twisting required! Place them in a paper bag and hang upside down in a dry, well-ventilated spot for 2-3 weeks to fully dry. The pods will release seeds easily once dry.
If you miss the window and pods start twisting naturally, don’t worry—just harvest them anyway. The seeds will still be viable, though the pods may be harder to open. I like to cut seed heads with scissors for cleaner breaks, especially if the stems are woody. Store dried seeds in an airtight container in a cool, dark place for up to 2 years.
🌿 Step 5: Maintain Plants Through Maturity
Remove any yellow or diseased leaves promptly to keep plants healthy. If stems grow tall and leggy, pinch back the tips to encourage bushier growth and more pods. Amaranth is drought-tolerant once established, but wilting in hot afternoons means it’s time to water again. Mulch around the base to retain moisture and suppress weeds.
Watch for pests like aphids or spider mites, which love amaranth’s sap. Spray plants with a soapy water solution (1 tsp mild soap per quart of water) if you spot clusters of tiny insects. With proper care, your plants will produce vibrant, twist-free pods ready for harvest in just 6-8 weeks—no fuss, no frustration.
Tips & tricks for growing amaranth with zero-twist pods
These simple strategies will help you avoid common pitfalls and grow amaranth that practically harvests itself.
Soil Prep Secret: Before creating those ½-inch deep furrows in Step 1, mix a handful of wood ash into your compost-amended soil. This raises the pH slightly toward the ideal 6.0-7.5 range while adding potassium—amaranth loves both. Test your soil first if you're unsure about pH levels, as this makes all the difference for healthy root development. The extra effort prevents weak stems that might snap during harvest.
Planting Precision: When placing your zero-twist pods in Step 2, I've found that spacing them 8 inches apart (instead of the full 12-18 inches) works beautifully in containers or small gardens. The pods' natural bushiness means they won't compete for sunlight when closer together. Just be prepared to thin seedlings if you use regular seeds—crowding leads to those tangled pods we're trying to avoid!
Harvest Timing Tip: For that perfect 30-40 day harvest window in Step 4, watch for the seed heads to turn from green to a pale golden hue. This is your cue that they're halfway mature. If you're unsure, snap off a small pod—if it opens easily with a gentle tug, it's ready. The zero-twist pods will feel slightly crisp when mature, unlike regular pods that become tough and fibrous. This visual cue prevents over-maturing and seed loss.
Drying Strategy: When drying your harvested pods for 2-3 weeks in Step 4, place them in a location with a small fan circulating air. This speeds up the process while preventing mold. I've had the best luck with a well-ventilated garage or basement where temperatures stay between 60-70°F. Check pods weekly—if they're completely dry but still feel slightly damp inside, they need another week. Proper drying ensures easy seed release and long storage life.
Pro Tips for Amaranth Seed Planting
- These simple strategies will help you avoid common pitfalls and grow amaranth that practically harvests itself.
- Soil Prep Secret: Before creating those ½-inch deep furrows in Step 1, mix a handful of wood ash into your compost-am...
- Planting Precision: When placing your zero-twist pods in Step 2, I've found that spacing them 8 inches apart (instead...
Frequently asked questions
Got questions about growing amaranth seeds? You’re not alone! Here are some of the most common queries—and their straightforward answers—to help you crush your planting game with confidence.
When is the best time to plant amaranth seeds?
Amaranth thrives in warm soil, so wait until after the last frost when temperatures consistently stay above 50°F (10°C). For most U.S. regions, this means mid-to-late spring (April–June). If you’re in a short-season area, opt for fast-maturing varieties like ‘Red Garnet’ or ‘Love Lies Bleeding’.
How long does it take for amaranth seeds to germinate?
Count on 7–14 days for germination, depending on soil warmth and moisture. Keep seeds moist (not soggy) and in direct sunlight—they need warmth to sprout. If soil is cool (<60°F/15°C), germination may take longer. Pro tip: Use a seedling heat mat for faster results!
Can I plant amaranth seeds indoors first?
Yes! Start seeds indoors 4–6 weeks before the last frost in biodegradable pots or peat pellets. Use a seed-starting mix, keep soil moist, and place under grow lights (12–16 hours/day). Transplant seedlings outdoors when they’re 2–3 inches tall and hardened off. Just be gentle—they’re tender!
What pests or problems should I watch for when growing amaranth?
Amaranth is generally pest-resistant, but keep an eye out for aphids, spider mites, or cutworms. Handpick pests early or spray with neem oil. Overwatering can cause powdery mildew, so ensure good airflow. If leaves yellow, check for nutrient deficiencies (add compost or balanced fertilizer).
What can I do with amaranth seeds if I don’t want to plant them?
Don’t let those seeds go to waste! Use them as a nutrient-rich snack (toast and season them like popcorn) or grind them into gluten-free flour for baking. They’re also a great wildlife feed—birds and squirrels love them! Store seeds in a cool, dry place for up to 2 years.
Wrapping up and next steps
Planting amaranth seeds with zero-twist pods is a rewarding way to grow a nutrient-packed crop with minimal fuss! 🌱 Whether you're a seasoned gardener or just starting out, these easy-to-harvest pods simplify the process while delivering a bountiful harvest.
Now that you’re equipped with the right knowledge, it’s time to roll up your sleeves and give it a try in your garden this season—your taste buds (and future smoothies!) will thank you.
Next steps:
- Mark your calendar for planting season (spring or early summer).
- Start small—try a 5x5 ft patch to test your green thumb!
- Share your progress (or harvest!) with fellow gardeners for extra motivation.