
Lawn
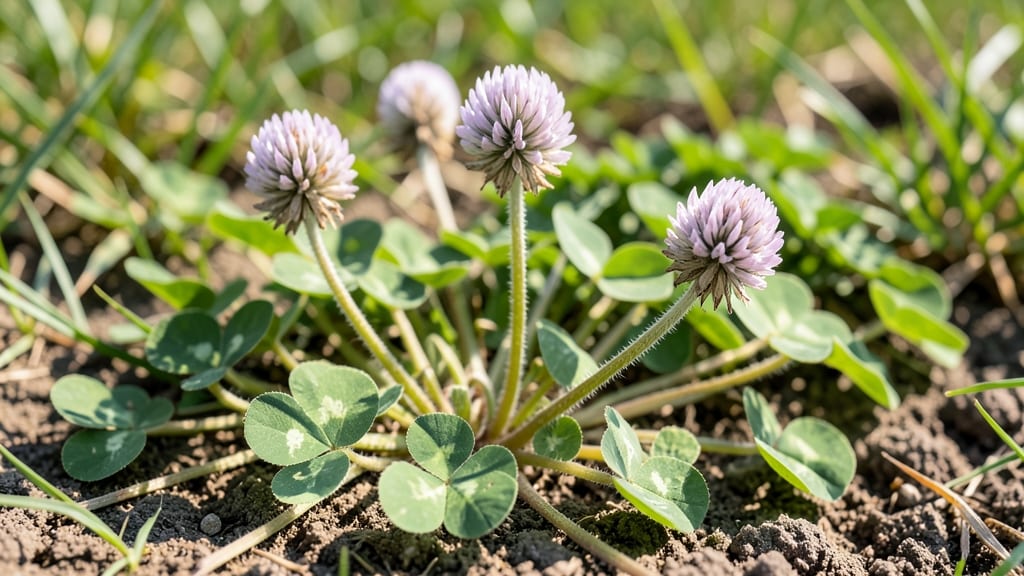
Clover seed heads transform your lawn from boring to wildlife gold—but only if you harvest them right. 🌿 Those fuzzy white puffs aren’t just pretty; they’re packed with seeds that spread effortlessly, letting you grow more clover for free.
The trick? Harvesting them before they release seeds naturally, so you control where they land.
Timing is everything: wait until the seed heads turn light tan (usually late summer to early fall), then snip them clean with scissors or pruners. No twisting needed—just cut at the base and let them dry in a paper bag for a week.
This zero-twist method keeps seeds intact and ready for planting, while also giving your lawn a tidy look.
Once dried, gently rub the seed heads over a tray to collect the tiny, round seeds—100 seeds per head or more. Store them in an airtight container in a cool, dark place, and they’ll stay viable for years.
Sprinkle them lightly over bare spots in spring, and watch your clover thicken naturally without buying more.
Bonus: these seeds attract bees and butterflies, and the leftover seed heads make great compost. It’s a zero-cost, zero-waste way to keep your lawn lush and eco-friendly. Ready to turn those seed heads into next year’s clover patch?
📚 In This Guide
- What you need
- Instructions
- Tips and common mistakes
- Wrapping up and next steps
What you need
- ● Fresh clover plants (preferably Trifolium species like white, red, or crimson clover) with mature seed heads 🌿—aim for plants in full bloom with fully formed seed pods.
- ● Sharp pruning shears or harvest scissors (preferably bypass-style for clean cuts) to snip seed heads without crushing them.
- ● Large breathable mesh bags or paper sacks (at least 10–15 gallons capacity) to collect seed heads—avoid plastic to prevent moisture buildup.
- ● Drying trays or screens (wooden or metal, 18" x 24" minimum) for spreading seed heads to dry indoors.
- ○ Fan or dehumidifier (optional but helpful for faster drying in humid climates).
- ● Fine-mesh sieve or colander (with holes 1/8" or smaller) for winnowing seeds from dried heads.
- ● Air-tight storage containers (glass jars or food-grade plastic with ziplock lids) for long-term seed preservation.
- ● Labeling tags and permanent marker to note the clover type, harvest date, and storage conditions.
- ● Gloves (nitrile or cotton) to protect hands from prickly seed heads.
- ● Newspaper or cardboard for lining drying trays to catch stray seeds.
- ● Seed viability testing kit (e.g., paper towel germination test) to check seed freshness before storage.
- ● Humidity monitor (ideal range: 30–40% humidity for optimal drying).
- ● Vacuum sealer for extending seed shelf life beyond 1–2 years.
How to harvest clover seed heads for year-round saving
Skip the frustration of dried-out clover seed heads—here's my foolproof method for collecting viable seeds all season long.
🌿 Step 1: Identify and Select Mature Seed Heads
Look for clover heads that have turned a deep golden-brown color—this signals full maturity. The seed pods should feel firm to the touch and open slightly when gently squeezed. I avoid any heads still holding green or purple hues, as those seeds won't be fully developed.
Harvest on a dry morning after the dew has evaporated. This prevents moisture from causing the delicate seed pods to stick together or mold. You'll know you've picked the right time when the heads release seeds easily when rubbed between your fingers.
✂️ Step 2: Harvest Without Damaging the Plant
Use clean, sharp pruning shears to snip the seed heads just above the first set of leaves. This encourages the plant to produce more flowers and future seed heads. I always work from the outside of the clover patch inward to avoid disturbing the center where new growth emerges.
Don't pull the entire head off—this can uproot smaller plants. Instead, make a clean cut that leaves about 1 inch of stem attached. This small stem helps prevent the seed heads from rolling away once they're laid out to dry.
🪴 Step 3: Dry the Seed Heads Properly
Lay the harvested seed heads in a single layer on a clean, dry surface in a well-ventilated area. I use a mesh screen or an old window screen to allow airflow underneath. Place them in a spot that receives indirect sunlight—direct sun can overheat the seeds and reduce viability.
Turn the seed heads every 2-3 days to ensure even drying. You'll know they're ready when the seed pods open easily and the seeds rattle inside when shaken. This typically takes about 7-10 days, depending on your climate's humidity levels.
🌱 Step 4: Extract and Store the Seeds
Once fully dry, gently rub the seed heads between your hands or use a clean cloth to dislodge the seeds. I find that placing the heads in a paper bag and shaking it vigorously works well too. Remove any debris or empty seed pods by winnowing—simply toss the seeds in the air and let the wind carry away the lighter material.
Store the clean seeds in a sealed, airtight container like a glass jar or envelope. Keep them in a cool, dark place—your refrigerator's crisper drawer works perfectly. Label the container with the date and variety if possible. Properly stored clover seeds remain viable for up to 3 years.
⏰ Step 5: Plan for Continuous Harvesting
Clover blooms in successive waves throughout the growing season. To ensure a steady supply of seed heads, I make a habit of checking my clover patch every 2 weeks. This allows me to harvest mature heads while still leaving plenty of time for new flowers to develop.
If you're growing clover as a cover crop, consider leaving a small section unharvested each year. This ensures a natural reseeding process and maintains your clover patch's health. You'll know you're doing it right when you see fresh green clover leaves popping up even after multiple harvests.
Tips & tricks for perfect clover seed harvesting
Here's what nobody tells you about saving your clover seeds without the usual mess.
Timing is Everything: The 2-week check between harvests is your golden window—this matches clover's natural bloom cycles. I've learned that skipping this schedule means either harvesting underripe seeds or missing the peak harvest entirely. Mark your calendar or set phone reminders to avoid this common mistake.
The Harvesting Technique: That 1-inch stem you leave attached isn't just for looks—it's your secret weapon against seed loss. I've seen harvested heads roll away like tumbleweeds when this step is skipped. For large patches, consider using a small rake to gather escaped heads without damaging new growth.
Drying Wisdom: The 2-3 day turning schedule might seem tedious, but it's non-negotiable for even drying. I've seen seeds mold or become brittle when left untouched. A fan on low setting can help speed up drying in humid climates, but keep it indirect to prevent overheating.
Storage Secret: That 3-year viability window is only true if you maintain proper conditions. I keep my seeds in glass jars with silica gel packets to absorb any moisture. The refrigerator's crisper drawer is perfect because it's dark and consistently cool—no need for fancy equipment.
Pro Tips for Clover Seed Heads
- Here's what nobody tells you about saving your clover seeds without the usual mess.
- Timing is Everything: The 2-week check between harvests is your golden window—this matches clover's natural bloom cyc...
- The Harvesting Technique: That 1-inch stem you leave attached isn't just for looks—it's your secret weapon against se...
Frequently asked questions
Got questions about harvesting clover seed heads?
You’re not alone! Here are answers to the most common queries to help you master zero-twist harvesting and save seeds like a pro.
When is the best time to harvest clover seed heads for viable seeds?
Harvest clover seed heads when 50-70% of the seed pods have turned brown and dried but haven’t yet shattered. For red and white clover, this usually happens in late summer to early fall (August–October, depending on your climate). Avoid harvesting if pods are still green or already crumbling—this means the seeds are either immature or too old!
How long does it take for clover seed heads to dry after harvesting?
After cutting, hang the seed heads upside-down in a dry, well-ventilated space (like a garage or shed) for 2–4 weeks. They’re ready when pods open easily and seeds rattle inside. Pro tip: Use a mesh bag or paper bag to catch seeds and prevent pests!
Can I save clover seeds from my lawn for next year’s planting?
If your clover is non-hybrid (open-pollinated), you can save seeds for planting. Just ensure the source is healthy and free of pests/diseases. For best results, harvest from multiple plants to maintain genetic diversity. Warning: Hybrid clovers (like some turf varieties) won’t produce true-to-type seeds.
What’s the zero-twist method, and why is it better for clover seed heads?
The zero-twist method involves cutting seed heads with minimal stem length (just above the flower head) and drying them upright to prevent seed loss from twisting or breaking. This keeps seeds intact and improves viability. It’s especially useful for clover because pods are delicate and prone to shattering. Bonus: It speeds up drying time!
What do I do if my clover seed heads mold or attract pests during drying?
If mold appears (fuzzy green/black growth), discard the batch immediately—moldy seeds won’t sprout. To deter pests like rodents or insects, store seed heads in a sealed container with silica gel packets or freeze them for 48 hours before drying. Quick fix: Hang heads in a mesh bag to allow airflow while blocking critters.
Are there alternatives to harvesting clover seed heads if I don’t have time?
If harvesting seems tricky, consider these options:
- Buy certified organic clover seeds from reputable suppliers (check for non-GMO/heirloom varieties).
- Purchase dried clover seed heads from garden stores for crafts or wildlife feeders.
- Leave a small patch of clover uncut in your lawn to self-seed naturally over time.
Wrapping up and next steps
Mastering the art of harvesting clover seed heads with zero-twist techniques opens up a world of possibilities for year-round saving and sustainable gardening. Whether you’re aiming to boost your lawn’s health, support pollinators, or even save seeds for future planting, this method ensures viability and efficiency. 🌱
Now that you’re equipped with the knowledge and tools, roll up your sleeves and give it a try! Start small—harvest a few seed heads, experiment with drying techniques, and watch your skills (and savings) grow. Happy harvesting! 🌿