
Lawn
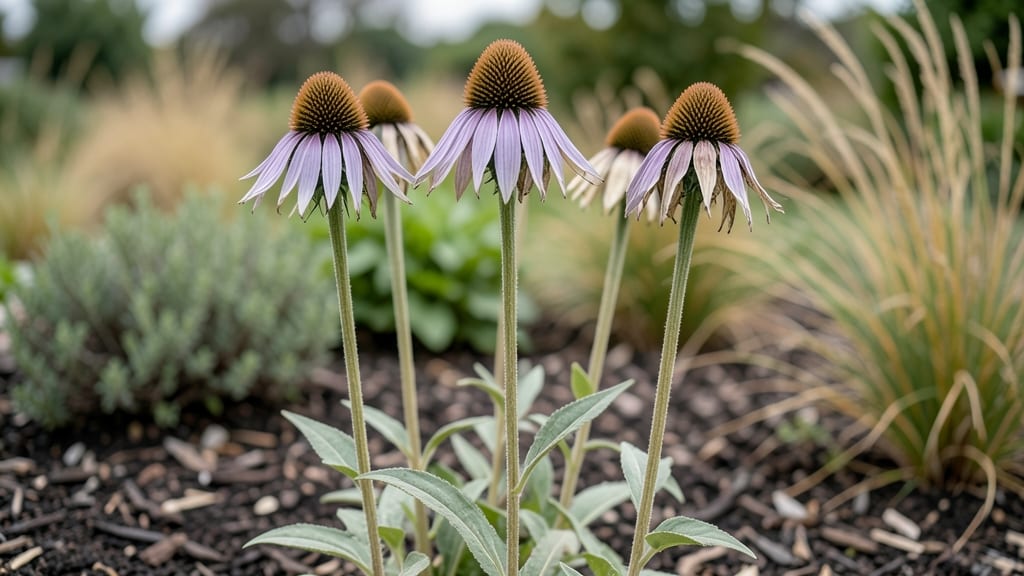
Those coneflower seed heads are nature’s unsung superstars—packed with seeds that can regrow your garden for free. 🌻 I’ve turned mine into everything from rustic centerpieces to bird feeders, and the best part? You don’t need fancy equipment, just a little patience and the right timing.
The secret starts in late summer when the seed heads turn papery brown—this is your cue to harvest. Cut stems at the base, bundle them upside-down in a dry, airy spot, and let them cure for 2-3 weeks.
No twisting, no stressing: the seeds release naturally when ready, leaving you with fluffy, easy-to-handle heads. You’ll end up with seeds that sprout reliably next spring, plus dried blooms that add texture to winter arrangements.
The birds will thank you too—leave some heads on the stems, and you’ll have a free, long-lasting feeder that keeps them visiting all winter long. Works for gardeners with space for cutting gardens or even small balconies. Here’s how to make the most of every seed head without waste.
📚 In This Guide
- What you need
- Instructions
- Tips and common mistakes
- Wrapping up and next steps
What you need
- ● Fresh or dried coneflower seed heads – Harvest from healthy, pesticide-free plants (aim for 10–20 heads for a small project or 50+ for bulk storage).
- ● Pruning shears or sharp scissors – For clean cuts (sterilize with rubbing alcohol if reusing).
- ● Brown paper bags or breathable fabric sacks – 2–3 medium-sized bags (avoid plastic to prevent moisture buildup).
- ● Twist ties or rubber bands – 5–10 pieces (to secure seed heads during drying).
- ● Newspaper or cardboard – A flat surface (2’x3’) for drying (avoid direct sunlight).
- ○ Fine-mesh sieve or colander – For sifting seeds post-drying (optional if hand-picking).
- ● Small paintbrush or soft-bristle brush – To gently dislodge stubborn seeds from dried heads.
- ● Air-tight glass jars or seed envelopes – For long-term storage (label with date and plant name!).
- ● Desiccant packets – 1–2 (to absorb moisture in storage containers).
- ● Magnifying glass – For inspecting seed viability (if you’re a detail-oriented gardener!).
- ● A dry, well-ventilated space (e.g., garage, shed, or covered porch) with indirect sunlight.
- ● Patience – Seed heads need 2–4 weeks to fully dry (depending on humidity).
- ○ Gloves (optional) – If you’re sensitive to plant fibers or pollen.
Step-by-step instructions for harvesting coneflower seed heads
Here’s how to collect seeds without wasting a single stem—just follow these simple, twist-free techniques.
🌿 Step 1: Wait Until Seed Heads Are Fully Dry and Brown
Harvest coneflower seeds only when the central cone turns deep brown and the petals have fallen or dried completely. You’ll notice the seed heads feel light in your hand—this means they’re fully mature and ready. If you pick them too early, the seeds won’t be viable.
Check for dry, brittle stems—they should snap easily when bent. If the heads still feel heavy or the seeds inside look green, wait another week. Patience here ensures a bountiful harvest and prevents wasted effort.
✂️ Step 2: Cut Stems at a 45-Degree Angle for Better Storage
Use clean, sharp scissors or pruners to slice stems at a 45-degree angle, about 2-3 inches below the seed head. This angled cut increases surface area, helping stems absorb moisture if you decide to dry them indoors. Avoid tearing the stem—this can damage the seed head and reduce seed quality.
Place the cut stems in a brown paper bag (not plastic) to collect any loose seeds as they fall. I like to label the bag with the coneflower variety and harvest date—this keeps things organized if you’re saving seeds for next year.
🪴 Step 3: Dry Seed Heads Completely Before Handling
Hang the stems upside down in a dry, well-ventilated area (like a garage or shed) for 1-2 weeks. Choose a spot with indirect sunlight—direct light can overheat the seeds and reduce viability. You’ll know they’re fully dry when the seeds rattle inside the cone when shaken.
If you’re short on space, lay stems on a wire rack or mesh screen instead of hanging them. Just make sure they’re completely dry before moving to the next step—moisture left in the seeds can cause mold or rot.
💧 Step 4: Separate Seeds from Chaff Gently
Once dry, break apart the seed heads by hand over a clean, flat surface (like a baking sheet or cardboard). The seeds will separate from the chaff naturally—no need to twist or pull aggressively. If some seeds stick, rub them between your fingers or use a fine-mesh sieve to sift out debris.
Discard any discolored or shriveled seeds—these won’t germinate. Store the good seeds in a paper envelope or glass jar in a cool, dark place for up to 2 years. Label them clearly so you don’t mix varieties.
🌱 Step 5: Use Leftover Stems for Zero-Waste Compost or Crafts
Instead of tossing the leftover stems, chop them into small pieces and add them to your compost pile. The fibrous material breaks down quickly and adds texture to finished compost. If you’re feeling creative, dried coneflower stems make beautiful wreaths or potpourri—just tie them together with twine.
For a final touch, scatter any remaining chaff in your garden beds. It adds organic matter and beneficial microbes to the soil, closing the zero-waste loop. This step ensures nothing goes to waste—just like the title promised!
Tips & tricks for perfect coneflower seed harvesting
These little details make all the difference when harvesting coneflower seeds without wasting a single stem.
Timing is Everything: I can't stress enough how important it is to wait until the central cone turns deep brown and the petals have completely fallen. I've made the mistake of harvesting too early, and those seeds were barely viable. The lightness test is your best friend—if the seed head feels light in your hand, it's ready. If you're unsure, wait another week; patience here prevents wasted effort and ensures a bountiful harvest.
The Angle Matters: When cutting stems at that 45-degree angle in Step 2, resist the urge to rush. A clean, sharp cut about 2-3 inches below the seed head is crucial. This angled cut increases surface area, which helps stems absorb moisture if you decide to dry them indoors. I've found that using a sharp pair of pruners makes all the difference—dull blades can crush stems and damage the seed head, reducing quality.
Drying Strategy: The 1-2 week drying period in Step 3 is where many people go wrong. I've learned that indirect sunlight is key—direct light can overheat the seeds and reduce viability. A well-ventilated area like a garage or shed works perfectly. Pro tip: Hang stems upside down to prevent seeds from spilling out prematurely. If you're short on space, lay them on a wire rack, but make absolutely sure they're completely dry before handling. You'll know they're ready when seeds rattle inside the cone when shaken.
Zero-Waste Upcycling: Don't toss those leftover stems! Chop them into small pieces and add them to your compost pile—they break down quickly and add valuable texture. For a creative touch, dried coneflower stems make beautiful wreaths or potpourri. I've even scattered remaining chaff in my garden beds to add organic matter and beneficial microbes to the soil. This step ensures nothing goes to waste, just like the title promises.
Pro Tips for Coneflower Seed Heads
- These little details make all the difference when harvesting coneflower seeds without wasting a single stem.
- Timing is Everything: I can't stress enough how important it is to wait until the central cone turns deep brown and t...
- The Angle Matters: When cutting stems at that 45-degree angle in Step 2, resist the urge to rush. A clean, sharp cut ...
Frequently asked questions
Got questions about harvesting and repurposing coneflower seed heads? You’re in the right place! Here are some of the most common queries—plus practical tips to make your zero-waste gardening a breeze.
When is the best time to harvest coneflower seed heads?
Harvest seed heads once they’ve fully matured—usually in late summer to early fall—when the petals have dropped and the cone turns dry and papery. Wait until the seed fluff (pappus) is visible but hasn’t yet dispersed naturally. Pro tip: A gentle tug should release the cone easily!
Can I reuse dried coneflower seed heads for crafts or decorations?
Once harvested, let the seed heads dry completely (1–2 weeks in a dry, shaded spot). They’re perfect for wreaths, potpourri, or dried arrangements. For a rustic look, leave the cones intact; for texture, crush them slightly. Bonus: Freeze them in ice cubes for winter centerpieces!
Will harvesting seed heads harm my coneflowers or pollinators?
Nope! Leave at least 1/3 of the seed heads on the plant to feed birds and bees. Coneflowers are self-seeding, so removing excess heads actually encourages stronger growth next season. Just avoid cutting back stems until late fall to support overwintering pollinators.
How do I store coneflower seeds for planting next year?
Store seeds in a cool, dry place (like a paper envelope in the fridge) for up to 2 years. For best germination, trick: Nick the hard outer shell with sandpaper before planting. Scatter seeds in well-draining soil in early spring—they’ll self-sow happily!
What if my seed heads mold or attract pests?
Mold or pests (like aphids) can happen if seed heads stay damp. Harvest on dry days and store them in a well-ventilated container. If pests appear, spray with neem oil or rinse gently. Warning: Discard any seed heads with visible rot to prevent spreading.
Wrapping up and next steps
Harvesting coneflower seed heads is a rewarding way to reduce waste and embrace sustainable gardening! 🌱 With the right dry twist-free techniques, you can effortlessly collect seeds for future planting or share with fellow gardeners.
Whether you're a seasoned pro or a beginner, these methods are simple, eco-friendly, and full of potential.
Now that you’re equipped with the knowledge, why not give it a try this season? Grab your garden shears, head outdoors, and enjoy the process of nurturing your garden—one seed at a time. Happy harvesting! 🌻