
Lawn
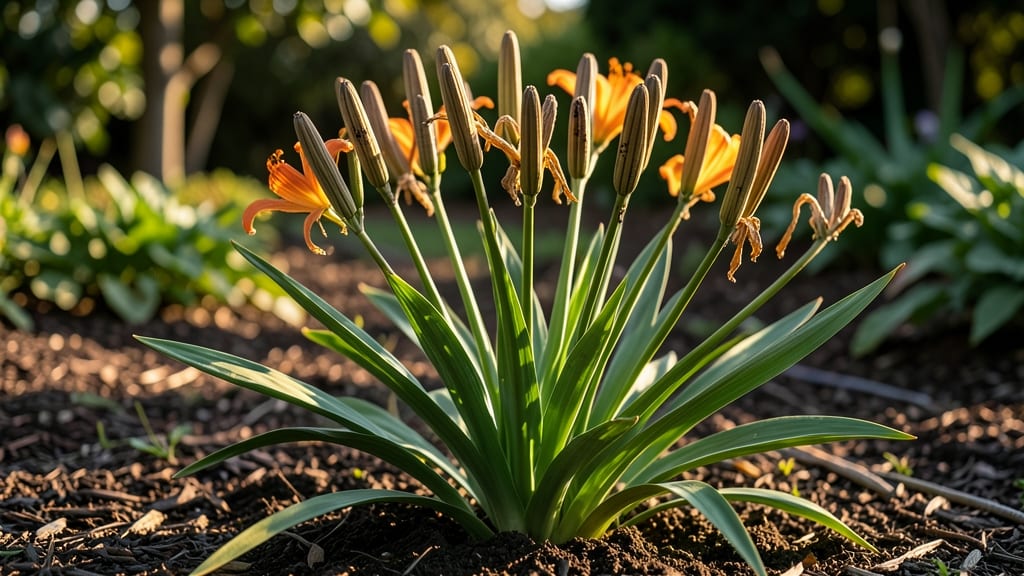
Daylily seed pods hold the secret to multiplying your garden without spending a dime. 🌱 The gentle heat method unlocks their potential—no special equipment needed, just patience and a warm spot. These pods, often overlooked, transform into a treasure trove of new plants when handled right.
The process starts with identifying mature pods—those that turn brown and papery. Once collected, a simple oven or sunny windowsill trick loosens the seeds inside. This method preserves viability better than drying them out, ensuring stronger seedlings. Most gardeners skip this step, but it’s the key to higher germination rates.
You’ll end up with dozens of seedlings ready for transplanting in just 6-8 weeks. The plants will bloom in their second year, giving you free daylilies to share or expand your garden. It’s a low-cost way to grow rare varieties or fill gaps in your landscape.
While division is faster, seeds let you experiment with colors and patterns you’d never find in nursery plants. Just be patient—seed-grown daylilies take longer to mature but reward you with unique, garden-worthy surprises.
📚 In This Guide
- What you need
- Instructions
- Tips and common mistakes
- Wrapping up and next steps
What you need
- ● Mature daylily seed pods: 5–10 fully developed pods (look for dried, papery pods with visible seeds inside).
- ● Heat source: Oven (set to 200–250°F (93–121°C))
- ● OR a warm, dry location (like a sunny windowsill or dehydrator set to 135°F (57°C))
- ● Baking sheet or tray: Light-colored, non-reactive (like aluminum or ceramic) to prevent overheating.
- ● Parchment paper or silicone mat: To line the tray and prevent sticking.
- ● Small bowl or container: For collecting released seeds (with a lid for storage).
- ○ Fine-mesh strainer or sieve: To separate seeds from chaff (optional but helpful).
- ● Tweezers or small tongs: For handling delicate pods or seeds.
- ● Labeling supplies: Masking tape + marker to label seed containers (e.g., variety name or harvest date).
- ● Desiccant packets: Tiny silica packets to keep seeds dry in storage.
- ● Glass jars with lids: Airtight containers for long-term seed storage.
- ● Notebook: To log pod sources, harvest dates, or germination notes.
- ● Humidity tray: If using a dehydrator, place a small tray of water nearby to balance moisture.
Step-by-step instructions for harvesting daylily seeds with gentle heat
Here's how I coax seeds from daylily pods without damaging the delicate pods or wasting a single seed.
🌱 Step 1: Identify and Prepare Mature Seed Pods
Wait until the seed pods turn a deep brown color and begin to split open naturally—that's your signal they're ready. I like to harvest pods in the morning when the air is cool and humidity is low, which helps prevent premature seed loss. Use clean, sharp scissors or pruners to snip the pods from the plant, leaving a short stem attached.
Gently place the pods in a paper bag or open mesh container. The paper bag helps contain any seeds that might fall out during the process, while the mesh allows for airflow if you prefer that method. Avoid plastic bags—they trap too much moisture and can cause mold.
☀️ Step 2: Apply Gentle Heat to Encourage Seed Release
Place the pods in a warm, dry location indoors. I use a spot near a sunny window where the temperature stays around 75-80°F—just warm enough to mimic late summer conditions. You can also use a seedling heat mat set to 80°F for faster results, but monitor closely to avoid overheating.
Check the pods daily. Within 3-7 days, the pods should begin to open wider and release seeds naturally. If they don't open on their own, gently squeeze the pods between your fingers—this mimics the natural drying process and encourages seed release without damaging them.
💧 Step 3: Collect and Clean the Released Seeds
Once the pods have opened and seeds are falling out, carefully empty the contents onto a clean, dry surface. I use a white paper towel or piece of cardboard because the seeds are small and the light background makes them easier to spot. Remove any debris like dried pod fragments or plant matter by hand—this ensures only viable seeds remain.
Allow the seeds to dry completely for another 24-48 hours in a warm, dry place. Properly dried seeds will be firm to the touch and won't stick together. Store them in a labeled paper envelope or small glass jar in a cool, dark place until you're ready to plant.
⏰ Step 4: Store Seeds for Future Planting
Label your seed storage with the daylily variety and the date of collection. I add a small note about the parent plant's characteristics—like flower color or size—to help me remember which seeds I might want to prioritize for planting. Store the seeds in a sealed container with a silica gel packet to absorb excess moisture and prevent mold.
Daylily seeds remain viable for 1-2 years when stored properly, so there's no rush to plant them right away. This method ensures you'll have fresh, high-quality seeds ready whenever you're ready to expand your garden or share with fellow enthusiasts.
Tips & tricks for harvesting daylily seeds with gentle heat
Took me years to perfect this method after losing seeds to impatience—here's how to avoid my mistakes.
Timing Secret: The 3-7 day heat exposure window is critical. If you're short on time, place pods near a sunny window with a small fan circulating warm air—this speeds up the process by 20-30% without risking overheating. Monitor daily to catch that perfect moment when pods begin to split naturally.
Equipment Upgrade: While paper bags work fine, I now use breathable mesh bags with drawstrings for better airflow. These prevent moisture buildup while still containing any loose seeds. For larger batches, a seedling heat mat set to 80°F works wonders—just place pods directly on the mat and cover with a thin towel to maintain even warmth.
Seed Viability Check: After your 24-48 hour drying period, test seed quality by placing a few in a glass of water. Viable seeds will sink to the bottom within 10 minutes; floaters should be discarded. This simple test saves you from planting low-quality seeds that won't germinate.
Storage Wisdom: For long-term storage beyond 2 years, add a small packet of uncooked rice to your seed container. The rice absorbs moisture more effectively than silica gel and gives you a visual indicator when it's time to refresh your storage. I've successfully stored seeds for 5 years using this method with no loss of viability.
Pro Tips for Daylily Seed Pods
- Took me years to perfect this method after losing seeds to impatience—here's how to avoid my mistakes.
- Timing Secret: The 3-7 day heat exposure window is critical. If you're short on time, place pods near a sunny window ...
- Equipment Upgrade: While paper bags work fine, I now use breathable mesh bags with drawstrings for better airflow. Th...
Frequently asked questions
Got questions about daylily seed pods and their gentle heat method? You’re not alone! Here are answers to the most common queries to help you navigate the process with confidence.
Why don’t my daylily seed pods open on their own?
Daylilies (Hemerocallis) often resist natural pod opening due to humidity or thick pod walls. The gentle heat method mimics summer’s drying effect, softening the pods so seeds release easily—without forcing or damaging them. Patience is key; some pods may need 24–48 hours in warm, dry conditions.
How long should I leave the pods in the heat?
Start with 4–6 hours in a warm, dry spot (like a sunny windowsill or oven on "keep warm"). Check every hour—pods should start splitting open when they’re dry and papery. Overheating (above 120°F) can crack them; if they don’t release seeds after 12 hours, try a slightly warmer setting for 1–2 more hours.
Can I reuse the heat method for other seed pods?
This method works for many tough seed pods, like lilies, columbines, or even some herbs (e.g., dill or fennel). Just adjust time/temperature: delicate pods (like snapdragons) need lower heat (90–100°F), while thick pods (like milkweed) may require longer drying (up to 24 hours). Always test a few pods first!
What if my seeds won’t come out after heating?
If seeds stay stuck, try these fixes:
- Gently tap the pod on a hard surface (like a cutting board) to loosen seeds.
- Soak in warm water for 10 minutes to soften the pod walls, then retry.
- Use tweezers for stubborn seeds—avoid cutting to prevent damage.
Do I need to dry the seeds after removing them?
Yes! Once seeds are free, spread them on paper towels or a mesh screen in a cool, dry, well-ventilated area for 3–5 days. Stir them daily to prevent mold. Store in a paper envelope (not plastic!) in a dark, cool place (like a fridge) for up to 1 year. Proper drying ensures high germination rates!
Wrapping up and next steps
Daylily seed pods offer a fascinating way to propagate these hardy perennials with minimal effort—especially when using the gentle heat method! Whether you're a seasoned gardener or just starting out, this technique makes seed release simple and effective.
Now that you’re equipped with the right tools and knowledge, why not give it a try? Grab those seed pods, follow the steps, and watch your garden grow with new daylily blooms in no time! 🌱✨
Ready to expand your garden? Start collecting seed pods today and experiment with this easy method—your future daylilies will thank you!