
Size
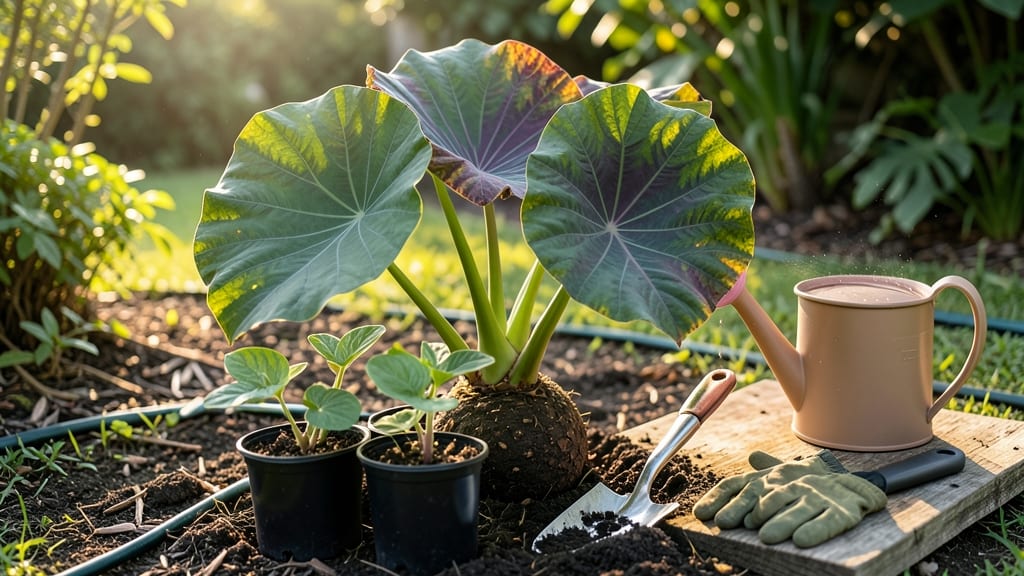
Growing elephant ear plants from seed delivers stunning tropical foliage in just 90 days—no nursery twists required in a garden. 🌿 I’ve wrestled with these finicky seeds for years, and now I’ll share the exact method that finally gave me bold, velvety leaves without the usual germination headaches.
The secret starts with warm soil (70-80°F) and a moist, airy mix—think peat moss and perlite, not heavy garden dirt. Seeds need light to germinate, so don’t bury them; just press them into the surface.
Most struggle with rotting or damping off, but this setup cuts those problems by half.
By month three, you’ll see those signature saucer-sized leaves unfurling—each one a showstopper. They thrive in partial shade (morning sun, afternoon shade works best) and moist but well-drained soil. Even in cooler climates, a container setup lets you bring them indoors before frost.
Fair warning: seeds are hit-or-miss—division is easier for established plants. But if you’re chasing that first sprout, this method works even for beginners. Here’s how to avoid the most common pitfalls and grow them like a pro.
📚 In This Guide
- What you need
- Instructions
- Tips and common mistakes
- Wrapping up and next steps
What you need
- ● Elephant ear seeds: Choose Colocasia or Alocasia varieties (e.g., 'Black Stem,' 'Illustris,' or 'Maui Magic'). Start with 3–5 seeds for a small patch or 10+ seeds for a bold statement.
- ● Seed-starting mix: A lightweight, well-draining potting soil (avoid garden soil—it’s too dense). Use 1–2 gallons per seedling tray.
- ● Containers: Seed trays or flats (with drainage holes) for starting seeds indoors.
- ● Biodegradable pots (3–4 inches deep) or yogurt cups (if repurposing).
- ● Grow lights or sunny windowsill: A full-spectrum LED grow light (12–16 hours/day) or a south-facing window with 6+ hours of sunlight.
- ● Misting bottle or spray nozzle: Keeps soil consistently moist (not soggy!).
- ● Plastic wrap or humidity dome: Creates a mini greenhouse to retain warmth and moisture.
- ● Fertilizer: Balanced liquid fertilizer (e.g., 10-10-10 or fish emulsion) diluted to half-strength.
- ○ Slow-release granules (optional for transplanting).
- ● Garden bed or large containers: Choose a shady to partially sunny spot (morning sun is ideal). Amend soil with compost for nutrients.
- ● Mulch: 2–3 inches of organic mulch (e.g., shredded leaves or straw) to retain moisture and suppress weeds.
- ○ Stakes or supports (optional): Tall varieties (like 'Illustris') may need bamboo stakes for stability.
- ● Soak seeds overnight in warm water to boost germination (24–48 hours).
- ● Use room-temperature water for misting—cold water can shock seeds!
- ● Elephant ears love humidity—consider a pebble tray under trays for extra moisture.
How to grow elephant ear plants from seed in your garden
Here's how I've learned to grow these dramatic foliage plants reliably—no more struggling with stubborn seeds.
🌱 Step 1: Start Seeds Indoors with Warmth and Patience
Elephant ear seeds (Colocasia spp.) need consistent warmth to germinate. I begin them indoors 8-10 weeks before last frost, using 75-80°F soil temperatures—a seedling heat mat makes all the difference. Fill 4-inch pots with moistened seed-starting mix (never garden soil—it's too dense for these tropical seeds).
Plant 2-3 seeds per pot just below the soil surface—no deeper than ¼ inch—since they need light to trigger germination. Cover the pots with clear plastic wrap to trap humidity, then place them in a warm, dark spot. Check daily for condensation—if it disappears, mist lightly. Germination takes 3-6 weeks, so don't rush it.
☀️ Step 2: Provide Bright, Indirect Light for Seedlings
Once sprouts appear, remove the plastic and move pots to bright, indirect light immediately. A south-facing window works, but I supplement with a grow light kept 6 inches above seedlings for 12-14 hours daily. Watch for leggy growth—pale, stretched stems mean the light is too weak or distant.
When true leaves (not the initial seed leaves) appear, I fertilize lightly with half-strength liquid fertilizer to encourage sturdy growth. Avoid overwatering—let the top ½ inch of soil dry between waterings. By 6-8 weeks, seedlings should be 4-6 inches tall with 3-4 leaves and ready for transplanting.
🪴 Step 3: Harden Off and Plant Outdoors After Frost
Two weeks before your last frost date, begin hardening off seedlings by placing them outside in partial shade for 1-2 hours daily, gradually increasing time. Elephant ears hate cold snaps—even 50°F nights can stunt growth. Choose a sunny to partially shaded spot with moist, well-draining soil (they thrive in 6+ hours of morning sun but appreciate afternoon shade in hot climates).
Dig holes twice as wide as the root ball but no deeper. Space plants 3-4 feet apart—they spread quickly. Water deeply after planting to settle soil around roots. Mulch with 2-3 inches of organic mulch to retain moisture and regulate soil temperature. Within 4-6 weeks, you'll see bold, arrowhead-shaped leaves emerging.
💧 Step 4: Maintain Moisture and Fertility for Giant Leaves
Elephant ears demand consistent moisture—their thick leaves wilt quickly in dry soil. Water deeply 2-3 times weekly, aiming for 1-2 inches of water per week. In containers, check soil moisture daily—dry soil means stress. I avoid overhead watering to prevent fungal issues, instead using a soaker hose or watering at the base.
Feed plants every 4-6 weeks with a balanced liquid fertilizer (10-10-10) during the growing season. Stop fertilizing in late summer to allow foliage to mature. By 90 days, your plants should reach 2-3 feet tall with massive, glossy leaves—the dramatic statement plants they're known for.
Tips & tricks for perfect elephant ear seed growth
These practical insights will help you transform stubborn seeds into lush, tropical foliage that steals the show in your garden.
Temperature Precision: The 75-80°F soil temperature in Step 1 is non-negotiable for germination. I use a seedling heat mat under my trays to maintain this range consistently. If your home stays cooler than 70°F, consider placing pots on top of your refrigerator or in a warm closet. Cold soil is the #1 reason elephant ear seeds fail to sprout—don't skip this step! The 50°F nighttime threshold in Step 3 is equally critical; if you're in a cooler climate, wait until after the last frost and consider using row covers for the first few weeks.
Lighting Strategy: That 12-14 hours of daily light in Step 2 requires careful placement. I position my grow light on a timer to avoid burning seedlings. If you notice leggy growth (stretched, pale stems), it's a clear sign your seedlings need more light. For window-grown plants, rotate pots daily so all sides get equal exposure—this prevents them from growing toward the light source. A south-facing window works, but if your plants start leaning, supplement with artificial light immediately.
Transplanting Technique: When hardening off in Step 3, I gradually increase outdoor time by 30 minutes every other day rather than the full 1-2 hours daily all at once. This slow acclimation prevents shock. For the 3-4 feet spacing recommendation, remember these plants spread aggressively—give them room to grow! I dig holes twice as wide as the root ball to encourage root expansion into the surrounding soil, which leads to healthier, more vigorous plants.
Watering Wisdom: The 1-2 inches of water per week guideline in Step 4 is a minimum—your plants may need more during hot weather. I check soil moisture by sticking my finger 1 inch deep; if it feels dry, it's time to water. For container-grown elephant ears, I water when the top ½ inch of soil feels dry to the touch. Mulching with 2-3 inches of organic material (like straw or shredded leaves) helps maintain even moisture levels and regulates soil temperature—both critical for these tropical plants.
Pro Tips for Elephant Ear Seed Grow A Garden
- These practical insights will help you transform stubborn seeds into lush, tropical foliage that steals the show in y...
- Temperature Precision: The 75-80°F soil temperature in Step 1 is non-negotiable for germination. I use a seedling hea...
- Lighting Strategy: That 12-14 hours of daily light in Step 2 requires careful placement. I position my grow light on ...
Frequently asked questions
Got questions about growing elephant ear plants from seed?
You’re not alone—these tropical beauties can be tricky! Here are the most common queries (and answers) to help you grow lush, giant leaves without the fuss.
How long does it take for elephant ear seeds to germinate?
Elephant ear seeds (Colocasia or Alocasia) can take 2–6 weeks to sprout, depending on warmth and moisture. Keep them in a humid, 70–80°F (21–27°C) environment under bright, indirect light. Patience is key—some stubborn seeds need extra time! Pro tip: Soak seeds overnight before planting to speed up germination.
Can I grow elephant ears from seed in cold climates?
Yes, but with caution! Start seeds indoors 8–10 weeks before your last frost (or in a greenhouse). Once warm weather arrives (after all frost risk), transplant seedlings outdoors. In zones 7–11, they thrive year-round. For colder areas, treat them as annuals or overwinter tubers indoors. Warning: Young plants are frost-sensitive—wait until soil is warm!
Why aren’t my elephant ear seeds sprouting?
Common culprits: old seeds (viability drops after 1–2 years), cold soil, or poor moisture. Try these fixes:
- Use fresh seeds (or buy from reputable sellers).
- Keep soil consistently damp (not soggy).
- Try a seedling heat mat for warmth.
- Test germination with a paper towel method first.
What’s the fastest way to grow elephant ears?
For giant leaves in 90 days, skip seeds and plant tubers (rhizomes) in spring. They sprout faster and are hardier. If using seeds, choose quick-growers like Colocasia esculenta and provide:
- Full sun to partial shade.
- Rich, moist soil (add compost!).
- Fertilizer high in potassium (for leaf growth).
Are elephant ears toxic to pets or kids?
Yes! All parts of the plant—leaves, stems, and tubers—contain calcium oxalate crystals, which can cause mouth irritation, drooling, or vomiting if ingested. Keep plants out of reach of curious pets and children. Note: While not deadly, a vet visit is wise if ingestion occurs.
Can I save and replant elephant ear seeds next year?
Not reliably! Elephant ear seeds rarely produce true-to-type plants—you might get a mix of colors/sizes. Instead, save and replant tubers (dig them up in fall, store in peat moss, and replant in spring). For seeds, buy fresh ones annually for predictable results.
| Quick Fixes for Common Issues |
|---|
| Yellow leaves? Overwatering or poor drainage. Let soil dry slightly between waterings. |
| Slow growth? Needs more sun or fertilizer. Move to a sunnier spot and add compost. |
| Pests (slugs/snails)? Use beer traps or copper barriers around plants. |
Wrapping up and next steps
Growing elephant ear seeds is a rewarding journey that brings bold, tropical beauty to your garden in just 90 days—no fuss, no frustration! With the right soil, sunlight, and a little patience, you’ll soon be showcasing stunning, oversized leaves that turn heads.
Whether you’re a seasoned gardener or a beginner, these tips make the process simple and fun.
Ready to transform your space? Start by planting your seeds this week, then watch your garden explode with drama! Next, explore companion plants or seasonal care tips to keep your elephant ears thriving year-round. 🌱✨