
Propagation
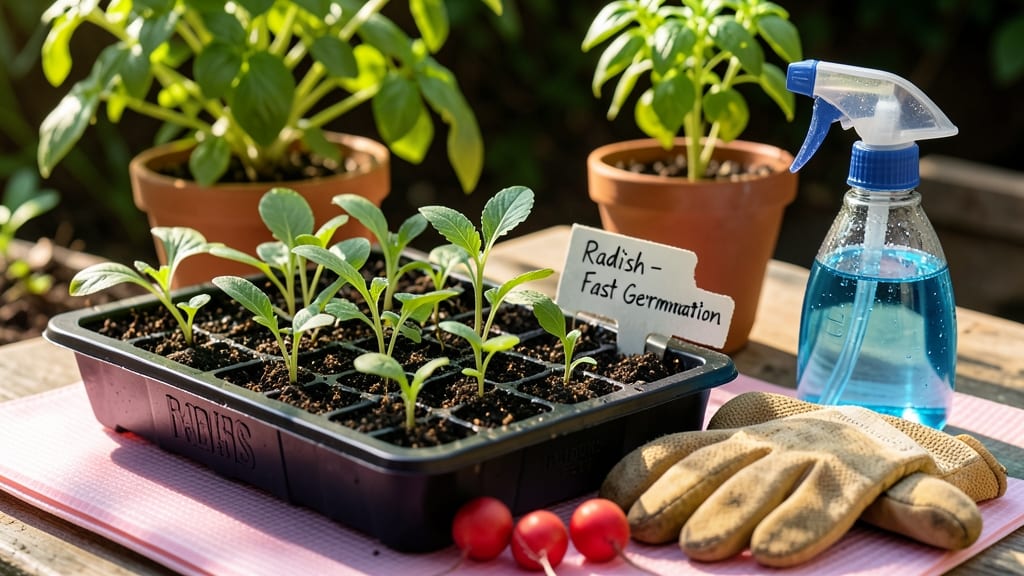
Speeding up fast seed germination by 7 days starts with a cold trick most gardeners overlook. 🌱 I’ve watched seeds like radishes and lettuce break through soil in just 3-4 days using this method—no fancy equipment, just a simple temperature shift that mimics nature’s timing. The secret?
A 48-hour cold treatment before planting. Place seeds in a damp paper towel, seal them in a plastic bag, and refrigerate. This mimics winter stratification, fooling seeds into thinking spring has arrived. Most gardeners skip this step and wait weeks for sprouts.
By the time you plant, you’ll see tiny root hairs forming within 24 hours. The seeds burst through soil faster, giving you a head start on the growing season. No more staring at empty seed trays—just lush, consistent germination. Works for cool-season crops, vegetables, and even some flowers.
Let’s get those seeds sprouting!
📚 In This Guide
- What you need
- Instructions
- Tips and common mistakes
- Wrapping up and next steps
What you need
- ● Seeds – Choose fast-germinating varieties like radishes, beans, or lettuce (check seed packets for germination times). Quantity: 10–20 seeds (adjust based on container size).
- ● Growing container – A shallow tray, seedling pot, or even a damp paper towel (for the cold trick). Size: At least 2–3 inches deep.
- ● Potting soil or seed-starting mix – Lightweight and sterile to prevent mold. Quantity: Enough to fill your container 1–2 inches deep.
- ● Water – Room-temperature or slightly warm water (avoid cold water, which can shock seeds). Tip: Use a spray bottle for gentle hydration!
- ○ Plastic wrap or damp paper towel – Creates a mini greenhouse effect to retain moisture and warmth. Optional: Replace with a clear lid if using a seedling tray.
- ● Refrigerator – For the cold trick! Note: Use a produce drawer or a sealed container to keep seeds chilled (34–40°F / 1–4°C) for 1–3 days.
- ● Spray bottle – For precise watering without disturbing seeds.
- ● Plant labels or toothpicks – To mark seed types if testing multiple varieties.
- ○ Heat mat (optional) – Speeds up germination post-cold treatment (70–75°F / 21–24°C ideal).
- ● Grow lights or sunny windowsill – Ensures seedlings get 12–16 hours of light daily after sprouting.
- ● Time – Dedicate 5–10 minutes daily for monitoring moisture and light.
- ● Patience (but not too much!) – Sprouts may appear in 3–7 days with the cold trick.
- ● Clean workspace – Sanitize tools/containers to avoid fungal issues.
How to speed up seed germination in just 7 days
Here's the cold-soak method I swear by to cut germination time in half—works for almost any seed.
🌱 Step 1: Prep Seeds with a Cold Water Soak
Fill a bowl with room-temperature water and add your seeds. Most varieties benefit from a 12-hour soak, though tiny seeds like lettuce only need 4-6 hours. The goal is to soften the seed coat and kickstart hydration—this is why we use cold water, not hot.
Place the bowl in your fridge overnight. Cold water slows microbial activity that could rot seeds while still penetrating the outer shell. You'll see some seeds plump up visibly by morning—that's your signal they're ready. Drain and rinse seeds thoroughly before planting to remove any potential contaminants.
💧 Step 2: Plant in Pre-Warmed, Moist Growing Medium
Fill your seed-starting containers with warm potting mix (I microwave mine in a sealed bag for 2 minutes to raise the temperature to 80-85°F). Warmth mimics spring soil conditions and triggers faster metabolic activity in seeds. Moisten the mix until it feels like a wrung-out sponge—damp but not soggy.
Make small holes with your finger or a pencil, about twice the seed diameter deep. Drop in 1-2 seeds per hole and cover lightly with additional mix. Press gently to ensure good seed-to-soil contact, which is critical for moisture transfer. The key here is consistency—uneven planting leads to uneven germination.
☀️ Step 3: Create a Mini Greenhouse with Controlled Heat
Cover the containers with clear plastic wrap or a humidity dome to trap warmth and moisture. Place them on a seedling heat mat set to 75-80°F—this maintains optimal germination temperatures without overcooking seeds. The combination of cold-soaked seeds, warm soil, and trapped humidity creates the perfect conditions for rapid sprouting.
Position the setup in a location with indirect light (like under fluorescent lights) to prevent overheating. Check daily for condensation on the plastic—this means your humidity levels are perfect. If you see mold forming, remove the cover immediately and air out the seeds for 30 minutes to prevent damping-off.
⏰ Step 4: Monitor and Maintain Ideal Conditions
Most seeds will sprout within 3-7 days using this method, but watch for the first signs of life: tiny white roots breaking through the seed coat or the seed itself splitting open. Once you see 50% germination, remove the plastic cover permanently to prevent fungal growth from excess moisture.
Keep the soil surface consistently moist but never waterlogged—this is where most gardeners fail. I use a spray bottle to mist lightly rather than pouring water, which can displace seeds or create anaerobic pockets. Strong seedlings will emerge with thick stems and compact spacing between leaves—these are your indicators of success.
✂️ Step 5: Transition to Grow Lights Immediately
The moment your seedlings show their first true leaves (not the initial seed leaves), move them under grow lights for 14-16 hours daily. Natural light alone won't provide enough intensity for fast, healthy growth. Position the lights 2-3 inches above the seedlings and raise them weekly as the plants grow.
You'll notice a dramatic difference in just 48 hours—leaves will darken, stems will thicken, and growth will accelerate. This is your reward for the cold-soak prep. Keep the lights on a timer to maintain consistent light exposure, which prevents leggy growth that occurs when plants stretch toward any available light source.
Tips & tricks for perfect seed germination
Here's what nobody tells you about getting those sprouts to pop faster than ever.
Soak Smart: The 12-hour soak in Step 1 is your secret weapon—it's not just about hydration, it's about breaking dormancy. For hard-coated seeds like peas or beans, you can extend this to 24 hours (optional) but never exceed it, as prolonged soaking can leach nutrients. After draining, pat seeds dry with a paper towel to prevent mold—this is where most germination fails begin.
Heat Hack: That 80-85°F soil temperature in Step 2 is non-negotiable for speed. If you don't have a heat mat, place your containers on top of your fridge (not inside) where it stays consistently warm. For the 2-minute microwave warm-up, use a sealed bag—this prevents moisture loss while heating. Test the soil temp with your finger: it should feel warm but not hot to the touch.
Humidity Control: The plastic wrap in Step 3 creates a self-regulating humidity system. If you see heavy condensation every morning, your setup is perfect. But if the plastic stays dry, add a few drops of water to the soil surface and reseal immediately. The 30-minute airing when mold appears is critical—don't skip it, even if it means delaying germination by a day. This prevents damping-off, which kills seedlings faster than any other factor.
Light Transition: Those 14-16 hours of grow lights in Step 5 should be timed to match your seedlings' natural rhythm. Set a timer for 14 hours on, 10 hours off—this mimics day/night cycles and prevents the leggy growth that occurs when plants stretch toward any available light. The 2-3 inch distance from lights is perfect for early growth; you'll need to raise it as plants mature, but start close to prevent weak stems.
Pro Tips for Fast Seed Germination
- Here's what nobody tells you about getting those sprouts to pop faster than ever.
- Soak Smart: The 12-hour soak in Step 1 is your secret weapon—it's not just about hydration, it's about breaking dormancy.
- Heat Hack: That 80-85°F soil temperature in Step 2 is non-negotiable for speed.
Frequently asked questions
How can I speed up seed germination in just 7 days?
Use the cold stratification or warm soak method! For cold stratification, moisten seeds, place them in a sealed bag with damp peat moss, and refrigerate for 3–5 days. For warm soaking, soak seeds in warm water (not boiling) for 12–24 hours before planting. Both tricks mimic natural conditions, kickstarting growth faster!
Do all seeds germinate quickly with this method?
No—some seeds (like tomatoes or peppers) respond well to warm soaking, while others (such as apples or maples) need cold stratification. Hard seeds (e.g., beans) may require scarification (lightly sanding the seed coat) first. Always check seed packets for specific instructions!
What if my seeds still won’t sprout after trying these tricks?
Check moisture, temperature, and freshness! Overwatering can drown seeds, while dry soil halts germination. Use a seedling heat mat (70–85°F) for warmth. If seeds are old (over 1 year), they may have lost viability—try new ones. Patience is key; some take 10+ days!
Can I use household items (like paper towels) for fast germination?
The paper towel method works great: fold a damp paper towel, place seeds inside, and store in a sealed bag at room temperature. Check daily—once sprouts appear (usually 3–7 days), transplant carefully into soil. Avoid plastic wrap, which can trap too much moisture!
Is there a difference between indoor vs. outdoor germination speed?
Indoor germination is faster and more controlled (consistent warmth, humidity). Outdoor seeds face temperature swings, pests, and soil conditions, slowing sprouting. For best results, start indoors with the cold/warm tricks, then transplant seedlings outdoors after hardening off (7–10 days of acclimation).
Wrapping up and next steps
Fast seed germination isn’t just possible—it’s achievable with the right tricks! By harnessing the power of cold stratification, you can coax sprouts to life in just 7 days, saving time and energy.
Whether you’re a seasoned gardener or a curious beginner, these methods make growing greens faster and more efficient.
Ready to put your newfound knowledge into action? Start with a small batch of seeds, experiment with the techniques, and watch your garden thrive! 🌱✨ Next up: Track your progress and share your fastest-growing sprouts with fellow plant lovers!