
Lawn
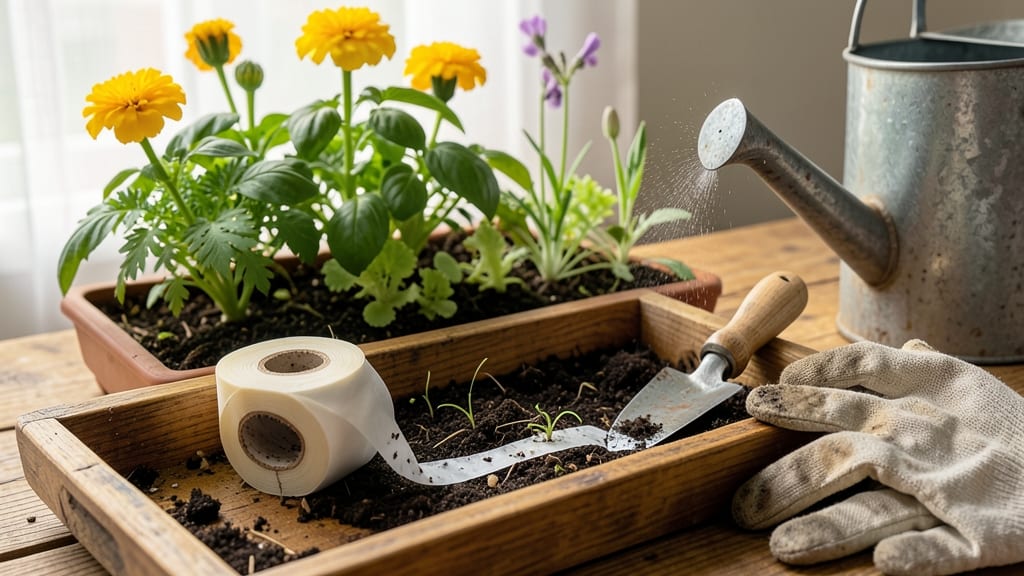
Planting seeds with garden seed tape means no more tangled rows or uneven spacing—just perfectly aligned blooms every time. ✨ I used to struggle with uneven seed drops and overcrowding, but this simple strip changed everything by embedding seeds in biodegradable tape at precise intervals.
The magic is in the prep: you just unroll the tape, press it into soil, and cover it—no measuring, no guessing. It works best with small seeds like cosmos, snapdragons, or lettuce, where spacing matters most.
My rows now look like they came from a professional nursery, not a beginner’s trial-and-error. You’ll see faster germination and stronger starts because seeds get consistent moisture and sunlight. No more thinning seedlings or dealing with leggy, uneven growth.
The tape dissolves naturally, leaving no trace behind. Perfect for beginners, small spaces, or anyone tired of messy seed-starting. Here’s how to use it like a pro—no frustration, just flawless results.
📚 In This Guide
- What you need
- Instructions
- Tips and common mistakes
- Wrapping up and next steps
What you need
- ● Garden seed tape: Choose tapes pre-loaded with your favorite seeds (e.g., marigolds, sunflowers, or herbs).
- ● Standard rolls typically measure 100–500 feet—pick based on your garden size.
- ● Garden soil: Well-draining, loose soil (amend with compost if needed).
- ● Watering can or hose: With a gentle spray nozzle for hydration.
- ○ Gloves (optional but recommended): To keep hands clean while handling soil.
- ● Measuring tape or string: To mark planting lines (if needed).
- ● Seed tape applicator tool: A small hand-held roller to press seeds gently into soil.
- ● Mulch or straw: To retain moisture and protect young seedlings.
- ● Plant labels: To track seed types if mixing varieties.
- ● Fertilizer (slow-release): For a nutrient boost after planting.
Step-by-Step instructions for using garden seed tape
Here's how to create flawless rows with zero fuss—ideal for flowers, herbs, or vegetables.
🌱 Step 1: Measure and Mark Your Planting Row
Use a tape measure to determine the length of your row and mark the starting point with a small stake or pencil. For most flowers, spacing seeds 6-12 inches apart ensures proper air circulation and prevents overcrowding. I like to use a 12-inch spacing for annuals like zinnias or snapdragons—this gives them room to mature without competing for nutrients.
Run a string line along your marked row to create a straight guide. If you're planting in a curved bed, use a garden hose instead—it bends naturally and stays in place. Press the string or hose lightly into the soil to prevent shifting when you work. This step is critical for achieving that "perfect" look you're after, especially in formal garden designs.
💧 Step 2: Prepare the Seed Tape
Unroll your seed tape and verify the spacing matches your planting needs. Most tapes have seeds embedded every 1-2 inches, but always check the packaging—some specialty tapes (like those for tiny flowers) may have seeds spaced ½ inch apart. If your tape has seeds too close together, you'll need to stretch it slightly between your fingers to achieve the desired spacing when planting.
Moisten the tape lightly with water using a spray bottle. This prevents static cling and makes the seeds adhere better to the tape as you plant. I like to work in sections of about 3 feet at a time—longer than that and the tape can sag or twist. Hold the tape by the edges to avoid touching the seeds, which can damage them or leave fingerprints on the tape.
☀️ Step 3: Plant the Seed Tape Along Your Row
Press the first seed gently into the soil at your marked starting point, making sure the tape lies flat against the ground. Use your thumb to create a small furrow about ¼ inch deep—this is the ideal planting depth for most flower seeds. As you move along the row, keep the tape taut but not stretched. If you notice the tape twisting, pause and gently straighten it with your fingers.
Cover the seeds completely by pressing soil back over the tape with your fingers or a small board. This ensures good seed-to-soil contact, which is essential for even germination. Water lightly afterward to settle the soil without disturbing the seeds. You'll see the tape's advantage immediately—no more guessing about spacing or depth, and no more wasted seeds from uneven scattering.
⏰ Step 4: Water and Monitor Germination
Keep the soil consistently moist but not soggy for the first 7-14 days, depending on the seed type. Most flower seeds germinate best when the soil temperature stays between 65-75°F. If you're planting in cooler weather, consider using a clear plastic tunnel or row cover to trap heat and speed up germination. I like to water from the side rather than overhead to avoid dislodging the tape.
Once the seeds sprout, you can leave the tape in the ground—it will decompose naturally over time. Watch for first true leaves (the second set after the initial seed leaves) to appear, which signals that the plants are establishing roots. This is also the time to thin if necessary, though seed tape usually eliminates the need for thinning. You'll love how uniform your rows look compared to traditional seed scattering.
Tips & tricks for perfectly spaced blooms with garden seed tape
Here's how to transform your planting game with these game-changing insights for flawless results.
Precision Spacing Secret: In Step 1, when marking your row, use a small garden flag or colored stake at the starting point instead of a pencil mark. These stay visible longer and won't fade or get lost in the soil. For curved beds, I've found that using a garden hose works even better than string—it naturally follows the curve while staying in place, and you can adjust it as needed without it slipping.
Tape Handling Technique: When working with seed tape in Step 2, I recommend using a pair of clean, dry tweezers to gently position each seed rather than pressing directly with your fingers. This prevents smudging the tape's adhesive and gives you more control over seed placement. For longer rows, try working in 2-foot sections instead of 3 feet—it gives you better control over keeping the tape straight without it sagging.
Soil Contact Tip: After planting in Step 3, use the back of a spoon or a small trowel to gently press the soil around the tape edges. This creates better seed-to-soil contact than just using your fingers and helps prevent the tape from shifting when you water. I've also found that lightly misting the soil with a fine spray before planting helps the seeds adhere better to the tape during the initial press.
Germination Environment: For the 7-14 day germination period in Step 4, consider using a simple DIY mini greenhouse. Place a clear plastic bottle (like a 2-liter soda bottle) cut in half over your newly planted row to create a humidity dome. This helps maintain consistent moisture and temperature around the 75°F ideal without requiring a full row cover. Just remove it during watering and when temperatures exceed 85°F to prevent overheating.
Pro Tips for Garden Seed Tape
- Here's how to transform your planting game with these game-changing insights for flawless results.
- Precision Spacing Secret: In Step 1, when marking your row, use a small garden flag or colored stake at the starting ...
- Tape Handling Technique: When working with seed tape in Step 2, I recommend using a pair of clean, dry tweezers to ge...
Frequently asked questions
Got questions about garden seed tape? You’re not alone! Here are some of the most common concerns—and straightforward answers—to help you get the most out of this fuss-free planting method.
What’s the best time of year to use seed tape?
Seed tape works best when planted during your region’s ideal sowing window for the specific flowers or herbs you’re growing. For most annuals, spring (after the last frost) and early fall are prime times. Check the seed tape packaging for variety-specific recommendations—some, like cosmos or zinnias, thrive in warm soil, while others (like snapdragons) prefer cooler temps.
How long does it take for seeds in tape to germinate?
Germination time varies by plant, but seed tape typically speeds up the process compared to loose seeds. Most varieties sprout within 7–14 days under ideal conditions (warm soil, consistent moisture, and sunlight). For faster results, keep the soil warm with a mini greenhouse or row cover until sprouts appear. Pro tip: Label your tape with the planting date to track progress!
Is seed tape more expensive than regular seeds?
Upfront, seed tape can cost slightly more per seed than bulk seeds, but it saves time and reduces waste. For example, a pack of 50 flower seeds in tape might run $5–$8, while buying loose seeds and prepping them yourself could take extra effort—and possibly yield uneven spacing. If you’re planting small plots or containers, the convenience often justifies the cost!
What if the seed tape won’t stay in place when watering?
If your tape keeps shifting, try these fixes:
- Press firmly into the soil before watering—finger pressure or a small board can help.
- Use a light spray of water first to settle the soil, then apply a deeper watering.
- For loose soil, consider planting on a slight incline or using a tiny amount of seed-starting gel to hold it in place.
Can I reuse seed tape for multiple seasons?
No—seed tape is a one-time-use product. Once planted, the seeds germinate and the tape degrades or dries out. However, you can store unopened seed tape in a cool, dry place for 1–2 years (check the packaging for specifics). For next year, buy fresh tape or try making your own with biodegradable paper and glue!
Wrapping up and next steps
Garden seed tape is your secret weapon for effortless, flawlessly spaced blooms—no fuss, no guesswork! Whether you're a seasoned gardener or just starting, this simple tool transforms planting into a breeze, saving time and ensuring vibrant results.
Ready to elevate your garden game? Grab your seed tape, head outdoors, and let nature do the rest—your future garden will thank you!
🌱 Next step: Try it with your favorite flowers or veggies this season and share your progress! Tag us in your garden pics—we’d love to see your perfectly aligned plants! 📸