
Lawn
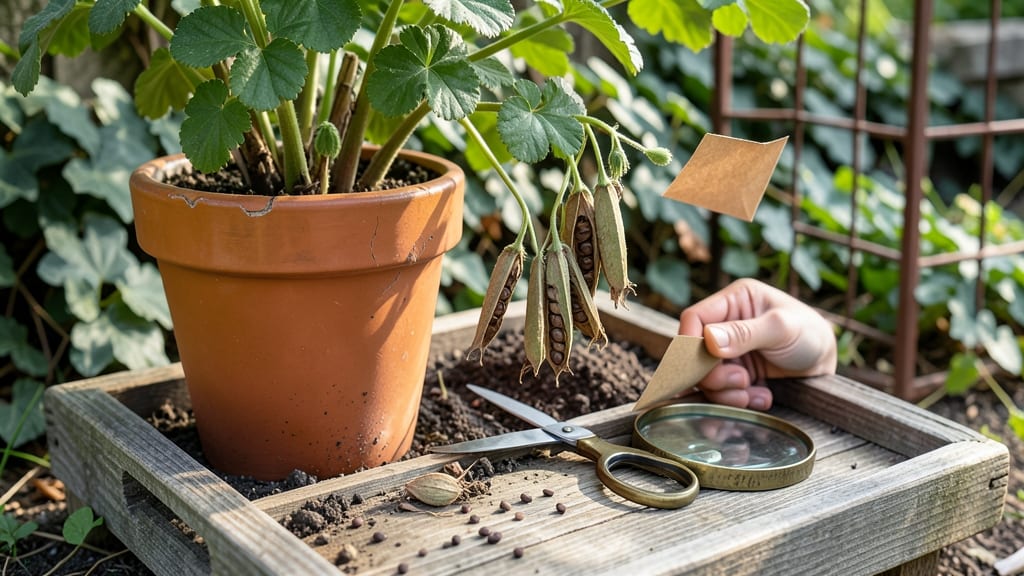
Geranium seed collection isn’t as tricky as it seems—especially when you know the right moment to harvest those little brown pods. 🌱 I’ve saved seeds from my hardy geraniums for years, and the process gets easier every time you do it. The key is patience: waiting for the pods to turn from green to brown signals they’re ready, and a quick twist is all it takes to release the seeds inside.
You’ll only need a few supplies: scissors or gloves for handling, a brown paper bag for drying, and a cool, dark spot to store them. Harvest on a dry morning after the dew has evaporated—this keeps moisture out and prevents mold.
Once you’ve gathered a handful of pods, let them dry completely before storing them in an envelope labeled with the variety and collection date.
When spring rolls around, you’ll be ready to plant those seeds indoors about 8-10 weeks before your last frost. Geraniums germinate best in warm soil, so a heat mat or sunny windowsill speeds things up.
The first true leaves appear within 2-3 weeks, and by summer, you’ll have lush plants ready to brighten up your garden or containers.
Pro tip: If you’re growing geraniums for their flowers, save seeds from the healthiest, most vibrant plants for the best results. And don’t worry if not every seed sprouts—geraniums are forgiving, and even a few strong seedlings will give you a stunning display. Happy harvesting!
📚 In This Guide
- What you need
- Instructions
- Tips and common mistakes
- Wrapping up and next steps
What you need
- ● Mature geranium plants: Choose healthy, fully bloomed plants (preferably with seed pods forming). Aim for at least 3-5 plants for a good seed yield.
- ● Sharp pruning shears or scissors: Use sterilized, clean tools to avoid spreading disease (e.g., blank">Felco F-2 pruners or small garden scissors).
- ● Paper bags or breathable seed envelopes: Opt for kraft paper or unbleached cotton bags (size: ~4" x 6"). Quantity: 1 bag per plant or 10-15 pods.
- ● Labeling tags or masking tape + marker: Label seeds with plant variety, date collected, and location (e.g., "Pelargonium 'Mistery Blue' – June 2024 – Sunny Patio").
- ● Rubbing alcohol (70% isopropyl) and paper towels: For sanitizing tools and hands before handling seeds.
- ● Drying tray or screen: A wire mesh tray or cardboard box with holes to allow airflow (e.g., a blank">seed drying rack or DIY version with a wooden frame + window screen).
- ○ Small fan (optional but helpful): A low-speed desk fan to speed up drying in humid climates.
- ● Glove: A lightweight gardening glove to protect hands from thorns or sap.
- ● Magnifying glass: For inspecting seed pods for pests or damage.
- ● Seed storage containers: Airtight glass jars or Mylar bags with silica gel for long-term storage (e.g., blank">vacuum-sealed bags).
- ● Notebook or seed-tracking app: To log seed viability, germination dates, and notes (e.g., blank">Seed Savers Exchange app).
- ● Humidity pack: A small silica gel packet to place in storage containers for extra dryness.
How to collect geranium seeds without the frustrating twists
Geraniums self-seed like crazy—here's how to turn that into a stress-free harvest every year.
🌿 Step 1: Identify Mature Seed Pods
Watch for seed pods that form after flowers fade. They start green and firm, then turn brown and papery when ready. The pods will feel dry to the touch and split open easily with gentle pressure. I always check plants in late summer or early fall when the weather cools but before frost hits.
Don't wait until pods burst open on the plant—those seeds scatter everywhere, and you'll lose track of varieties. When pods are brown and crisp, they're at peak collection time. A single mature geranium plant can produce hundreds of seeds, so you'll want to harvest multiple pods per plant.
✂️ Step 2: Harvest and Dry the Pods
Use clean, sharp scissors or fingers to snip off entire seed pods. Place them in a paper bag (not plastic) with the plant name written on it. The paper allows airflow while preventing seed loss. I label bags immediately—next year's memory won't last through winter!
Leave pods in a dry, shaded spot for 7-10 days to fully dry. They'll rattle when shaken if they're ready. If you rush drying, seeds may mold inside the pods. A warm, dry attic or garage works perfectly—just keep them away from direct sunlight which can overheat the seeds.
🪴 Step 3: Extract and Store Seeds Properly
Once pods are completely dry, gently crush them between your fingers or use a small hammer to break them open. Seeds will spill out cleanly if pods were fully mature. I spread them on a clean sheet of paper to remove any remaining pod debris before storing.
Store seeds in envelope-sized paper packets (not plastic bags) with the geranium variety and harvest date written on them. Keep them in a cool, dark place like a seed drawer or even the fridge. Properly stored geranium seeds stay viable for 2-3 years, though they germinate best when used within a year.
🌱 Step 4: Test Germination Before Next Season
In early spring, plant 5-10 seeds in a small pot with seed-starting mix to test viability. Press them ¼ inch deep and keep the soil evenly moist at 65-75°F. You should see sprouts in 10-14 days—if germination is slow or patchy, store the remaining seeds in the freezer for another year to break dormancy.
This test also helps you gauge how many seeds to collect next time. If your test batch produces 30+ seedlings, you've got plenty for next season. If germination is weak, consider buying fresh seeds or collecting from more mature plants next year.
Tips & tricks for perfect geranium seed collection
Here's what nobody tells you about turning those pesky seed pods into a gardener's treasure trove.
Timing is Everything: Late summer through early fall is your golden window for harvesting geranium seed pods. I learned this the hard way after watching seeds scatter everywhere during a spring storm. The cooler temperatures after summer's peak help pods mature uniformly, making collection much easier. Watch for pods that turn from green to brown and feel crispy when squeezed gently—this is your cue they're ready.
Harvesting Hack: Use a pair of clean, sharp scissors to snip pods directly from the plant rather than pulling them. This prevents damage to the plant and ensures you get the entire pod intact. I always collect pods on a dry morning after the dew has evaporated—this helps prevent any unwanted moisture from getting trapped in the paper bags during drying. Place pods in labeled paper bags immediately to keep track of varieties, especially if you're growing multiple types.
Drying Done Right: The 7-10 day drying period in Step 2 is non-negotiable—rushing this step can lead to moldy seeds. I've found that a warm attic with good airflow works perfectly, but avoid direct sunlight which can overheat the seeds. Test for readiness by gently shaking a pod—if you hear a rattling sound, it's ready. This simple check saves hours of waiting and potential disappointment.
Storage Wisdom: Those envelope-sized paper packets are your best friend for long-term storage. I've kept geranium seeds viable for up to 3 years using this method, though they germinate best within the first year. The key is maintaining a cool, dark environment—your fridge works great for this. Labeling with both the variety name and harvest date helps you track which seeds are freshest for planting next spring.
Pro Tips for Geranium Seed Collection
- Here's what nobody tells you about turning those pesky seed pods into a gardener's treasure trove.
- Timing is Everything: Late summer through early fall is your golden window for harvesting geranium seed pods. I learn...
- Harvesting Hack: Use a pair of clean, sharp scissors to snip pods directly from the plant rather than pulling them. T...
Frequently asked questions
Got questions about collecting geranium seeds? You’re not alone! Here are some of the most common queries—and their straightforward answers—to help you master the process like a pro.
When is the best time to collect geranium seeds?
Harvest seeds when the seed pods turn brown and papery (usually late summer to early fall). Avoid collecting too early—they won’t be fully mature, and too late, they’ll burst open, scattering seeds everywhere. Aim for late August to September in most climates for peak readiness.
How do I know if the seeds are ripe for collecting?
Ripe geranium seeds are housed in dry, crinkly pods that split open easily. Gently squeeze a pod—if seeds spill out or the pod feels hollow, it’s ready. Unripe pods stay green and firm. Pro tip: Collect on a dry day to avoid moldy seeds!
Can I collect geranium seeds from store-bought plants?
Probably not! Most commercial geraniums (Pelargonium) are hybrids bred for flowers, not seed viability. If you’re lucky, you might get a few seeds—but they’ll likely revert to wild-type traits (smaller, less vibrant). For reliable seeds, grow from heirloom or open-pollinated varieties.
What should I do if my seed pods won’t open naturally?
If pods stay stubbornly closed, don’t force them—wait a few more days. For urgent cases, place pods in a paper bag and store in a warm, dry spot for 1–2 weeks. The heat and humidity often trigger natural splitting. Never microwave them! (Yes, we’ve heard the myth.)
How do I store geranium seeds long-term?
Keep seeds in a cool, dry place (like a sealed envelope or airtight container with silica gel). Label with the collection date—geranium seeds stay viable for 2–3 years if stored properly. Avoid refrigeration unless humidity is high in your climate.
Wrapping up and next steps
Collecting geranium seeds doesn’t have to be a struggle—with the right tools and techniques, you can harvest them easily and efficiently. Whether you’re saving seeds for next season or sharing them with fellow gardeners, patience and precision pay off in vibrant blooms.
Now that you’re equipped with the know-how, why not try it this weekend?
Start small: pick a few healthy geraniums, follow the steps, and watch your garden thrive with new life! 🌱