
Propagation
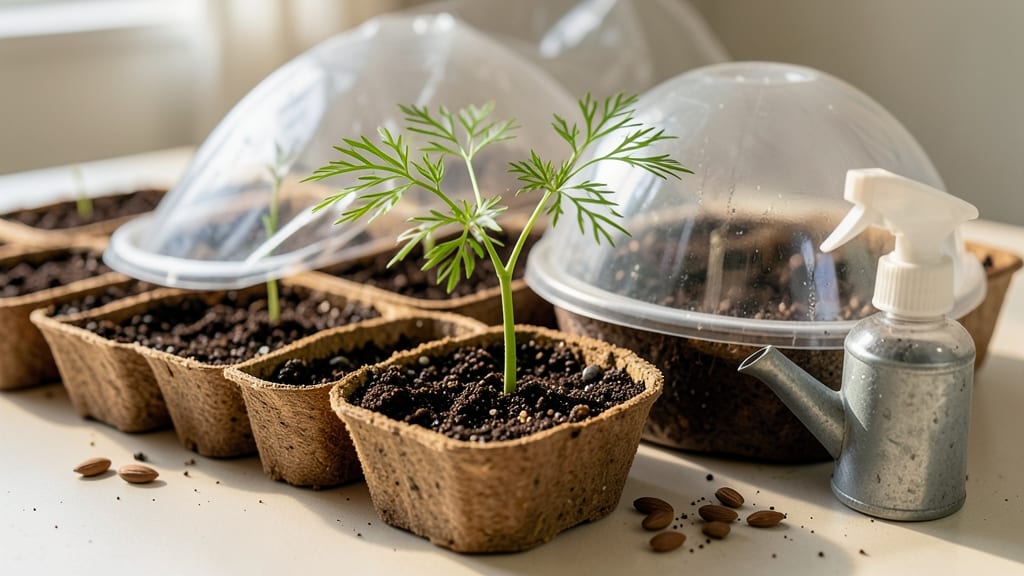
Growing asparagus from seed indoors is the secret to beating grocery store prices and getting a jumpstart on your perennial harvest. 🌱 I’ve tried the slow outdoor method, but starting these seeds inside gives them a head start—and zero waste from those empty pods.
The trick is patience (they take 3-4 months just to sprout) and the right conditions to coax them along.
You’ll need just a few supplies: biodegradable seed pods, a shallow container, a heat mat (they love warmth), and a bright window or grow light. The soil mix should be light and sterile—think 50% potting soil and 50% perlite—to prevent rot.
Water gently but keep it consistently moist, like a wrung-out sponge. Most people rush this step and drown the seeds, but asparagus roots need air almost as much as water.
By week 12, you’ll see those first pale green shoots pushing through the soil—tiny but unmistakable. They’ll need 10-12 hours of light daily to stay sturdy, and you’ll transplant them outdoors after the last frost, giving them a full growing season head start.
The payoff? A perennial harvest for years, starting as early as the second year.
Here’s the catch: asparagus is a slow grower, but indoor starts mean you skip the first year of outdoor struggles. The pods break down in soil, so you’re not left with trash—just a better garden. Ready to turn those pods into a future harvest? Let’s get those seeds sprouting.
📚 In This Guide
- What you need
- Instructions
- Tips and common mistakes
- Wrapping up and next steps
What you need
- ● Asparagus seeds: Choose organic, non-GMO seeds (e.g., Mary Washington or Purple Passion varieties). Aim for 5–10 seeds per pod or container.
- ● Seed-starting pods: 3–5 biodegradable pods (e.g., EcoPods or Jiffy-7) for zero-waste growing.
- ● Potting mix: A seed-starting mix (sterile, peat-free if possible) or a blend of 50% coco coir + 50% perlite for drainage.
- ● Grow lights or sunny windowsill: A full-spectrum LED grow light (12–16 hrs/day) or a south-facing window with indirect light.
- ● Spray bottle: For gentle watering (16 oz capacity, fine mist setting).
- ● Humidity dome or plastic wrap: To retain moisture while seeds germinate.
- ● Small tray or saucer: To hold pods and catch excess water (shallow and wide, ~10" diameter).
- ○ Thermometer (optional): Ideal germination temp: 70–75°F.
- ○ Fertilizer (optional): Diluted fish emulsion (1:10 ratio) or seaweed extract after sprouts emerge.
- ● Plant labels: To track varieties and planting dates.
Step-by-step instructions for growing asparagus from seed indoors
Here's how I get those first sprouts popping in just 7-10 days—no fancy gear, just smart prep.
🌱 Step 1: Prepare Zero-Waste Pods for Fast Germination
Asparagus seeds have tough coats that slow sprouting, but we're using these zero-waste pods to break that barrier naturally. Soak the seed pods in warm water for 24 hours—this softens the outer layer and kickstarts germination. I like to use a small bowl and cover it with a damp paper towel to keep humidity high while they soak.
After soaking, gently rub the pods between your fingers to loosen the outer skin—don't scrape, just coax it open. This step is key for fast sprouts. Once the pods feel slightly rougher to touch, they're ready for planting. The goal is to work with nature, not force it, so handle them like you're cradling tiny seeds.
🌿 Step 2: Plant Pods in Moistened Growing Medium
Fill your 4-inch pots with the seed-starting mix (I use a blend of peat moss and perlite for best drainage). Moisten it until damp but not soggy—you should see slight moisture beads on the surface when you squeeze a handful. Press the mix down lightly to create a firm base for the pods.
Plant 2-3 pods per pot, spacing them about 1 inch apart. Press them gently into the soil so they make contact but don't bury them—just enough so the soil holds them in place. Cover the pots with a clear plastic dome or wrap them in plastic wrap to trap warmth and moisture. This creates the ideal greenhouse environment for those first sprouts.
💧 Step 3: Maintain Warmth and Moisture for Sprouting
Place the pots in a warm spot, ideally 70-75°F. A seedling heat mat works wonders here, but even a sunny windowsill with afternoon sun will do. Check daily for moisture—mist the soil lightly if it feels dry to the touch, but avoid soaking. Overwatering now will drown the pods before they sprout.
You'll see the first tiny shoots break through the pods in 7-10 days. That's your signal to remove the plastic immediately—too much humidity now invites damping-off, a fungal disease that collapses seedlings overnight. Once sprouted, move the pots to a bright spot with 6-8 hours of indirect light daily.
☀️ Step 4: Provide Light and Care for Young Seedlings
The moment those first true leaves appear (they'll look like tiny fern fronds), it's time to upgrade their light. Asparagus seedlings need bright, indirect light—a south-facing window works, but supplement with a grow light if natural light is weak. Keep the light 4-6 inches above the plants and adjust as they grow.
Water when the top inch of soil feels dry, but never let the soil stay soggy. Asparagus roots are sensitive to rot, so I use a spray bottle to water gently at the base rather than pouring from above. Fertilize lightly with a diluted fish emulsion every 4 weeks to encourage strong root development.
⏰ Step 5: Harden Off Before Transplanting Outdoors
When seedlings reach 4-6 inches tall and show 5-6 true leaves, they're ready for the great outdoors. Start by placing them outside in a sheltered spot for 1-2 hours the first day, gradually increasing exposure over 7-10 days. This process, called hardening off, helps them adjust to wind and sun without shock.
Transplant on a cool, overcast day to reduce stress. Dig a hole twice as wide as the root ball and mix in a handful of compost. Water deeply after planting to settle the soil and encourage root growth. With patience, your asparagus will establish and reward you with harvests in 2-3 years—worth every step!
Tips & tricks for perfect indoor asparagus sprouts
These little tricks will help you turn those zero-waste pods into thriving asparagus seedlings faster than you'd expect.
Soaking Secret: The 24-hour soak is your ticket to faster germination, but don't skip the warm water—it activates the seeds' enzymes. I like to use a small glass jar so I can see the pods plumping up. If your water feels tepid, pop it in the microwave for 20 seconds to warm it up—just don't let it get hot enough to cook the seeds.
Pod Handling: When you're rubbing those pods in Step 1, think of it like giving them a gentle massage rather than scrubbing. Too much pressure can damage the delicate seed inside. I've found that wrapping the pods in a damp paper towel while rubbing helps prevent overhandling—just give them a little coaxing, not a workout.
Lighting Strategy: Those 6-8 hours of indirect light in Step 4 are non-negotiable, but here's the trick: if your seedlings start leaning toward the light, it's time to rotate them. I use a small timer to remind myself every 2-3 days to give them a quarter turn. This prevents them from growing lopsided and ensures even growth all around.
Harden Off Gradually: The 1-2 hour outdoor acclimation in Step 5 sounds simple, but timing matters. Start with just 1 hour on day one, even if your schedule allows more. This gradual approach prevents shock—think of it like letting your plants take a warm bath rather than jumping into cold water. You'll know you're doing it right when they look a little wilted but perk up within an hour.
Pro Tips for Growing Asparagus From Seed Indoors
- These little tricks will help you turn those zero-waste pods into thriving asparagus seedlings faster than you'd expect.
- Soaking Secret: The 24-hour soak is your ticket to faster germination, but don't skip the warm water—it activates the...
- Pod Handling: When you're rubbing those pods in Step 1, think of it like giving them a gentle massage rather than scr...
Frequently asked questions
Got questions about sprouting asparagus from seed indoors?
You’re not alone—this method is still a niche (but rewarding!) skill. Below, we tackle the most common concerns to help you grow confidently, even if you’re a beginner.
How long does it take for asparagus seeds to sprout indoors?
Patience is key! Asparagus seeds are notoriously slow—expect germination in 2–4 weeks (sometimes longer) if kept in warm (70–75°F), moist conditions. Use a heat mat or sunny windowsill to speed things up. Once sprouted, seedlings grow very slowly—don’t rush them!
Can I grow asparagus indoors year-round, or do I need seasonal adjustments?
Indoors, you can start seeds anytime, but light and temperature matter most. Use grow lights for 14+ hours/day in winter, and keep temps above 60°F. If your space gets too cold (<50°F), germination stalls. A sunny windowsill works in spring/summer, but supplement with artificial light for consistency.
Are asparagus seed pods worth the cost, or should I use regular seeds?
Zero-waste pods (like Epic Probiotic Pods) are highly recommended for beginners—they’re pre-soaked, easy to sprout, and eliminate seed mess. Regular seeds require pre-soaking (24+ hours) and more effort. Pods also yield faster, tastier sprouts with zero compost waste!
My asparagus sprouts look leggy or weak—what’s wrong?
Leggy sprouts = not enough light. Move them within 2–3 inches of a grow light (or brighter window) immediately. Rotate pods daily for even growth. Overwatering can also weaken them—let the pod drain after soaking, and rinse gently (no soaking bowls!).
How do I harvest asparagus sprouts without killing the plant?
Harvest when sprouts reach 1–3 inches tall by snipping just above the pod with clean scissors. For regrowth, rinse and resprout the pod within 24 hours. Avoid pulling stems—this damages the plant. With care, one pod can yield 3–5 harvests before composting!
Wrapping up and next steps
Growing asparagus from seed indoors is a rewarding journey that combines sustainability with the joy of nurturing life. With patience and the right techniques—like using zero-waste seed pods—you’ll soon enjoy fresh, homegrown asparagus that’s healthier and more satisfying than anything store-bought. 🌱
Now that you’re armed with tips and tricks, take the next step: start your seeds today! Whether you’re a beginner or a seasoned gardener, every sprout is a victory. Happy growing—and may your asparagus spears be plentiful! 🌟