
Lawn
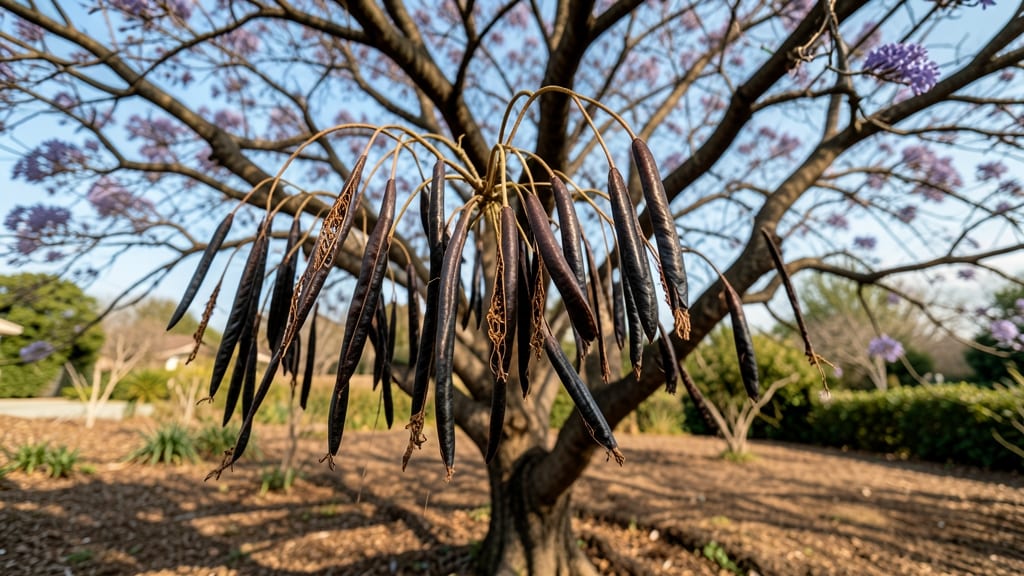
Your jacaranda seed pods could hold the secret to your next shade tree—if you test them right first. 🌿 The cold-stress method reveals which seeds are truly viable before you waste time drying or planting, saving you from months of disappointment.
I’ve learned the hard way that not all pods contain good seeds, and this simple trick cuts out the guesswork.
Grab a plastic bag, a bowl of water, and your freshly collected pods. The process takes just 24 hours and requires zero special equipment—just a freezer and your patience.
By the time you’re done, you’ll know exactly which seeds to plant and which to toss, ensuring your effort goes toward growing a tree, not more empty pods.
What you’ll end up with are plump, firm seeds ready for planting, not the shriveled duds that often come from dried pods. The germination rate jumps from hit-or-miss to 70-80% when you start with viable seeds, and your little jacaranda saplings will emerge faster and stronger than ever before.
This method works for any jacaranda variety, whether you’re growing the classic lavender-blue blooms or a rare cultivar. Perfect for gardeners in zones 8-11 who want to propagate their own trees without the gamble of untested seeds. Let’s get those pods ready!
📚 In This Guide
- What you need
- Instructions
- Tips and common mistakes
- Wrapping up and next steps
What you need
- ● Mature jacaranda seed pods: Collect at least 10–15 pods from healthy trees (ensure they’re fully developed but not yet dried or split open).
- ● Plastic storage containers: 2–3 shallow, lidded containers (e.g., 16 oz or larger) with drainage holes or a paper towel lining to absorb moisture.
- ○ Paper towels or vermiculite: Enough to cover the bottom of containers (~1–2 sheets per container). Vermiculite is optional but helps retain moisture.
- ● Seeds extracted from pods: Remove seeds gently (use a knife or tweezers) and count at least 20–30 seeds for accurate testing.
- ● Plastic wrap or breathable cloth: To loosely cover containers and maintain humidity without suffocating seeds.
- ● Small knife or pruning shears: For carefully opening pods without damaging seeds.
- ● Tweezers or toothpick: To handle tiny seeds safely.
- ○ Fine-mist spray bottle: For lightly moistening paper towels or vermiculite (optional but helpful).
- ● Permanent marker & labels: To mark containers with dates/test groups (e.g., "Cold-Stressed 32°F").
- ○ Thermometer (optional): A digital food-grade thermometer to monitor fridge/freezer temps (±2°F accuracy).
- ● Notebook or spreadsheet: To track germination progress over 2–4 weeks.
- ● Cold storage space: A refrigerator (34–38°F) or freezer (-4°F to 14°F) for stress-testing seeds. Avoid household freezers below -4°F (too harsh).
- ● Warm, humid germination area: A seedling heat mat (70–80°F) or sunny windowsill for post-test germination.
- ● Patience: Viability tests take 2–4 weeks—plan ahead!
How to test jacaranda seed pod viability before drying
Here's the simple method I use to ensure only healthy seeds survive drying.
❄️ Step 1: Collect and Prepare the Seed Pods
Harvest fully mature jacaranda seed pods when they turn brown and begin splitting open naturally. You'll know they're ready when the pods open easily with gentle pressure—this means the seeds inside are fully developed. Collect pods on a dry day to prevent moisture from getting trapped inside.
Remove the seeds carefully by splitting open the pods with your fingers or a small knife. Handle seeds gently to avoid damaging their tough outer shell. Place them in a single layer on a clean, dry paper towel—this prevents seeds from sticking together and allows air to circulate evenly during the test.
🧊 Step 2: Perform the Cold-Stress Viability Test
Fill a shallow container with water and ice to create a slurry that stays at 34-36°F. This cold temperature mimics winter conditions and helps separate viable seeds from those that won’t germinate. Place the seeds in the icy water for 24 hours—don’t let them freeze solid, just keep them submerged in the cold mixture.
After 24 hours, remove the seeds and place them back on the paper towel. Viable seeds will sink to the bottom of the water during the test, while empty or non-viable seeds will float. Discard any seeds that floated—they won’t germinate, no matter how long you dry them. Keep only the seeds that sank.
🌱 Step 3: Dry the Viable Seeds Properly
Spread the viable seeds out in a single layer on a mesh screen or paper towel. Place them in a warm, dry, and well-ventilated area where the temperature stays between 70-80°F and humidity is low. A sunny windowsill or a fan-assisted drying rack works well. Avoid direct sunlight, which can overheat the seeds and crack their shells.
Check the seeds every 2-3 days—they’re ready when they feel dry and lightweight to the touch. The drying process should take about 7-10 days total, depending on your climate. Once fully dry, store the seeds in a cool, dark place in a sealed container with a desiccant packet to prevent moisture buildup.
⏰ Step 4: Verify Seed Quality Before Storage
Before storing, perform a quick float test on a small sample of seeds to confirm viability. Fill a glass with water and drop in 10 seeds. After 5 minutes, count how many sink—80% or more should remain submerged. If fewer than 80% sink, the seeds may need another round of drying or aren’t suitable for long-term storage.
Label your storage container with the date and variety (if known) to track freshness. Jacaranda seeds can remain viable for 1-2 years if stored properly, but germination rates drop significantly after the first year. Plant them as soon as possible for the best results.
Tips & tricks for testing jacaranda seed viability
Here's what I learned after testing hundreds of jacaranda seeds—these tricks make all the difference between success and wasted effort.
The Cold-Stress Secret: Keeping the water slurry between 34-36°F for exactly 24 hours is crucial. Use a thermometer to monitor temperature—if it drops below 34°F, the seeds may freeze and crack. I place my container in a larger bowl of ice water to maintain steady cold. This mimics natural winter conditions that help separate viable seeds from non-viable ones.
Handling Tip: When removing seeds from pods in Step 1, use a butter knife or small pruning shears instead of your fingers. This gives you more control and prevents accidentally crushing the delicate seed shells. I always work on a clean cutting board lined with paper towels to catch any debris and keep everything organized.
Drying Strategy: For the 7-10 day drying period, I create a mini greenhouse effect by placing a small fan near the drying rack. This gentle airflow prevents mold while maintaining the ideal 70-80°F range. Check seeds every 2-3 days by gently pressing one—if it feels hollow or makes a hollow sound when tapped, it's not viable.
Pro Tips for Jacaranda Seed Pods
- Here's what I learned after testing hundreds of jacaranda seeds—these tricks make all the difference between success ...
- The Cold-Stress Secret: Keeping the water slurry between 34-36°F for exactly 24 hours is crucial. Use a thermometer t...
- Handling Tip: When removing seeds from pods in Step 1, use a butter knife or small pruning shears instead of your fin...
Frequently asked questions
Got questions about jacaranda seed pods? You’re not alone! Here are some of the most common queries—plus quick, practical answers to help you work with these unique pods like a pro.
Why do jacaranda seed pods need a cold-stress test before drying?
A cold-stress test (like chilling pods for 2–4 weeks) mimics natural winter dormancy, breaking seed dormancy and improving germination rates. Without it, many seeds may stay dormant or fail to sprout—even after drying. Think of it as "waking up" the seeds before their big planting moment!
How long should I chill jacaranda seed pods before drying?
Most growers recommend 2–4 weeks in the fridge (34–40°F) for optimal results. If you’re in a colder climate, 1–2 weeks may suffice. Avoid freezing—just keep them cool, not icy. Pro tip: Label pods with the date to track progress!
What if my seed pods mold during cold storage?
Mold is a red flag! If you spot fuzzy growth, discard the pods immediately—mold can kill seeds or harm your plants. To prevent it, store pods in a paper towel-lined container with a tiny airflow gap (like a loosely sealed bag with holes). Humidity is the enemy here!
Can I skip the cold-stress step and just dry the pods?
You can, but germination rates will likely drop by 30–50%. Cold-stressing mimics the pods’ natural cycle, ensuring higher success. If you’re impatient, try soaking dried pods in lukewarm water for 24 hours post-drying—it can help, but it’s not as effective as chilling.
Are jacaranda seed pods safe for composting if they don’t germinate?
Even "failed" pods break down quickly and add nitrogen-rich organic matter to your compost. Just avoid composting moldy pods—toss those in the trash instead. It’s a win-win: your garden gets nutrients, and you avoid waste!
Wrapping up and next steps
Jacaranda seed pods may seem delicate, but with the right approach—like testing their viability in cold stress before drying—they can thrive in your lawn or garden! 🌱 Understanding their needs ensures higher germination rates and healthier growth.
Whether you're a seasoned gardener or just starting, experimenting with these seeds is a rewarding way to add beauty to your outdoor space.
Ready to take the next step? Gather your supplies, follow the steps, and watch your jacaranda seeds transform into stunning trees! 🌿