
Lawn
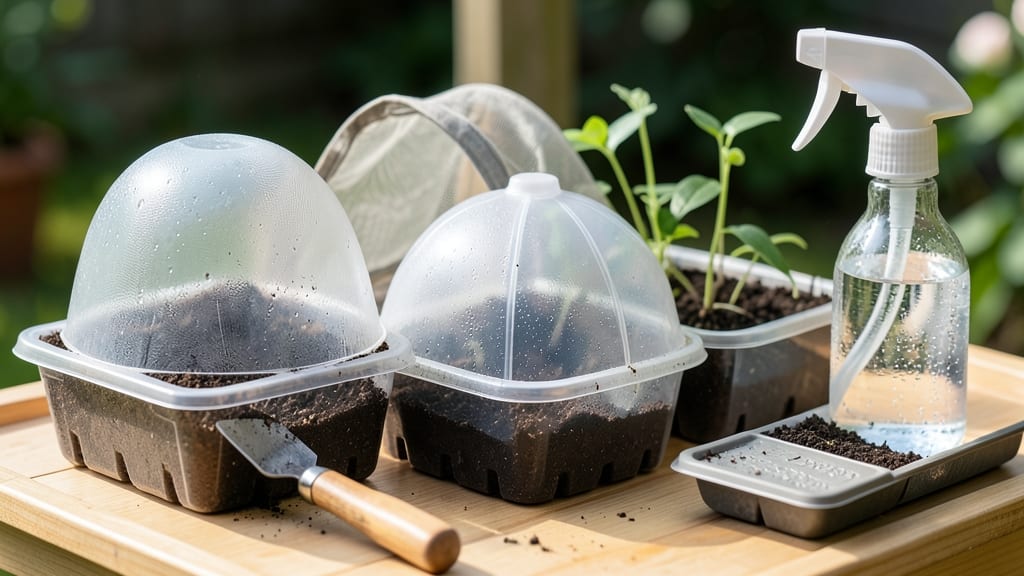
Seed trays with lids create the perfect greenhouse environment for tiny seedlings to thrive. 🌱 I learned this the hard way after watching delicate sprouts wilt from inconsistent moisture—until I discovered how simple lids transform seed-starting success.
The right lid keeps humidity steady, protects young roots, and speeds up germination by trapping warmth, especially for slow starters like parsley or snapdragons.
Plastic lids are the easiest solution—clear ones let you check moisture levels without removing them, while opaque versions work better for light-sensitive seeds. Glass jars or even repurposed takeout containers can also work in a pinch, as long as they fit snugly.
The key is balance: too much condensation leads to mold, but too little air circulation stunts growth. A tiny gap or venting with a toothpick can solve this.
You’ll notice seedlings emerge faster and stay sturdier with consistent moisture, especially in cool rooms where heat escapes. Remove lids once sprouts have their first true leaves and can handle a bit of air circulation.
For heat-loving plants like peppers, keep lids on until soil temperatures hit 70°F—that’s when they’ll really take off.
Not all seeds need lids—fast germinators like radishes or lettuce do fine without them—but for anything slower or fussy, this simple trick makes all the difference. Once you try it, you’ll wonder how you ever started seeds any other way.
📚 In This Guide
- What you need
- Instructions
- Tips and common mistakes
- Wrapping up and next steps
What you need
- ● Seed trays: Standard 1020 or 2020 trays (10" x 20" or 20" x 20")—check your existing trays for dimensions.
- ● Clear plastic sheeting: 6–12 mil thickness, enough to cover trays with overlap (e.g., 3–4 ft x 6–8 ft sheet for multiple trays). Solar plastic or greenhouse film works best!
- ● Scissors or utility knife: For cutting plastic to size.
- ● Measuring tape or ruler: To ensure precise cuts.
- ● Masking tape or clear packing tape: 1–2 inch width, to secure edges (avoid colored tape—it may block light).
- ○ Optional ventilation holes tool: A nail, awl, or hole punch (if adding breathability).
- ● Clamps or binder clips: To hold plastic in place while taping.
- ● Heat gun or hairdryer: For slightly shrinking plastic to create a snug fit.
- ● Permanent marker: To trace tray edges before cutting.
- ● Drill with small bit (1/8"): For making ventilation holes if needed.
- ● Recycled materials: Clear plastic containers (e.g., takeout lids, yogurt cups) for mini trays.
- ● 🌡️ Plastic thickness matters: Thicker plastic (8–12 mil) lasts longer but may reduce light penetration.
- ● ✨ Double-layer lids: Use two thin sheets of plastic for better insulation in cold climates.
- ● 🔄 Reusable magic: Clean and store lids for future seed-starting seasons!
Step-by-Step guide to creating DIY seed tray lids
Here’s how to make simple, effective lids to keep your seedlings cozy and protected.
🪴 Step 1: Choose Your Base Material
Start with clear plastic lids from takeout containers, plastic food storage boxes, or even cut-up milk jugs. I like using the lids from 4-pack berry containers—they’re the perfect size for standard seed trays and let you see moisture levels without opening. If you’re using larger trays, cut a piece of clear plastic sheeting (like from a hardware store) to fit snugly over the top.
Clean the material thoroughly with warm, soapy water—any residue could inhibit germination. For extra protection, line the inside with a paper towel cut to size. This adds an extra moisture barrier while still allowing light to reach the seedlings.
💧 Step 2: Secure the Lid for Humidity Control
Place the lid over the seed tray immediately after planting and watering. The goal is to trap warmth and moisture while still allowing light to filter through. If using plastic lids, press them down firmly but don’t crush the soil—you want airflow but minimal gaps. For plastic sheeting, weigh it down with small pebbles or books around the edges to keep it in place.
Check the setup daily. You’ll see condensation on the inside of the lid—that’s perfect. If the soil feels damp but not soggy and the air inside stays humid (not dripping), you’re golden. Open the lid for 5-10 minutes daily to prevent mold or fungal growth, especially after the first true leaves appear.
⏰ Step 3: Monitor and Adjust for Germination
Keep the lids on until 50% of seeds have sprouted—usually 5-10 days depending on the plant. You’ll know it’s time to remove them when you see the first tiny green shoots breaking through the soil. At this stage, seedlings need fresh air to strengthen their stems and prevent damping-off disease.
After removing the lids, place a humidity dome (if using a commercial tray) or a small tent made from a plastic bag over the tray for another 3-5 days. This gradual transition helps seedlings adjust without shock. Watch for leggy growth—if stems stretch toward the light, your seedlings need more light or less warmth.
🌱 Step 4: Transition to Independent Growth
Once seedlings have their first true leaves (not the initial seed leaves), remove the humidity dome entirely. This is the moment they start photosynthesizing on their own. Place the tray under bright, indirect light for a few days to help them adjust. If you notice wilting, it’s a sign they need more moisture or less light, not the other way around.
For long-term protection, consider reusable seedling domes made from clear plastic with ventilation holes. These let you control humidity while still allowing airflow. Store your DIY lids for future use—they’re perfect for propagating cuttings or keeping new plants moist after transplanting.
Tips & tricks for perfect DIY seed tray lids
Here's what I learned after testing different materials and setups—these tricks make all the difference for happy seedlings.
Material Matters: For best results, use clear plastic lids from berry containers or food storage boxes—they provide the perfect balance of light transmission and moisture retention. If you're working with larger trays, opt for clear plastic sheeting from hardware stores, as it's more durable and reusable. Avoid opaque materials, which can block light and slow germination.
Ventilation is Key: In Step 2, when securing the lid, leave a tiny gap around the edges—just enough to allow airflow while maintaining humidity. I like to press plastic lids firmly but not tightly, and for sheeting, use small pebbles or books to weigh it down without sealing completely. This prevents mold while still trapping warmth.
Daily Check Routine: The 5-10 minute daily ventilation you do in Step 2 is crucial. Open the lid when you see condensation forming inside—this signals the perfect humidity level. If the soil feels damp but not soggy, you're on track. If you notice drips or mold spots, increase ventilation time gradually. This simple check prevents damping-off disease.
Transition Timing: When removing lids after 50% sprouting (Step 3), don't rush the process. After removing the initial lid, the 3-5 day humidity dome phase is essential for seedlings to acclimate. Watch for leggy growth—this is your cue to adjust lighting rather than assuming you need more warmth.
Pro Tips for Lids For Seed Trays
- Here's what I learned after testing different materials and setups—these tricks make all the difference for happy see...
- Material Matters: For best results, use clear plastic lids from berry containers or food storage boxes—they provide t...
- Ventilation is Key: In Step 2, when securing the lid, leave a tiny gap around the edges—just enough to allow airflow ...
Frequently asked questions
Got questions about using lids for seed trays?
You’re not alone! Whether you're a seasoned gardener or just starting out, these common concerns can make all the difference in your seedling success. Here’s what you need to know:
What are the best materials for DIY seed tray lids?
Clear plastic lids (like those from takeout containers) or plastic wrap work best for humidity and visibility. For a reusable option, try plexiglass or acrylic sheets—just ensure they’re snug to prevent gaps. Avoid materials that trap too much heat, like thick cardboard, unless you’re using them for short-term moisture retention.
How long should I keep the lids on my seed trays?
Most seeds benefit from lids for 7–14 days until sprouts emerge and develop their first true leaves. After that, remove the lids gradually to harden off seedlings—start by propping them open for a few hours daily. Overwatering or mold risk increases if lids stay on too long.
Can I reuse lids from store-bought containers?
Lids from yogurt cups, butter tubs, or salad containers are perfect for small seed trays. Just clean them thoroughly with soapy water and rinse well to remove residue. For larger trays, combine multiple lids or use parchment paper secured with rubber bands as a temporary fix.
What do I do if mold appears under the lid?
Mold is a red flag—act fast! Remove the lid immediately, discard any moldy soil, and repot healthy seedlings into fresh, sterile mix. To prevent recurrence, reduce watering slightly and ensure trays have drainage holes. A light spray of hydrogen peroxide (3%) can also help sterilize the soil.
Do I need lids if I’m using a greenhouse or humidity dome?
If your seedlings are under a greenhouse or humidity dome, lids may not be necessary—they’re already creating a controlled environment. However, lids can still help with microclimates in cooler climates or during temperature drops. Monitor humidity levels; aim for 40–70% to avoid issues.
Wrapping up and next steps
Choosing the right lids for your seed trays is a game-changer for nurturing healthy seedlings—whether you opt for store-bought solutions or DIY alternatives. Humidity control and root protection are key to strong starts, and now you’ve got the tools to make it happen! 🌱
Ready to take the next step? Grab your materials, follow the steps, and watch your garden grow from the ground up. Happy planting!