
Lawn
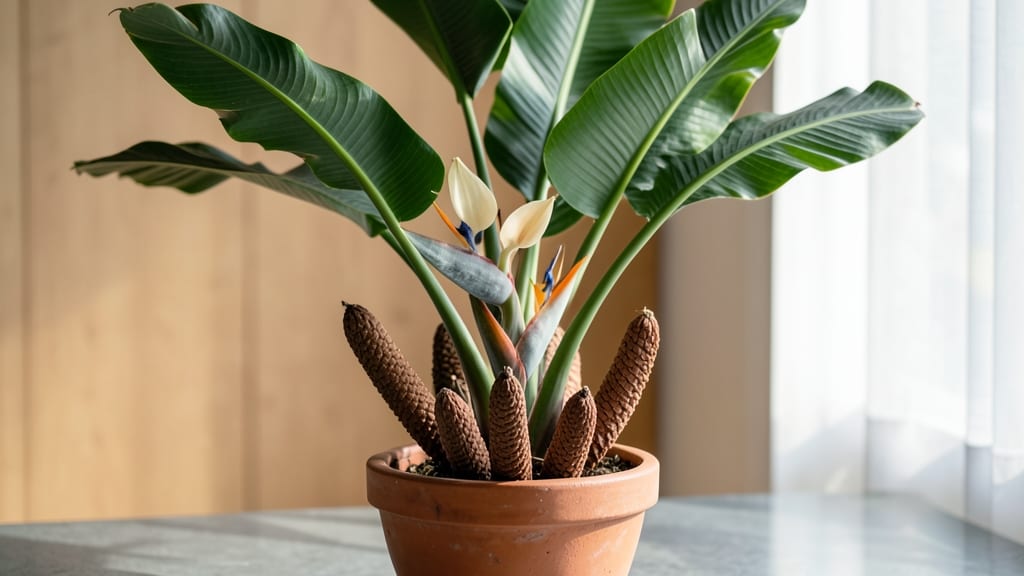
Those striking Mexican bird of paradise seed pods hold the secret to growing more of this tropical stunner—if you know the right steps. 🌿 I’ve learned the hard way that patience and timing are everything when working with these unique pods, which take a full year from bloom to viable seeds.
The process unfolds in three distinct layers: first, the pods themselves must ripen fully on the plant, then you’ll need to extract and clean the seeds properly, and finally, you’ll tackle the tricky germination phase where dormancy often throws a curveball.
Most gardeners give up at this stage, but with the right approach, you can break through it. What you’ll end up with are sturdy young plants ready to bring that bold, architectural beauty to your garden—just like the mature specimen that produced those pods in the first place.
The key is understanding each stage’s quirks, from pod collection timing to the exact moisture levels needed for germination. Works for both container growers and in-ground gardeners, though larger pots give you more control over the process. Here’s how to navigate each layer without frustration.
📚 In This Guide
- What you need
- Instructions
- Tips and common mistakes
- Wrapping up and next steps
What you need
- ● Mature Mexican Bird of Paradise plant (ensure it’s healthy and producing seed pods—look for brown, dry pods!
- ● Pruning shears or sharp scissors (sterilized to avoid disease transfer)
- ● Paper bags or breathable mesh sacks (1–2 per harvest, 12"x18" size)
- ● Newspaper or cardboard (for drying seed pods—1–2 sheets)
- ● Plastic or glass container with lid (for seed storage, 1–2 quart size)
- ● Fine-mesh strainer or sieve (to separate seeds from chaff)
- ● Paper towels or coffee filters (for seed cleaning)
- ● Small hand trowel or spoon (for planting seeds)
- ● Well-draining potting mix (1–2 gallons, blend of cactus/succulent mix + perlite)
- ● Labels & permanent marker (to tag seed pods by harvest date)
- ● Humidity tray (for creating a mini greenhouse effect during germination)
- ● Seedling heat mat (if germinating indoors in cooler climates)
- ● Spray bottle with water (for gentle seed pod hydration)
- ● Gloves (to protect hands from prickly pods or sap)
- ● Camera or sketchbook (to document the seed pod’s transformation!)
Step-by-Step guide to harvesting and processing Mexican Bird of Paradise seed pods
Here's how I turn those striking orange seed pods into new plants—simple, rewarding, and full of surprises.
🌿 Step 1: Identify and Collect Mature Seed Pods
Wait until the pods turn a deep orange-brown and begin to split open naturally—this usually happens in late fall or winter after the flowers fade. The pods will feel dry and papery to the touch, and you'll see tiny black seeds inside. I collect them on a dry day when the air is still to avoid moisture getting inside.
Use clean, sharp pruning shears to snip the pods from the stem, leaving a small portion of the stem attached. This helps prevent the pod from splitting open prematurely. Place the pods in a paper bag to dry further for 3-5 days in a warm, dry spot away from direct sunlight.
🌱 Step 2: Extract and Clean the Seeds
Once the pods are completely dry, gently squeeze them to release the seeds. The pods will crumble easily at this stage. I like to do this over a clean sheet of newspaper or a tray to catch all the tiny black seeds and the papery seed husks. The seeds are about the size of a pinhead, so take your time—don't rush and miss any.
Separate the seeds from the husks by gently blowing or sifting them through a fine-mesh sieve. Discard any seeds that look shriveled or discolored, as they won't germinate well. Store the viable seeds in a small envelope or airtight container in a cool, dry place until you're ready to plant them.
☀️ Step 3: Prepare the Seeds for Germination
Mexican Bird of Paradise seeds benefit from a stratification process to break dormancy. Place the seeds in a small container with a mix of equal parts damp sand and peat moss. Cover the container loosely with plastic wrap and refrigerate for 4-6 weeks. Check the mix weekly to ensure it stays moist but not soggy.
After the stratification period, remove the container from the fridge and let it sit at room temperature for 24 hours before planting. This gradual shift helps the seeds adjust to warmer conditions. You'll see tiny sprouts emerging within 2-4 weeks if everything is just right.
🪴 Step 4: Plant the Germinated Seeds
Fill small pots with a well-draining cactus or succulent mix—this plant loves dry conditions and hates soggy roots. Plant the germinated seeds about ¼ inch deep in the soil, spacing them 1-2 inches apart in the pot. Water lightly to settle the soil around the seeds, but avoid soaking the mix.
Place the pots in a bright, indirect light spot, like a south-facing window with sheer curtains. Keep the soil lightly moist but never waterlogged. You'll notice the first true leaves appearing in 4-6 weeks. Once the seedlings have 3-4 sets of leaves, they're ready to be transplanted into larger pots or directly into the ground.
⏰ Step 5: Care for Young Seedlings
Young Mexican Bird of Paradise seedlings need bright light to thrive, but avoid harsh afternoon sun, which can scorch their delicate leaves. Gradually introduce them to more direct sunlight over 2-3 weeks to help them toughen up. Water the seedlings when the top inch of soil feels dry to the touch, but be cautious—overwatering is the biggest killer of these plants.
Fertilize lightly with a balanced, water-soluble fertilizer diluted to half strength every 4-6 weeks during the growing season. By the time they're a year old, your seedlings will be ready to bloom, and you'll have a stunning tropical accent for your garden or patio.
Tips & tricks for perfect Mexican Bird of Paradise seed pods
Transforming those vibrant orange seed pods into thriving plants takes patience—and a few insider tricks to make every step count.
Pod Collection Timing: The 3-5 day drying period in Step 1 is crucial for preventing premature seed release. I place the pods in a paper bag with a few holes punched in it—just enough airflow to keep them dry without letting moisture creep in. This mimics their natural drying process in the wild.
Stratification Success: For the 4-6 week cold treatment in Step 3, I use a small plastic container with a secure lid (not airtight) and poke a few tiny holes. This prevents condensation buildup while maintaining moisture. Place a damp paper towel in the bottom to keep humidity steady—this tiny detail makes all the difference in germination rates.
Seedling Light Transition: When moving seedlings to brighter light in Step 5, I start with just 30 minutes of direct sun in the morning, then gradually increase by 15 minutes each day. Sudden exposure can scorch those delicate leaves, and you'll notice the difference in plant resilience when done slowly. The 2-3 week transition period is your friend here.
Pro Tips for Mexican Bird Of Paradise Seed Pods
- Transforming those vibrant orange seed pods into thriving plants takes patience—and a few insider tricks to make ever...
- Pod Collection Timing: The 3-5 day drying period in Step 1 is crucial for preventing premature seed release. I place ...
- Stratification Success: For the 4-6 week cold treatment in Step 3, I use a small plastic container with a secure lid ...
Frequently asked questions
Got questions about harvesting, growing, or using Mexican Bird of Paradise seed pods? You’re not alone! Here are the most common queries—and their straightforward answers—to help you navigate the bloom-to-seed cycle like a pro.
When do Mexican Bird of Paradise seed pods ripen?
Seed pods typically mature 8–12 weeks after flowering, usually in late fall to winter (depending on your climate). Look for pods that turn brown and papery—they’ll split open on their own when fully ripe. Pro tip: If pods stay green, they’re not ready yet!
How do I collect seeds from the pods?
Once pods split open, gently tap or shake them over a clean tray to release the small, flat seeds. Avoid crushing them—these seeds are delicate! Store them in a paper envelope in a cool, dry place until planting. For best results, sow seeds within 2 weeks of harvest.
Can I grow Mexican Bird of Paradise from seed?
Yes! While it’s slower than propagating from cuttings, seeds are a budget-friendly option. Start them indoors 6–8 weeks before your last frost in well-draining soil. Keep them moist but not soggy—germination can take 4–6 weeks. Seedlings thrive in full sun and warm climates (Zones 9–11).
What if my seed pods rot or mold?
Overly wet or humid conditions can cause pods to mold or rot. If this happens, remove damaged pods immediately to prevent fungal spread. Ensure your plant has good air circulation and avoid overhead watering. A light fungicide spray (like neem oil) can also help protect future pods.
Are there alternatives if I can’t get seed pods?
If seed pods are scarce, try dividing mature plants (every 3–4 years) or buying rooted cuttings from nurseries. You can also propagate from suckers—small shoots that grow at the plant’s base. Just ensure new plants get plenty of sunlight and well-draining soil to thrive.
Wrapping up and next steps
Growing Mexican Bird of Paradise seed pods is a rewarding journey that blends patience with stunning results! 🌱 Whether you're a seasoned gardener or just starting, understanding the bloom-to-seed cycle in its three layers—roots, foliage, and flowers—will help you nurture these tropical beauties with confidence.
Now that you’re armed with the right materials and answers to common questions, it’s time to roll up your sleeves and watch your garden transform.
Your next step? Start small! Plant a few seed pods in a sunny spot, keep them hydrated, and observe their growth. Before you know it, your yard will be alive with vibrant blooms—and maybe even a few curious birds admiring their namesake! 🐦✨