
Lawn
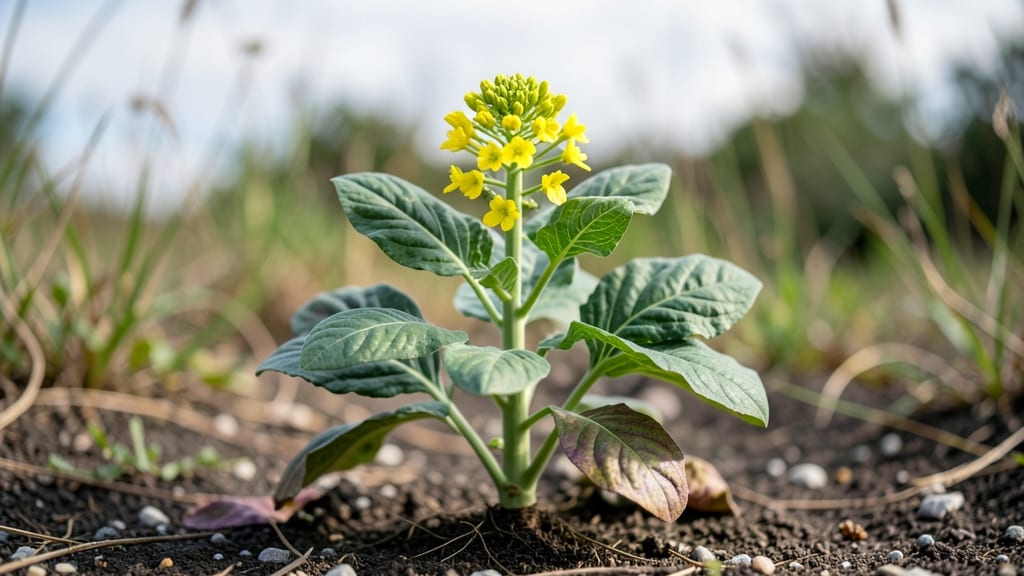
Growing mustard from seed isn't just about planting—it's about unlocking those bold blooms with a little winter magic. 🌱 I learned the hard way that skipping cold stratification means waiting months for flowers that never quite show up.
The secret? Mimicking nature's timing with a simple fridge trick that transforms floppy seedlings into sturdy plants ready to burst into color.
You'll need basic supplies: well-draining soil mix, small pots or a seed tray, and a zip-top bag for the cold treatment. Plant seeds just ¼ inch deep in moist soil, then pop them in the fridge for 2-4 weeks before moving to sunlight.
This process breaks dormancy, ensuring stronger roots and faster growth once you transplant outdoors after the last frost.
By mid-summer, you'll have tall, vibrant plants with clusters of bright yellow flowers that attract pollinators. The harvest is versatile—young leaves make great greens, mature pods add crunch to salads, and dried seeds become mustard for cooking.
Even if you miss the stratification step, don't worry: many varieties still grow, just with slightly less vigor.
For best results, plant in full sun and keep soil consistently moist but not soggy. If your mustard bolts too early, try a shorter variety like 'Tendergreen' next time. The key is patience—these plants grow fast once they get going, and the payoff is worth every step.
📚 In This Guide
- What you need
- Instructions
- Tips and common mistakes
- Wrapping up and next steps
What you need
- ● Mustard seeds: Choose high-quality, organic seeds (e.g., Brassica juncea or Sinapis alba). Aim for 1–2 teaspoons (5–10g) for a small garden plot or ½ cup (100g) for larger areas.
- ○ Growing medium: Potting mix: A well-draining blend like 50% peat moss + 30% perlite + 20% vermiculite (sterilized). Optional: Add 1 tbsp compost per gallon for extra nutrients.
- ○ Gravel/sand layer (optional): ½ inch (1.25 cm) at the bottom of containers for drainage.
- ● Containers: Seed trays: 1–2 1020-cell trays (for seedlings) or small pots (3–4 inches deep).
- ● Cold stratification setup: A ziplock bag or airtight container with a damp paper towel.
- ○ Outdoor pots (optional): 5–6 inch pots for transplanting after stratification.
- ● Refrigerator: A standard fridge set to 34–40°F (1–4°C) for stratification.
- ○ Thermometer (optional): To monitor temps if your fridge fluctuates.
- ● Spray bottle: For misting seeds/mix to keep moisture consistent.
- ● Patience: Cold stratification takes 4–8 weeks—plan ahead!
- ● Sunlight access: A south-facing window or grow lights (12–16 hrs/day) post-stratification.
- ● Outdoor space (if direct-sowing): A well-draining garden bed or raised bed with full sun (6+ hrs/day).
How to cold stratify mustard seeds for strong, reliable blooms
Here's the method I swear by to break through mustard seeds' stubborn dormancy and get them sprouting predictably.
🌱 Step 1: Soak Seeds to Kickstart Germination
Mustard seeds have tough outer shells that need softening before cold treatment. Place them in a bowl of lukewarm water for 12-24 hours. You'll see them swell noticeably—this is how they prepare to break dormancy. I like to use a mesh bag so I can easily retrieve them without losing any.
After soaking, drain the water completely and let the seeds air-dry on a paper towel for 30 minutes. This prevents mold while keeping them moist enough for stratification. The seeds should feel slightly damp but not wet when you handle them.
❄️ Step 2: Stratify with Moist Sand or Peat Moss
Fill a sealed plastic bag with clean sand or peat moss (I use the same mix I'd use for seed starting). Add the soaked seeds and enough water to moisten everything—it should feel like a damp sponge, not dripping. Seal the bag tightly and place it in your refrigerator.
The key is maintaining 35-40°F for 2-4 weeks. Check weekly to ensure the mix stays moist but not soggy. If condensation forms inside, open the bag for 30 minutes to air it out. This cold treatment mimics winter conditions and breaks the seeds' natural dormancy period.
🌿 Step 3: Test for Germination Readiness
After 2 weeks, remove the bag and gently press a few seeds between paper towels. Place them in a warm spot and check daily. You'll see the first sprouts in 3-5 days—this confirms your stratification worked. If nothing happens after a week, return the seeds to cold treatment for another 1-2 weeks.
Once you see consistent sprouting, it's time to plant. I like to sow them directly in the garden or in small pots with well-draining soil. Space them 1/4 inch deep and keep the soil consistently moist until seedlings emerge.
☀️ Step 4: Transplant to Garden When Safe
Wait until all danger of frost has passed and soil temperatures reach at least 50°F before moving seedlings outdoors. Mustard plants thrive in full sun and prefer cooler weather, so spring or fall planting works best in most climates. Harden off seedlings by placing them outside for 2-3 hours daily for 5-7 days before full transplant.
After transplanting, water deeply at the base to encourage root establishment. You'll notice new growth within 1-2 weeks—this is your sign the plants are settling in. Keep the soil moist but not waterlogged, as mustard plants are susceptible to rot if overwatered.
Tips & tricks for perfect mustard seed stratification
Cold stratification might seem like a gardening puzzle, but these simple tricks will help you crack the code every time.
Soak Smart: The 12-24 hour soak in lukewarm water is your first critical step. I've learned the hard way that using hot water can actually cook the seeds—just warm enough to feel comfortable to the touch. For extra convenience, place your mesh bag of seeds in a bowl of water and let it sit overnight on your counter. This hands-off approach ensures consistent results without any extra effort. The seeds will visibly swell, which means they're ready for the next phase.
Temperature Matters: When maintaining that 35-40°F range in your refrigerator, don't just assume your fridge is perfect. Use a small thermometer to check the temperature—some fridges have hot spots. I place my seed bag on the middle shelf where the temperature is most stable. If you notice condensation forming inside the bag, open it for 30 minutes to air it out. This prevents mold while keeping the seeds properly hydrated during their cold treatment.
Germination Test Hack: After your 2-week cold treatment, here's what nobody tells you—press just one seed between damp paper towels to test. Place it in a warm spot (like on top of your fridge) and check daily. If you see sprouts in 3-5 days, your whole batch is ready. If nothing happens after a week, return the seeds to cold treatment for another 1-2 weeks. This test saves you from planting seeds that might not germinate, ensuring you only work with the most reliable batch.
Planting Depth Secret: When it's time to plant those 1/4 inch deep, don't guess—use the tip of a pencil or your finger as a guide. Mustard seeds are tiny, and planting too deep can delay germination. I like to make small holes with a dibber or even a toothpick, then drop in 2-3 seeds per hole. This gives you better control over spacing and ensures your seedlings have room to grow without competing for nutrients.
Pro Tips for Mustard Seed Grown Up
- Cold stratification might seem like a gardening puzzle, but these simple tricks will help you crack the code every time.
- Soak Smart: The 12-24 hour soak in lukewarm water is your first critical step. I've learned the hard way that using h...
- Temperature Matters: When maintaining that 35-40°F range in your refrigerator, don't just assume your fridge is perfe...
Frequently asked questions
Got questions about growing mustard seeds into thriving plants? You’re not alone! Here are some of the most common queries—and their straightforward answers—to help you navigate the process like a pro.
What does "cold stratification" mean, and why is it necessary for mustard seeds?
Cold stratification mimics winter conditions, breaking the seed’s natural dormancy. Mustard seeds often need this step to germinate reliably. Without it, seeds may sprout unevenly or not at all—especially in warmer climates. Think of it as a "wake-up call" for your seeds!
How long should I cold-stratify mustard seeds before planting?
Most mustard varieties thrive with 2–4 weeks of cold stratification (34–40°F). Place seeds in a damp paper towel or moistened peat moss in a sealed bag, then refrigerate. Avoid freezing—just keep them chilly! For faster results, try 1–2 weeks if your climate is mild.
Can I plant mustard seeds directly in the ground without cold stratification?
Yes, but success depends on your climate. In cooler regions (Zones 3–6), direct sowing in early spring or fall often works. Warmer zones (7+) may need pre-chilling for consistent germination. If you skip stratification, plant deeper (½ inch) and keep soil moist—patience is key!
My mustard seeds sprouted, but the seedlings look weak. What went wrong?
Weak seedlings often mean overcrowding, poor light, or uneven moisture. Thin seedlings to 6–12 inches apart and ensure they get 6+ hours of sunlight daily. If soil stays soggy, improve drainage. A weak start? Boost with a balanced fertilizer (like 10-10-10) once true leaves appear.
Are there faster-growing mustard varieties that skip cold stratification?
Some mustard types (like Brassica juncea) germinate faster without stratification, especially in warm soil. Look for "tendergreen" or "fast-maturing" labels (e.g., 'Southern Giant Curled'). For best results, still pre-chill seeds in cooler climates—it’s a small trade-off for robust plants!
Wrapping up and next steps
The journey of growing a mustard seed into a thriving plant is a testament to patience and care—just like nurturing your lawn’s beauty! 🌱 By mastering cold stratification, you’ve unlocked the secret to reliable blooms and stronger plants, ensuring your garden flourishes season after season.
Now that you’re armed with the knowledge, it’s time to roll up your sleeves and try it yourself! Start small—grab a few seeds, follow the steps, and watch your green thumb grow. Your lawn (or garden) will thank you! 🌟