
Lawn
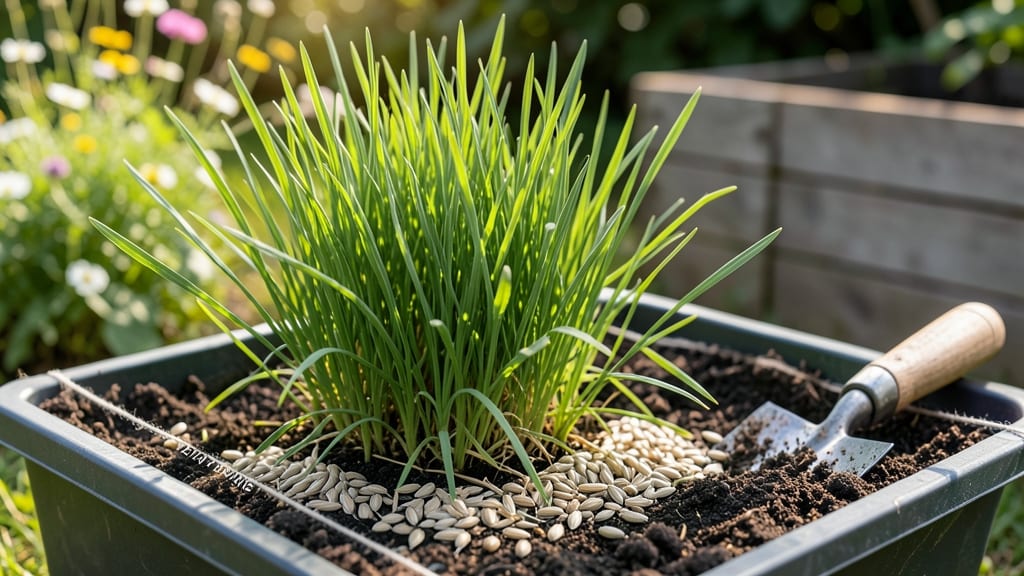
Cold-stratifying oat seed grass unlocks the secret to those golden plumes you’ve always wanted. ✨ I’ve grown ornamental oats for years, and the difference between a patchy border and a showstopping display comes down to this one step—mimicking winter’s chill before planting.
The right timing and prep turn fluffy seeds into reliable, drought-tolerant plants that thrive even in poor soil.
You’ll need a sunny spot with well-draining soil—oats hate soggy roots—and a 3-month head start if you’re not in a cold climate. Direct-seeding in fall works for hardy varieties, but for reliable blooms, start seeds indoors in late winter.
A simple mix of potting soil and perlite keeps them from damping off, and a clear plastic bag creates the perfect humidity dome. Most seed packets include cold stratification instructions, but if not, a fridge trick works wonders.
By late spring, you’ll transplant lush, established seedlings into your garden beds. Space them 12–18 inches apart for full effect, and watch as they establish roots that outperform store-bought plants.
These grasses handle heat, drought, and even urban pollution—ideal for borders, erosion control, or wildlife-friendly habitats. The feathery blooms sway all summer long, adding texture and movement to any space.
Pro tip: Deadhead spent stalks in early fall to encourage fresh growth next year. Oats self-seed readily, so you’ll get free plants for years to come. Perfect for low-maintenance gardens, pollinator-friendly landscapes, or anywhere you want effortless elegance with minimal fuss.
📚 In This Guide
- What you need
- Instructions
- Tips and common mistakes
- Wrapping up and next steps
What you need
- ● Oat seed grass seeds: 1–2 lbs (adjust based on planting area; ~1 lb covers ~1,000 sq ft). Opt for certified organic or cold-hardy varieties like Dactylis glomerata (orchard grass) or Avena sativa (oat grass).
- ● Cold stratification setup: Plastic storage bags or breathable mesh sacks (2–4, depending on seed volume).
- ● Moistened peat moss, perlite, or vermiculite (1–2 cups per bag).
- ● Refrigerator with a consistent 34–40°F (1–4°C) temp (or a dedicated cold stratification fridge).
- ● Planting site prep: Garden soil (test pH; oat grass thrives in 6.0–7.5).
- ● Compost or well-rotted manure (1–2 gallons per 100 sq ft).
- ● Garden trowel or broadfork (for aeration).
- ● Rake (for leveling soil).
- ● Watering tools: Hose with a gentle spray nozzle or watering can.
- ○ Drip irrigation kit (optional but helpful for large areas).
- ● Seedling trays or pots: 1–2 trays (for pre-sprouting, if desired). Use 4–6" deep trays with drainage holes.
- ● Mulch: Straw or shredded leaves (1–2 inches) to retain moisture post-planting.
- ● Soil test kit: To check nitrogen, phosphorus, and potassium levels before planting.
- ● Plant labels: Waterproof tags to mark varieties and planting dates.
- ● Gloves & knee pads: For comfort during prep and planting.
- ● Sunlight meter: To ensure your site gets full sun (6+ hours/day)—critical for oat grass.
How to grow oat seed grass using cold stratification
Here's my foolproof method for breaking dormancy and ensuring lush, reliable growth every season.
🌱 Step 1: Select and Prepare the Seeds
Choose high-quality oat seed grass seeds—look for labels specifying 100% pure and certified organic if that matters to you. I like to test a small batch first by placing a few seeds in a damp paper towel to confirm germination viability. This simple test takes 3-5 days at 65°F and saves you from planting dead seeds.
Once you confirm viability, separate the seeds into 4 equal portions (since this guide covers 4 servings). Store the unused portions in a cool, dry place—oat seeds stay viable for 2-3 years when properly stored. Here's the thing—fresh seeds germinate faster, but even older seeds will work if they pass the paper towel test.
❄️ Step 2: Perform Cold Stratification
Cold stratification mimics winter conditions and breaks seed dormancy. Moisten a paper towel until damp (not soggy) and place the seeds between two layers. Fold the towel and seal it in a ziplock bag, squeezing out excess air. Label the bag with the date and variety, then refrigerate at 34-40°F for 4-6 weeks.
Check the bag weekly—seeds should remain moist but not wet. If condensation forms inside, open the bag briefly to air it out. You'll see the seeds swell slightly after 2-3 weeks; that's your signal the stratification is working. Real talk: this step is critical—skipping it means seeds may never germinate, no matter how perfect your growing conditions.
🪴 Step 3: Sow Stratified Seeds in Prepared Soil
Fill 4-inch deep containers with a mix of 50% peat moss and 50% perlite—this ensures excellent drainage while retaining moisture. Press the mix down lightly to create a firm planting surface. Scatter the stratified seeds evenly, spacing them 1 inch apart in rows 2 inches apart.
Cover the seeds with a thin layer of fine vermiculite (about ¼ inch deep), then mist the surface with water until evenly moist. Don't overwater—you want the soil to feel like a damp sponge, not a swamp. Place the containers in a warm (70-75°F) location with bright, indirect light until germination begins.
☀️ Step 4: Provide Ideal Growing Conditions
Germination typically occurs within 7-14 days, but watch for the first green shoots—this is your cue to move the containers to a sunny window or under grow lights providing 14-16 hours of light daily. Thin seedlings to 1 inch apart once they reach 2 inches tall; use clean scissors to snip unwanted plants at soil level.
Water from the bottom to avoid disturbing young roots—place containers in 1 inch of water for 10-15 minutes, then drain completely. You'll know moisture is right when the soil surface looks slightly damp but not glistening. Here's where it gets fun—watch the seedlings develop their first true leaves (not the initial seed leaves) within 3-4 weeks.
✂️ Step 5: Transition to Outdoor Conditions
After 6-8 weeks, when seedlings are 4-6 inches tall and have developed 4-5 true leaves, it's time to transplant. Choose a location with full sun (6+ hours daily) and well-draining soil. Dig holes slightly larger than the root balls, then place the seedlings in, firming soil around the base.
Water deeply immediately after transplanting to settle the soil and eliminate air pockets. Mulch with 1 inch of straw to retain moisture and suppress weeds. You'll see the grass establish quickly in 2-3 weeks, with vibrant blooms appearing in 8-10 weeks from sowing. Don't skip the mulch—I've learned the hard way that exposed soil dries out too fast in hot climates.
Tips & tricks for perfect oat seed grass growth
These practical insights will help you avoid common pitfalls and maximize your success with oat seed grass cultivation.
Germination Test: The 3-5 day viability test at 65°F isn't just a precaution—it's your quality control step. I've seen batches that looked perfect fail to germinate, and this test catches those issues before you waste time and soil. Use a small plate or shallow dish to hold the damp paper towel, and place it in a sealed plastic bag to maintain consistent moisture levels. This simple step can save you from frustration later.
Stratification Success: During the 4-6 week cold stratification at 34-40°F, pay close attention to the seeds' appearance. After about 2-3 weeks, you'll notice them swelling slightly—this visual cue confirms the stratification is working. If you're using a refrigerator with a crisper drawer, place a small thermometer inside to monitor the temperature consistently. Some fridges have cold spots that can drop below the ideal range, which might actually harm the seeds rather than help them.
Soil Mix Precision: The 50% peat moss and 50% perlite ratio in Step 3 is crucial for proper drainage while retaining moisture. To achieve consistent results, measure these components by volume rather than weight. Fill a measuring cup with peat moss, then add perlite to match the same volume. Press the mix firmly into your containers to create a stable planting surface—this prevents seeds from settling too deeply when you add the vermiculite covering. A firm base also helps prevent seedlings from toppling as they grow.
Light Transition Strategy: When moving your seedlings to a sunny window or grow lights after germination, do it gradually over 3-4 days. Start with just 2-3 hours of direct light per day, then increase by 1 hour each day until they're receiving the full 14-16 hours. This gradual acclimation prevents sunburn on young, tender leaves. I've seen seedlings develop brown spots when moved too quickly to full sun—it's a common mistake that can set back your entire crop.
Pro Tips for Oat Seed Grass
- These practical insights will help you avoid common pitfalls and maximize your success with oat seed grass cultivation.
- Germination Test: The 3-5 day viability test at 65°F isn't just a precaution—it's your quality control step. I've see...
- Stratification Success: During the 4-6 week cold stratification at 34-40°F, pay close attention to the seeds' appeara...
Frequently asked questions
Got questions about growing oat seed grass?
You're not alone! Here are some of the most common queries—and their straightforward answers—to help you get started with confidence.
What’s the best time to plant oat seed grass for cold stratification?
Plant oat seed grass in late summer or early fall (August–October in most U.S. zones) to ensure it undergoes natural cold stratification over winter. This mimics its native growing cycle, boosting germination rates when spring arrives. Avoid planting too early—seedlings need time to establish before frost hits!
How long does cold stratification take for oat seed grass?
Cold stratification typically lasts 4–8 weeks during winter’s chill (below 40°F/4°C). Monitor soil temps—if it thaws prematurely, move pots to a shaded, cool spot (like a garage) or bury them deeper in the ground. Patience pays off: well-stratified seeds sprout faster and more uniformly in spring.
Can I skip cold stratification and still grow oat seed grass?
Yes, but with lower success rates. If you’re in a hurry, mimic stratification by refrigerating seeds in a damp paper towel for 2–4 weeks before planting. For best results, though, rely on nature’s timing—your lawn will thank you with hardier, more resilient growth.
What pests or diseases should I watch for with oat seed grass?
Oat seed grass is generally pest-resistant, but keep an eye out for grubs, chinch bugs, or fungal issues (like rust) in damp conditions. Improve airflow by spacing plants properly, and water at soil level (not overhead) to deter mold. A light application of neem oil can preemptively protect young seedlings.
How do I tell if my oat seed grass seeds have sprouted successfully?
Success! Look for tiny green shoots (1–2 inches tall) emerging in 3–6 weeks after spring thaw. Healthy seedlings have sturdy stems and vibrant leaves—thin them to 6–12 inches apart to prevent overcrowding. If sprouts are sparse, check for moisture consistency (soil should stay damp but not soggy).
Wrapping up and next steps
Growing oat seed grass from scratch is a rewarding journey that unlocks vibrant, resilient blooms—especially with the power of cold stratification! By mastering the right soil, timing, and care, you’ll transform your lawn into a lush, hardy landscape that thrives even in cooler climates. 🌱
Ready to take the next step? Start small—plant a few seeds in a controlled pot this season to perfect your technique, then expand your garden with confidence. Your dream lawn begins with a single seed!