
Lawn
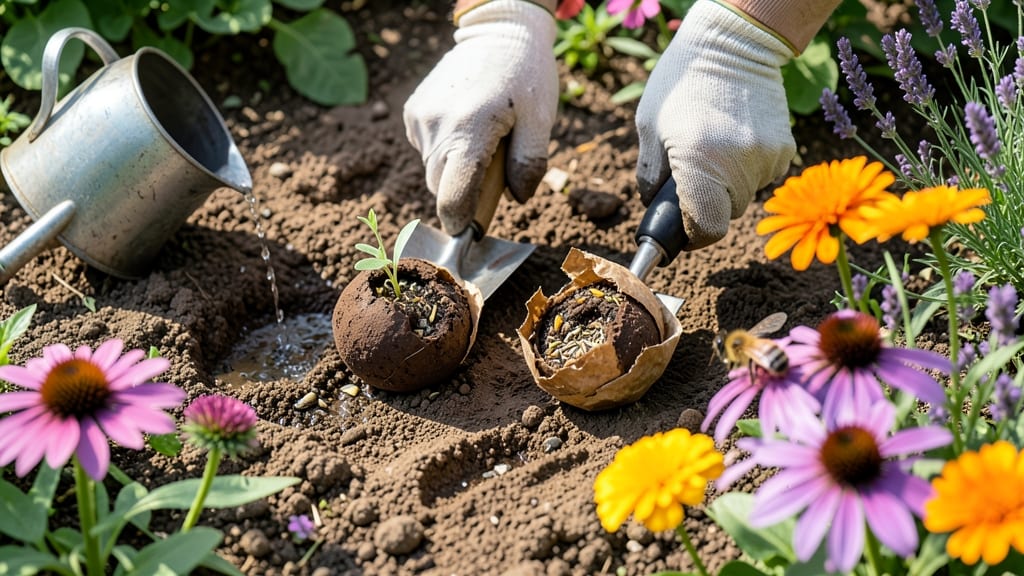
Transforming bare patches into vibrant wildflower meadows with just paper, clay, and seeds. 🌱 I’ve made hundreds of these seed bombs—each one a tiny ecosystem ready to bloom where you toss it. The beauty? No waste, no chemicals, just pure, pollinator-friendly color popping up in weeks.
You’ll need three simple layers: a paper core, a clay binder, and a seed-soil mix. The clay holds everything together while the paper provides structure—no fancy tools required. Most people overcomplicate it, but the real magic happens when you let nature handle the rest after you toss them.
By spring, you’ll see wildflowers thriving in cracks, medians, or even your own yard—zero maintenance after the initial toss. They attract bees, reduce erosion, and add color that store-bought grass never could. Perfect for guerrilla gardeners or anyone tired of boring lawns.
Works in urban crevices, roadside ditches, or your own backyard. Just wait until you see how quickly these little bombs turn into lush, living art. Let’s get rolling!
📚 In This Guide
- What you need
- Instructions
- Tips and common mistakes
- Wrapping up and next steps
What you need
- ● Wildflower seeds: 1–2 tbsp (choose native species for your climate; mix pollinator-friendly varieties like cosmos, black-eyed Susans, or clover)
- ● Compost or aged soil: ½ cup (sifted for fine texture—no clumps!)
- ● Clay or bentonite: ½ cup (acts as a binder; substitute with air-dry clay if unavailable)
- ● Water: ¼–½ cup (just enough to moisten—think damp sand, not soggy)
- ● Newspaper, junk mail, or brown paper bags: 1–2 sheets (tear into 3x3-inch squares; avoid glossy paper)
- ○ Optional: Coffee grounds (1 tbsp) for extra nutrients
- ● Mixing bowl: Small (8–10 oz capacity)
- ● Spoon or hands: For stirring (get messy!)
- ● Plastic wrap or damp towel: To cover mixture while working
- ○ Optional: Gloves (to keep hands clean)
- ○ Optional: Twine or string (for hanging seed bombs in dry areas)
How to make paper seed bombs for a wildflower lawn
Here's my go-to method for creating eco-friendly seed bombs that transform bare spots into vibrant wildflower meadows.
🌱 Step 1: Gather Your Materials
You'll need 4 cups of clay (like bentonite or regular clay powder), 2 cups of compost, and 1 cup of wildflower seeds. I like to use a mix of native wildflowers for local pollinators—clover, yarrow, and black-eyed Susans work beautifully. Grab a large bowl for mixing and a small one for water.
Place the 4 cups of clay in your mixing bowl. Add 2 cups of compost and stir until combined. The clay should look like thick, crumbly soil. If it's too dry, add water gradually until it holds together when squeezed but isn't sticky. You want a texture like damp sand.
💧 Step 2: Mix the Seed Bomb Paste
Once your clay-compost mix is the right consistency, add 1 cup of wildflower seeds and stir thoroughly. You'll see the seeds distributed evenly throughout the paste. Here's the thing—don't rush this step. The seeds need to be fully coated so they stay protected during the drying process.
If the mixture feels too loose, add a little more clay. If it's too stiff, add a splash of water. The perfect texture should hold its shape when rolled but still be moldable. Think of it like playdough—firm enough to shape but not crumbly.
🪴 Step 3: Shape the Seed Bombs
Now for the fun part! Scoop about 1/4 cup of the paste and roll it into a ball between your palms. Press gently to form a smooth, round seed bomb. I aim for about 2 inches in diameter—big enough to hold together but small enough to toss easily. Place each finished bomb on a tray or flat surface to dry.
Let them dry for 24-48 hours in a warm, dry spot. You'll know they're ready when they feel firm to the touch and no longer leave marks on your fingers. Avoid direct sunlight at this stage—it can cause the outer layer to harden too quickly, trapping moisture inside and preventing proper drying.
☀️ Step 4: Plant Your Seed Bombs
Once dry, your seed bombs are ready for action! Find a sunny spot in your yard where you want wildflowers to grow. Toss the seed bombs gently into the area, spacing them about 1 foot apart. A light rain or gentle watering will help them break apart and settle into the soil.
Water the area lightly for the first 2 weeks to help the seeds germinate. You'll see tiny green shoots emerge within 7-14 days, depending on your climate. Avoid walking on the area until the plants are at least 4 inches tall—this gives the roots time to establish and the seedlings time to grow strong.
⏰ Step 5: Maintain and Enjoy
Once your wildflowers are established, they'll need very little care. Water occasionally during dry spells, but avoid overwatering—wildflowers thrive in well-drained soil. You'll start seeing blooms in 6-8 weeks, and they'll continue to flower throughout the growing season.
Here's where it gets rewarding: Watch bees, butterflies, and other pollinators visit your new wildflower meadow. If you made 4 seed bombs, you'll have a small but vibrant patch that makes a big difference for local wildlife. Plus, you'll have a zero-waste, low-maintenance lawn alternative that's both beautiful and functional.
Tips & tricks for perfect paper seed bombs
Between us, these little eco-bombs are easier to mess up than you think—especially when it comes to the drying stage. Here's what I've learned after making dozens (and accidentally creating a few mud pies along the way).
Mixing Consistency: The 24-48 hour drying time depends entirely on getting that clay-compost mix just right. If your paste feels too crumbly, add a splash of water—just enough to make it hold together when squeezed. Too sticky? Sprinkle in a little more clay. Think of it like kneading bread dough: you want it to be firm enough to shape but still pliable. This consistency ensures your seed bombs dry evenly and don't crumble when you toss them later.
Seed Distribution: Don't just dump those wildflower seeds in and stir once—that's how you end up with seed bombs that mostly contain clay. Stir thoroughly in Step 2 until every seed is fully coated. I like to use my hands to break up any clumps in the clay first, then mix the seeds in with a fork before rolling. This ensures each bomb has the right balance of seeds for a vibrant meadow.
Drying Wisdom: That 24-48 hour drying window is your friend, but only if you treat it right. Spread your seed bombs on a tray in a warm, dry spot—like a sunny windowsill (but not direct sunlight). If you're impatient and try to speed up drying with a hairdryer, you'll end up with hard outer shells that trap moisture inside. Test doneness by pressing gently: they should feel firm but not rock-hard. Patience here means better germination later.
Planting Strategy: When you're ready to plant, don't just toss those seed bombs willy-nilly. Space them about 1 foot apart in sunny areas—this gives each plant room to grow without competing for nutrients. After planting, give them a light watering if nature hasn't provided rain in a few days. The clay will break down naturally, releasing the compost and seeds into the soil exactly where they need to be.
Pro Tips for Paper Seed Bombs
- Between us, these little eco-bombs are easier to mess up than you think—especially when it comes to the drying stage....
- Mixing Consistency: The 24-48 hour drying time depends entirely on getting that clay-compost mix just right. If your ...
- Seed Distribution: Don't just dump those wildflower seeds in and stir once—that's how you end up with seed bombs that...
Frequently asked questions
Got questions about creating your own paper seed bombs? You’re not alone—this eco-friendly project sparks curiosity! Here are answers to the most common queries to help you get started with confidence.
What’s the best time of year to plant paper seed bombs?
For optimal germination, plant your seed bombs in early spring or fall when temperatures are mild (50–75°F). Avoid extreme heat or frost, as these can dry out the paper or shock the seeds. If you’re in a warm climate, late summer can work too—just water them well during dry spells!
How often should I water my seed bombs after planting?
Keep the soil consistently moist but not soggy for the first 2–3 weeks. Water gently 1–2 times daily if planting in dry conditions, then taper off as seedlings establish roots. Once established, wildflowers are drought-tolerant, but young plants need regular hydration to thrive.
Can I make seed bombs without paper? What are good alternatives?
If you don’t have paper, try:
- Clay or soil pellets (mix seeds with clay and let dry into balls)
- Coconut coir (biodegradable and holds moisture well)
- Compost or worm castings (press seeds into a paste with water)
What should I do if my seed bombs fall apart before planting?
Don’t stress! If your bombs crumble, simply re-mix the ingredients with a little water to reform them. Store them in a cool, dry place until ready to plant. For extra durability, add a 1 tsp of flour or cornstarch to the mix as a binder—it’ll help hold them together without harming seeds.
Will these seed bombs attract bees or other pollinators?
Yes! Wildflower seed bombs are a pollinator magnet. Choose native species like clover, milkweed, or coneflowers to maximize benefits for bees, butterflies, and birds. Just avoid planting in areas where pesticides are used—your new green allies will thank you!
Wrapping up and next steps
Paper seed bombs are your zero-waste superpower for transforming dull lawns into vibrant ecosystems! 🌱 With just three simple layers—paper, soil, and seeds—you’re not just beautifying your space; you’re supporting pollinators and reducing waste.
Whether you’re a gardening newbie or a green-thumb pro, this project is easy, affordable, and impactful.
Ready to take action? Grab your supplies, roll up your sleeves, and start planting today—your future wildflower lawn (and the bees!) will thank you. 🐝✨