
Lawn
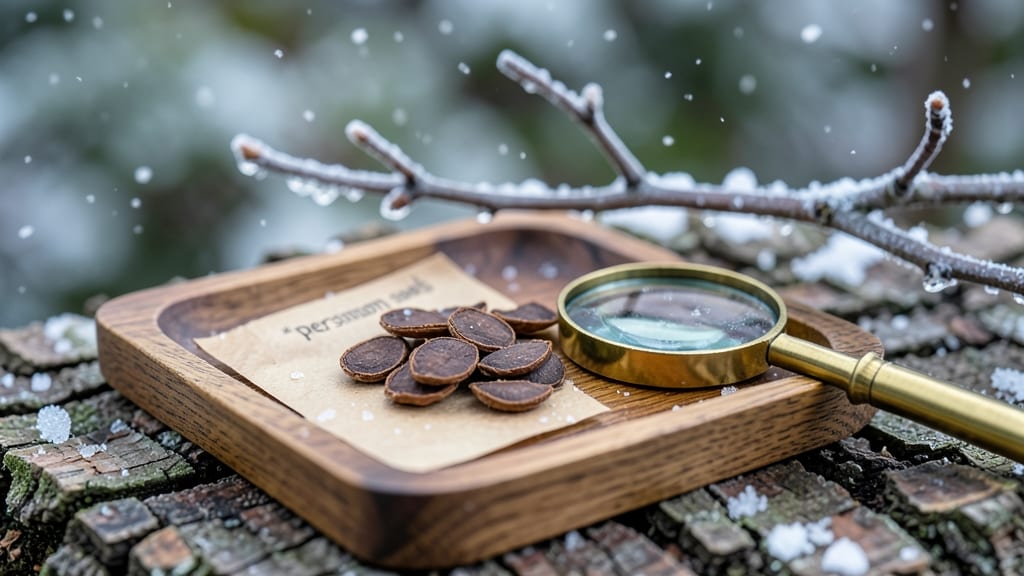
Persimmon seeds need winter’s chill to wake up—nature’s way of timing their spring debut. 🌱 I’ve learned that storing them in damp peat moss or a sealed bag in the fridge mimics the cold stratification they’d get buried in the ground, breaking dormancy just right for planting.
The key is patience: seeds stored this way stay viable for months, ready to sprout when temperatures rise. Too warm, and they’ll rot; too dry, and they won’t germinate. I’ve found that checking moisture weekly keeps them perfect for spring.
By March, you’ll see firm, plump seeds ready to plant. The first true leaves appear in 4-6 weeks, and the trees grow surprisingly fast—though they’ll need years to fruit. Persimmons reward that wait with stunning orange foliage in fall.
This method works for both American and Asian varieties, whether you’re growing from store-bought fruit or your own harvest. Just remember: the colder the winter storage, the better the germination rates in spring.
📚 In This Guide
- What you need
- Instructions
- Tips and common mistakes
- Wrapping up and next steps
What you need
- ● Persimmon seeds: 5–10 fresh, viable seeds (harvested from fully ripe persimmons). Pro tip: 💡 Store seeds in a damp paper towel in the fridge for 2–3 weeks to simulate winter stratification.
- ● Cold-resistant pods: 1–2 small, breathable containers (4–6 inches deep) with drainage holes. Options: biodegradable peat pots, plastic nursery pots, or recycled yogurt cups.
- ● Potting mix: 2–3 gallons of well-draining, sterile soil blend (60% peat moss, 30% perlite, 10% compost). Alternative: Cactus/succulent mix for faster drainage.
- ● Watering can or spray bottle: With a fine mist nozzle for gentle hydration.
- ● Plastic wrap or humidity dome: To retain moisture during germination.
- ○ Garden twine or labels: For marking pods (optional but helpful!).
- ● Pruning shears or knife: For opening pods/seeds (sterilize with rubbing alcohol).
- ○ Thermometer (optional): To monitor soil temps (ideal: 60–75°F for germination).
- ● Sunlight access: A south-facing windowsill or grow light (12+ hours/day).
- ● Outdoor space (later stage): USDA Zones 7–10 (persimmons thrive in mild winters). Note: Young pods need winter protection in colder zones!
- ○ Gloves (optional): Persimmon sap can stain—wear nitrile gloves if handling large quantities.
- ● Fungicide (preventative): 1 tsp hydrogen peroxide per gallon of water for seed soak (reduces rot risk).
- ● Mulch (for outdoor planting): Straw or shredded leaves to insulate pods during winter.
How to prepare persimmon seeds for winter planting
Cold-stratifying persimmon seeds unlocks their natural dormancy—here's how to do it right.
🌱 Step 1: Extract and Clean the Seeds
Open a fully ripe persimmon fruit (it should split open on its own or be very soft when squeezed). Scoop out the seeds and rinse them thoroughly under cool water to remove any remaining fruit pulp. Let them air-dry completely on a paper towel for 24 hours—this prevents mold during stratification.
I like to spread them in a single layer on a mesh screen or clean towel where they get gentle airflow. Watch for any seeds that start to sprout early—those won't survive the cold treatment and should be planted immediately instead.
💧 Step 2: Moisten and Prepare for Stratification
Place the dried seeds in a sealed plastic bag with a damp paper towel. The towel should feel slightly damp but not dripping wet—squeeze it gently to test. Add 1-2 tablespoons of sand or perlite to help with drainage and prevent rot.
Seal the bag tightly but leave a small opening to allow minimal airflow. This creates a humid environment while preventing mold buildup. I label each bag with the date and variety (if known) since stratification takes 3-4 months.
⏰ Step 3: Cold-Stratify in the Refrigerator
Store the sealed bag in your refrigerator's crisper drawer, where temperatures stay consistently between 35-40°F. Check the seeds every 2 weeks—they should remain firm but not shriveled. If you notice any mold or foul smell, open the bag immediately to air it out.
This cold treatment mimics winter conditions and breaks the seed's natural dormancy. You'll know stratification is working when the seeds begin to soften slightly after 8-12 weeks. Don't rush this process—proper cold treatment ensures strong germination.
☀️ Step 4: Plant After Stratification
Once the seeds feel slightly soft when pressed (but aren't mushy), they're ready to plant. Fill small pots with well-draining potting mix and plant each seed about ½ inch deep. Place the pots in a warm, sunny spot where temperatures stay above 65°F.
Keep the soil consistently moist but never soggy—persimmon seeds need steady moisture to sprout. Germination can take 2-4 weeks, so be patient. You'll see the first true leaves emerge when the seedlings are ready for transplanting outdoors in spring.
🌿 Step 5: Harden Off Seedlings Before Outdoor Planting
After the last frost date, gradually introduce seedlings to outdoor conditions by placing them outside for 1-2 hours daily, increasing exposure over 10-14 days. Choose a partially shaded spot to protect them from intense afternoon sun.
Persimmon trees are cold-hardy but need time to adjust. Once seedlings show new growth after outdoor exposure, they're ready for permanent planting. Space them 20-30 feet apart to allow for their mature size and spreading habit.
Tips & tricks for perfect persimmon seed stratification
Getting persimmon seeds ready for winter planting takes patience—but these tips will help you avoid common pitfalls and maximize your success.
Step 1: The Drying Process: That 24-hour drying period is crucial for preventing mold during stratification. I spread seeds on a mesh screen in a well-ventilated area to ensure even airflow. If your kitchen is humid, consider using a fan on low to speed up drying—just make sure seeds stay completely dry before moving to Step 2.
Temperature Matters: The refrigerator's crisper drawer maintains that perfect 35-40°F range needed for stratification. If your fridge runs cooler, place the bag on the top shelf instead. I always double-check with a thermometer during the first week to confirm consistent temperatures—this prevents uneven stratification.
Monitoring Seed Condition: When checking seeds every 2 weeks, look for firmness but also watch for any seeds that start to sprout early. These premature sprouts won't survive the full cold treatment—remove them immediately and plant separately. The seeds should feel slightly soft after 8-12 weeks, but never mushy.
Planting Preparation: Before planting, I like to soak the stratified seeds in lukewarm water for 6-8 hours to jumpstart hydration. This doesn't replace stratification but helps kickstart germination when you're ready to plant in Step 4. Just be sure to use fresh, well-draining potting mix that meets the recipe's requirements.
Pro Tips for Persimmon Seed Winter
- Getting persimmon seeds ready for winter planting takes patience—but these tips will help you avoid common pitfalls a...
- Step 1: The Drying Process: That 24-hour drying period is crucial for preventing mold during stratification. I spread...
- Temperature Matters: The refrigerator's crisper drawer maintains that perfect 35-40°F range needed for stratification...
Frequently asked questions
When do persimmon seeds naturally split open in winter?
Persimmon pods typically split open between late winter and early spring (February–April, depending on your climate). The exact timing depends on frost cycles—cold snaps trigger the pods to release seeds. If they don’t split by spring, they may need a light freeze-thaw cycle to encourage opening.
Can I speed up the splitting process if pods stay closed?
Yes! Place unopened pods in a freezer for 24–48 hours, then let them thaw at room temperature. The shock mimics winter conditions and often forces them to split. Avoid forcing them open manually—this can damage the seeds.
What should I do with seeds after the pods split?
Collect seeds, rinse off any pulp, and plant them ½ inch deep in well-draining soil. They germinate best in spring (wait until soil is thawed). For faster results, soak seeds in water for 24 hours before planting.
Will persimmon seeds survive harsh winters in the ground?
Persimmon seeds are hardy but not frost-proof once planted. If temperatures drop below 10°F (-12°C), cover seedlings with mulch or row fabric. Young trees benefit from winter protection until established (2+ years).
Are there alternatives if persimmon pods don’t split naturally?
If pods resist splitting, try:
- Sun-drying: Leave pods in a warm, sunny spot for 1–2 weeks.
- Paper bag method: Place pods in a paper bag with a damp towel for 3–5 days.
- Store-bought seeds: Purchase persimmon seeds online if natural splitting fails.
Wrapping up and next steps
Persimmon seeds are a fantastic, low-maintenance way to add beauty and resilience to your winter landscape—no fuss, just natural magic! 🌱 Their cold-resistant pods split open on their own, offering a stunning display while requiring minimal effort.
Whether you're a gardening newbie or a seasoned pro, these seeds are a delightful addition that thrives in colder months.
Ready to transform your yard into a winter wonderland? Start by gathering your materials, choosing the perfect spot, and planting those seeds before the first frost. Your future self—and your winter landscape—will thank you! 🌿✨