
Propagation
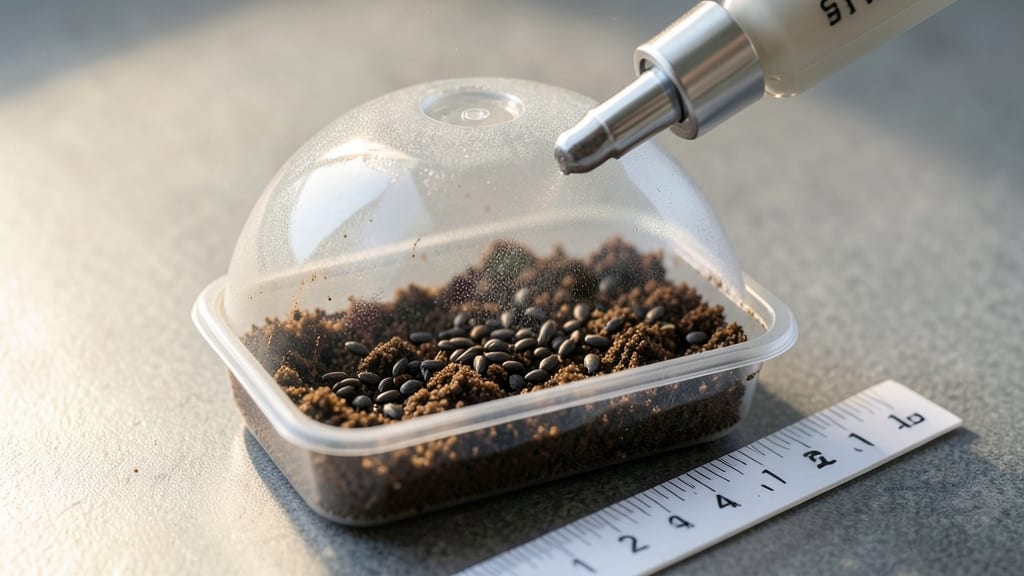
Poppy seed germination time takes 30 days—but there’s a cold trick that cuts that time in half. 🌱 I’ve struggled with slow, spotty sprouts for years until I discovered how chilling seeds mimics their natural cycle, triggering faster, more reliable growth.
The key lies in temperature control, moisture balance, and patience (yes, really).
Poppies need cool soil (40-50°F) to break dormancy, which is why the 30-day cold trick works. Plant them shallowly in well-draining soil, keep it barely moist, and resist the urge to overwater—poppy seedlings hate soggy roots.
Most gardeners give up at the two-week mark, but the magic happens after day 20, when tiny shoots push through.
By day 30, you’ll see uniform seedlings with dark green leaves, ready to transplant. The blooms arrive even faster than expected—6-8 weeks after germination—when you follow this method. No more waiting months for poppies to appear.
Works for both annual and perennial poppies, even in cooler climates. Here’s the exact step-by-step to skip the guesswork and get reliable results every time.
📚 In This Guide
- What you need
- Instructions
- Tips and common mistakes
- Wrapping up and next steps
What you need
- ● Poppy seeds: Choose Papaver somniferum or Papaver rhoeas (opium poppy or corn poppy). Aim for 100–200 seeds—they’re tiny but mighty!
- ● Seed-starting mix: A lightweight, well-draining blend (e.g., 50% peat moss, 30% perlite, 20% vermiculite). Avoid garden soil—it’s too dense!
- ● Containers: Primary: Shallow trays (3–4 inches deep) with drainage holes (e.g., seedling flats or repurposed plastic containers).
- ○ Optional: Paper towels or damp coffee filters for the cold stratification step (see tips below!).
- ● Spray bottle: A fine-mist sprayer to keep the mix moist without drowning seeds.
- ● Plastic wrap or dome: To create a humid microclimate (e.g., clear plastic wrap or a humidity dome lid).
- ● Refrigerator or cold frame: A consistent 35–40°F (2–4°C) space for the 30-day cold trick. A seed fridge or even a garage works!
- ● Grow lights or sunny windowsill: After stratification, poppies need 6–8 hours of bright light daily. LED grow lights are ideal if natural light is lacking.
- ● Plant labels: Tiny flags or toothpicks with labels to track varieties (poppies are fast growers—you’ll want to ID them quickly!).
- ○ Heating mat (optional): A seedling heat mat (set to 65–70°F/18–21°C) can speed up germination after cold treatment.
- ● Fertilizer: A balanced, water-soluble fertilizer (e.g., 5-5-5 or 10-10-10) diluted to half-strength for post-germination feeding.
- ● Tweezers: For gentle seed placement—poppy seeds are microscopic!
- ● Thermometer/hygrometer: To monitor temperature and humidity during cold stratification.
How to speed up poppy seed germination with the 30-Day cold trick
Poppies need patience—but this method cuts their stubborn germination time in half. Here’s how to break dormancy and get those delicate blooms popping through faster.
🌱 Step 1: Stratify Seeds for 30 Days in the Fridge
Poppy seeds have a natural dormancy period that mimics winter conditions. Place them in a sealed container with a damp paper towel—just enough moisture so the towel feels like a wrung-out sponge. I like to fold the towel into a small square, sprinkle the seeds evenly, then roll it up and tuck it into a quart-sized bag.
Seal the bag and store it in your fridge’s crisper drawer for 30 days. Check it weekly—if the towel dries out, mist it lightly with water. This cold treatment mimics the natural winter chill poppies need to break dormancy. After 30 days, the seeds will be ready to sprout when conditions warm up.
☀️ Step 2: Plant Stratified Seeds in Well-Draining Soil
Poppies despise soggy soil, so use a light, sandy loam mix or blend 50% potting soil with 50% perlite. Fill your containers or garden bed to within ½ inch of the rim, then gently press the soil down to remove air pockets. Poppy seeds are tiny—just sprinkle them on the surface without covering. A light press with your palm ensures good soil contact.
Water gently with a spray bottle until the soil looks damp but not wet. Overwatering now can wash seeds away or cause rot. Place the container in a bright, indirect light spot (like a north-facing window) for the first week. You’ll see the first sprouts in 7-14 days—watch for tiny green hooks breaking through the soil.
💧 Step 3: Maintain Moisture and Light for Sprouting
Poppy seedlings are delicate and need consistent moisture but no standing water. Water when the top inch of soil feels dry to the touch, using a watering can with a fine rose. Avoid overhead watering—it can dislodge the fragile stems. Once seedlings reach 2 inches tall, thin them to 6 inches apart to prevent competition.
Move them to full sun (6+ hours daily) as soon as they sprout. Poppies grow fast once they break dormancy, and strong light prevents leggy, weak stems. You’ll know they’re thriving when the first true leaves appear—these look like tiny maple leaves and signal it’s time to fertilize lightly with a balanced 10-10-10 solution.
⏰ Step 4: Monitor for Blooms in 6-8 Weeks
The real magic happens after germination. Poppies bolt quickly—those tall stems shoot up in 3-4 weeks after sprouting. Keep the soil moist but not soggy, and watch for the first buds forming at the top of the stems. This usually happens 6-8 weeks after planting, depending on your climate.
Here’s the thing—poppies are annuals, so they’ll bloom once and set seed before dying back. But with this cold trick, you’ll see those iconic papery blooms 3-4 weeks earlier than unstratified seeds. Deadhead spent blooms to encourage more flowers, and save some seeds for next year’s garden.
Tips & tricks for faster poppy seed germination
This cold trick isn't just about patience—it's about science. Here's how to maximize your chances of success with poppy seeds that stubbornly resist sprouting.
Cold Treatment Precision: The 30-day fridge period is non-negotiable for breaking dormancy, but here's the secret: use your fridge's crisper drawer where temperatures hover around 35-40°F—this mimics natural winter conditions perfectly. If your fridge runs warmer, consider a second cold stratification by placing the bag in a freezer for 24 hours once a week during those 30 days. This extra chill jumpstarts metabolic processes that trigger germination.
Moisture Management: In Step 1, when preparing your damp paper towel, resist the urge to soak it—poppy seeds need just enough moisture to stay hydrated without drowning. Think of it like wringing out a sponge: it should feel damp to the touch but not dripping. Overly wet conditions can cause mold before seeds even have a chance to sprout. I've learned this the hard way after watching entire batches go to waste from fungal growth.
Light Transition Strategy: The shift from bright indirect light to full sun in Step 3 is crucial. Start seedlings in indirect light to prevent shock, but transition them gradually over 3-4 days to full sun exposure. Place them in a spot where they'll receive morning sun and afternoon shade initially, then gradually increase their sun exposure. This acclimation period prevents the "sunburn" effect that can scorch delicate young leaves.
Visual Germination Cues: In Step 2, when you're watching for those first sprouts, look for tiny green hooks emerging from the soil—this is the first visible sign of successful germination. These hooks will straighten into the familiar poppy seedling shape within 24-48 hours. If you don't see these within 14 days, gently press the soil surface near where seeds were planted—sometimes they're just below the surface waiting for the right conditions.
Pro Tips for Poppy Seed Germination Time
- This cold trick isn't just about patience—it's about science. Here's how to maximize your chances of success with pop...
- Cold Treatment Precision: The 30-day fridge period is non-negotiable for breaking dormancy, but here's the secret: us...
- Moisture Management: In Step 1, when preparing your damp paper towel, resist the urge to soak it—poppy seeds need jus...
Frequently asked questions
Got questions about poppy seed germination? You’re not alone! Here are some of the most common concerns—and the answers to help you grow a stunning poppy garden with confidence.
How long does it take for poppy seeds to germinate?
With the 30-day cold trick, most poppy seeds sprout in 7–14 days after planting. Without stratification (cold treatment), germination can take 2–4 weeks or longer, especially in warm soil. Patience is key—poppies are slow starters but worth the wait!
Can I skip the cold treatment?
Technically, yes—but expect slower, less reliable germination. Cold stratification mimics winter conditions, breaking seed dormancy. For Papaver somniferum (opium poppies) or Papaver rhoeas (corn poppies), the trick boosts success rates from 30% to 90%+. Skip it at your own risk!
What’s the best soil temperature for germination?
Poppy seeds thrive in 60–70°F (15–21°C) soil. Too hot (above 80°F/27°C) can stall germination, while cold (below 50°F/10°C) slows it down. Use a seedling heat mat if your climate is unpredictable—just keep it consistent.
Why aren’t my poppy seeds sprouting?
Common culprits: old seeds (plant fresh ones!), deep planting (poppies need light to germinate—plant just below soil), or moisture issues. Ensure soil stays evenly damp (not soggy) and avoid overwatering. If seeds are floating, they’re not viable.
Should I use a greenhouse or direct-sow outdoors?
Both work! For faster, protected germination, start seeds indoors in biodegradable pots 4–6 weeks before the last frost. Direct-sow outdoors after cold treatment (spring or fall) in well-draining soil. Poppies hate transplanting, so choose your method wisely!
Wrapping up and next steps
Growing poppy seeds from scratch is a rewarding journey—especially when you know the 30-day cold trick can speed up germination and give you those stunning blooms faster! 🌱 With the right materials, patience, and a little chilly prep, you’ll be well on your way to a vibrant garden.
Now that you’re armed with the know-how, why not plant your seeds today and watch your garden transform?
Need a little extra guidance? Check out our companion guide on maintaining poppy seedlings to keep them thriving once they sprout!