
Lawn
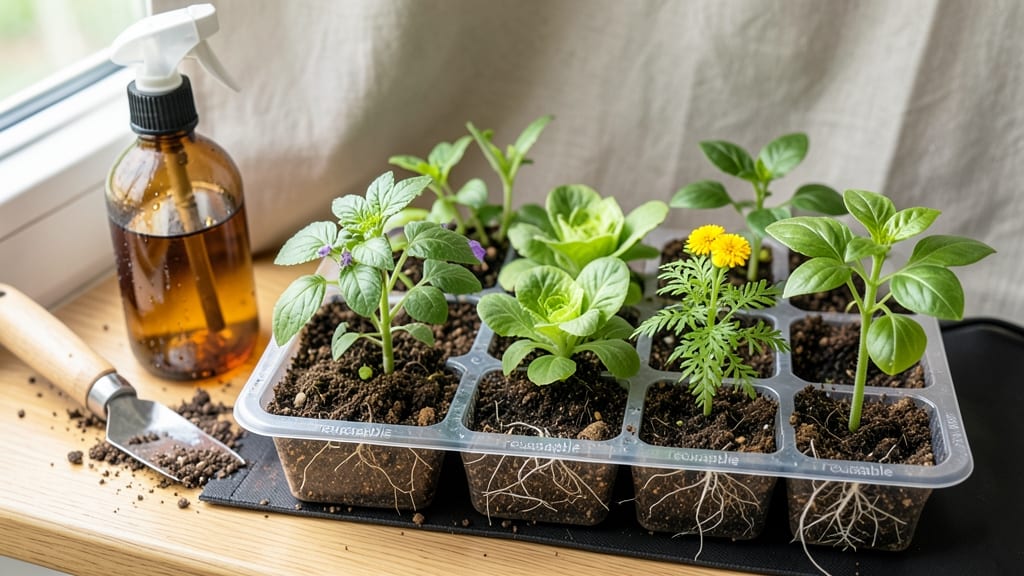
My reusable seed trays cut my seed-starting costs in half while keeping my seedlings thriving. 🌱 The plastic trays from last year are still going strong—no more buying flimsy disposable ones that collapse under damp soil. These sturdy containers save money, reduce waste, and make transplanting easier than ever.
They’re perfect for beginners and pros alike, requiring just a few supplies: a tray, some potting mix, and your favorite seeds. I’ve used them for everything from tomatoes to herbs, and the results speak for themselves—stronger seedlings with fewer casualties. The best part?
No more wrestling with root-bound plants when it’s time to move them outside. Cleanup takes less than 10 minutes with warm, soapy water, and they’re ready for next season’s batch. The trays stay crisp and functional year after year, unlike their disposable cousins that end up in the trash.
Your wallet and the planet both win. Whether you’re growing on a windowsill or in a greenhouse, these trays adapt to any setup. Here’s how to make the most of them—without the mess or the guilt.
📚 In This Guide
- What you need
- Instructions
- Tips and common mistakes
- Wrapping up and next steps
What you need
- ● Reusable seed trays: 10–20 trays (depending on your planting scale). Look for biodegradable or plastic trays with drainage holes (e.g., 2–3" deep, 6–12 cells per tray).
- ● Seed starting mix: 5–10 gallons of sterilized, lightweight potting soil (avoid garden soil—it’s too dense!).
- ● Seeds: Your choice of flowers, herbs, or veggies (check seed packet for spacing needs).
- ● Watering can or spray bottle: A gentle sprayer helps avoid disturbing seeds.
- ● Flat or tray base: To hold trays steady (e.g., a baking sheet or repurposed plastic tray).
- ● Grow lights or sunny windowsill: Seedlings need 12–16 hours of light daily.
- ○ Humidity dome or plastic wrap: Optional but helpful for moisture retention (especially for tiny seeds).
- ● Label maker or popsicle sticks: To track seed varieties.
- ● Heat mat: Speeds up germination for slow starters (e.g., peppers, tomatoes).
- ● Fan: For gentle airflow to strengthen seedlings.
- ● Tweezers: For delicate seed placement.
Step-by-step guide to using reusable seed trays for seedlings
Here’s how to maximize these eco-friendly trays for healthy, transplant-ready seedlings.
🌱 Step 1: Prepare Trays and Soil for Germination
Start by washing your reusable seed trays with warm, soapy water to remove any residue from previous use. Rinse thoroughly and let them dry completely—moisture trapped in the tray can lead to mold before your seeds even sprout. I like to add a light layer of coarse sand or small gravel to the bottom of each cell to improve drainage, especially if your seed-starting mix is heavy.
Fill each cell with the sterile seed-starting mix up to ½ inch below the rim. Press the soil down gently with your fingers until it’s firm but not compacted. This ensures good root contact without creating air pockets. A lightly moistened mix is ideal—water it until it’s damp like a wrung-out sponge, not soggy.
🌱 Step 2: Sow Seeds at the Right Depth and Spacing
Check the seed packet for recommended planting depth, but a general rule is to plant seeds at a depth twice their diameter. For tiny seeds like lettuce, a light sprinkle over the soil works best. For larger seeds like beans, press them ½ inch deep. I use a toothpick to make small holes in the soil—it’s more precise than poking with my finger.
Label each tray immediately with the seed type and date. I write on masking tape with a marker and stick it to the side of the tray. This prevents mix-ups when seedlings are still small and look identical. Cover the tray with a clear plastic dome or plastic wrap to retain moisture and warmth, which speeds up germination. Place it in a warm spot, ideally between 70-75°F.
💧 Step 3: Monitor Moisture and Light for Healthy Sprouts
Check the trays daily for condensation under the dome. If you see water droplets forming, remove the dome for 10-15 minutes to prevent fungal growth. Once seedlings emerge, remove the dome entirely and place the trays under grow lights or a south-facing window. Seedlings need 12-16 hours of light daily to prevent leggy growth.
Water from the bottom by placing the tray in an inch of water for 10-15 minutes. This encourages roots to grow downward and strengthens the seedlings. Avoid overhead watering once sprouts appear—wet foliage invites damping-off disease. You’ll know moisture is right when the soil surface looks slightly damp but not glistening.
☀️ Step 4: Harden Off Seedlings Before Transplanting
Two weeks before your last frost date, start hardening off seedlings by moving them outdoors to a shaded, sheltered spot for 1-2 hours the first day. Gradually increase their time outside by 1 hour daily, eventually leaving them out all day. This helps them adjust to wind, sun, and temperature fluctuations.
Watch for signs of stress like wilting or yellowing leaves. If you see this, extend the hardening-off period by a day or two. Once seedlings can handle a full day outside without wilting, they’re ready for transplanting. Use the reusable trays’ built-in cell structure to lift seedlings carefully—no need to disturb roots when moving them to the garden.
⏰ Step 5: Clean and Store Trays for Future Use
After transplanting, give the trays a quick rinse to remove soil residue, then soak them in a 10% bleach solution (1 part bleach to 9 parts water) for 10 minutes to sterilize. Rinse thoroughly and let them dry completely in the sun. Storing them in a dry, ventilated space prevents mold and keeps them ready for next season.
I stack mine with a layer of newspaper between trays to prevent scratches. Reusable trays last for years, making them a cost-effective and sustainable choice. With proper care, they’ll give you healthy starts for dozens of growing seasons.
Tips & tricks for perfect seedling starts with reusable trays
These simple strategies will help you get the most from your eco-friendly seed trays—no matter what you're growing.
Drainage is Key: That ½-inch layer of coarse sand or gravel at the bottom of each cell makes all the difference. I've seen seedlings drown when trays don't drain properly, especially with heavier seed-starting mixes. If your trays don't have drainage holes, add an extra layer of sand to prevent waterlogging. This is particularly important for seeds that need consistent moisture but hate soggy roots.
Temperature Matters: Keeping your trays between 70-75°F during germination is crucial, but don't let them get too hot. I've had trays sitting on top of refrigerators or near heat vents where temperatures crept above 80°F—this can actually slow germination and encourage mold. A simple seedling heat mat set to 75°F works perfectly if your home stays cooler than that.
Lighting Secrets: Those 12-16 hours of daily light are non-negotiable for preventing leggy seedlings. I've found that placing trays under LED grow lights just 4-6 inches away gives the best results. If you're using natural light, rotate your trays daily so all seedlings get equal exposure—this prevents them from stretching toward one side. The difference between proper lighting and inadequate light is like night and day for seedling health.
Harden Off Gradually: The 1-2 hour start to your hardening-off process might seem short, but it's the perfect way to avoid shocking tender seedlings. I've seen gardeners rush this step and end up with wilted, stressed plants. Start with just 30 minutes on the first day if your seedlings look particularly delicate. Watch for color changes in leaves—they should stay a healthy green, not yellow or grayish.
Pro Tips for Reusable Seed Trays
- These simple strategies will help you get the most from your eco-friendly seed trays—no matter what you're growing.
- Drainage is Key: That ½-inch layer of coarse sand or gravel at the bottom of each cell makes all the difference. I've...
- Temperature Matters: Keeping your trays between 70-75°F during germination is crucial, but don't let them get too hot...
Frequently asked questions
Got questions about reusable seed trays? You’re not alone! Here are answers to the most common ones to help you get started with confidence.
What materials are best for reusable seed trays?
Reusable seed trays are typically made from recycled plastic, biodegradable materials, or even repurposed household items like yogurt cups or egg cartons. Look for durable, lightweight options with drainage holes for optimal seedling growth. Plastic trays are the most common due to their longevity and ease of cleaning.
How long can I reuse seed trays before they degrade?
With proper care, plastic reusable seed trays can last for years—some gardeners pass them down for decades! Biodegradable options (like peat or coconut coir) typically last 1-2 growing seasons before breaking down. Always sanitize trays between uses to prevent mold or disease.
Can I use reusable trays for both flowers and vegetables?
Reusable seed trays are versatile for all seedlings, from tomatoes and peppers to marigolds and herbs. Just ensure the tray size matches your plant’s root space needs—smaller trays work for herbs, while larger ones suit veggies like cucumbers or squash.
What’s the easiest way to clean and store trays between uses?
Start by soaking trays in a 10% bleach solution (1 part bleach to 9 parts water) for 10 minutes, then scrub with warm, soapy water. Rinse thoroughly and let dry in the sun. Store in a dry, ventilated space to prevent mold—stacking with parchment paper between layers keeps them pristine.
What if my seedlings outgrow the trays too quickly?
If roots are circling or seedlings look cramped, it’s time to transplant into larger containers or directly into the ground. To delay this, choose trays with 6+ inches of depth for veggies or use a soilless mix to slow growth slightly. Always harden off seedlings for 7–10 days before moving them outdoors!Wrapping up and next steps
Switching to reusable seed trays is a game-changer for eco-conscious gardeners—saving money, reducing waste, and giving seedlings the perfect start! 🌱 These trays offer durability, cost-efficiency, and a sustainable edge, whether you're growing flowers, veggies, or lawn grasses.
Ready to make the shift? Start small by repurposing household items or investing in high-quality trays for your next planting season.
Now’s your chance to green your gardening routine—one seedling at a time! 🌿 Explore our guide on DIY reusable tray designs to kickstart your zero-waste journey.