
Flowers
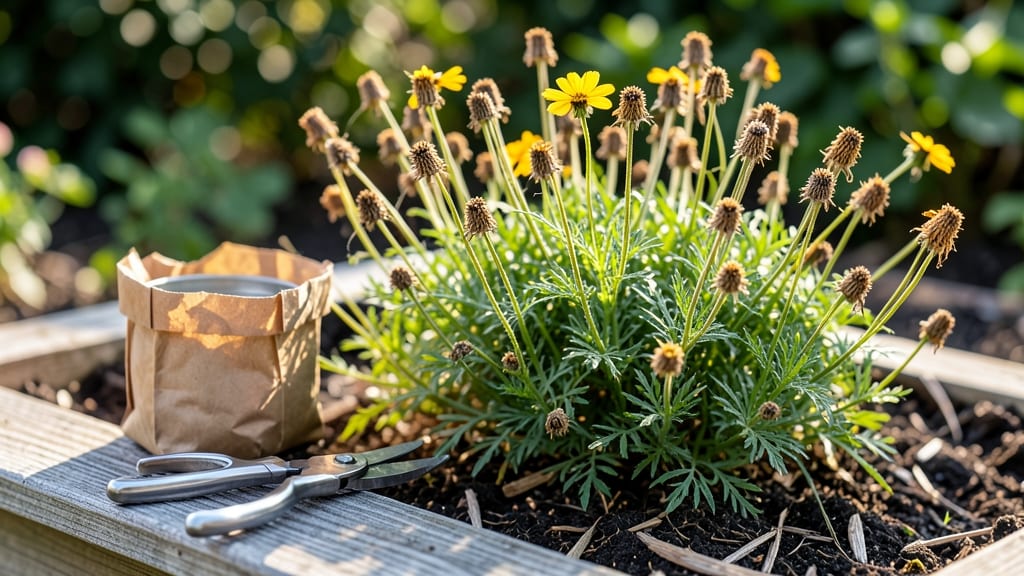
Growing whorled tickseed from seeds is easier than you think—no tangled roots or stubborn sprouts here. 🌱 The secret lies in timing and soil prep, which I perfected after my first batch of seeds tangled into a hopeless mess.
This hardy perennial thrives with minimal fuss once you get the basics right, and the results are worth every minute of setup.
Start seeds indoors 6-8 weeks before your last frost, using a light, well-draining mix with a pH of 6.0-7.0. Whorled tickseed loves warmth—keep soil at 70-75°F for consistent germination in 10-21 days.
A sunny windowsill or grow light works, but avoid cold drafts that slow things down. Thin seedlings to 12 inches apart once they’ve got 2-3 sets of leaves.
Outdoor planting happens after frost, when soil warms to 60°F. These plants spread happily but won’t take over—perfect for borders or wildflower mixes. Water lightly at first, then let nature handle it; they’re drought-tolerant once established.
By mid-summer, you’ll see those signature daisy-like blooms, and they’ll keep coming back year after year.
Pro tip: Pair whorled tickseed with black-eyed Susans or coneflowers for a low-maintenance pollinator magnet. Avoid over-fertilizing—too much nitrogen means fewer flowers. If seeds struggle to sprout, try a quick soak in warm water overnight before planting.
With these tricks, you’ll skip the stress and enjoy a garden that practically grows itself.
📚 In This Guide
- What you need
- Instructions
- Tips and common mistakes
- Wrapping up and next steps
What you need
- ● Whorled tickseed plants (Coreopsis verticillata) – Mature, seed-producing plants (at least 1-2 years old for best yield).
- ● Sharp pruning shears or scissors – For clean cuts without damaging stems.
- ● Brown paper bags or breathable seed envelopes – 5-10 bags (1 per plant or cluster).
- ○ Newspaper or cardboard – For drying seeds indoors (optional but helpful).
- ● Small fan or well-ventilated area – Ensures even drying and prevents mold.
- ● Fine mesh strainer or sieve – For separating seeds from chaff (1-2 mm mesh size works well).
- ● Small paper towels or coffee filters – For cleaning seeds (if needed).
- ● Permanent marker or labels – To mark seed bags with the harvest date and variety.
- ● Gloves – Protects hands from prickly stems or dirt.
- ● Desiccant packets (silica gel) – Speeds up drying in humid climates.
- ● Seed storage containers (airtight) – For long-term storage (glass jars or Mylar bags).
- ● Magnifying glass – Helps inspect seeds for quality before storage.
- ● Digital scale – Useful if you’re tracking seed weight for germination tests.
How to harvest whorled tickseed seeds without the twist
This native perennial gives you a second chance at seed collection—just time it right and handle the plants gently.
🌱 Step 1: Identify Mature Seed Heads
Wait until the late summer to early fall when the seed heads turn from bright yellow to a papery brown. The dried, papery bracts surrounding the seeds will begin to split open naturally—this is your cue that they're ready. I like to harvest on a dry, sunny morning when the dew has evaporated, as moisture makes the delicate seed heads brittle.
Gently grasp the seed head between your thumb and forefinger and give it a light tug. If the head pulls away cleanly with minimal resistance, it's ready. If it resists or breaks off at the stem, wait another 3-5 days—the seeds need a little more time to mature. Never pull when the heads are wet; you'll crush the seeds and invite mold.
🌿 Step 2: Collect and Dry the Seeds
Place the harvested seed heads in a paper bag (plastic traps moisture and causes spoilage). Leave them in a well-ventilated, dry location for 1-2 weeks—this allows the remaining seeds to fully dry and release from the bracts. I set mine on a mesh screen in a shady spot to prevent overheating while still allowing airflow.
Check daily for any seeds that have already fallen out—they're ready for storage. If you see mold or dark spots developing, move the bag to a cooler, drier place immediately. The goal is to dry the seeds completely without fermenting them.
✂️ Step 3: Separate Seeds from Chaff
Once the seed heads are fully dry, gently rub them between your palms or use a fine-mesh sieve to separate the seeds from the dried bracts. Whorled tickseed seeds are small and dark brown, while the chaff will be light and papery. I find a clean kitchen colander works well—just hold it over a bowl and rub the dried heads with your fingers.
Discard any debris or empty seed pods, then store the clean seeds in a paper envelope or glass jar in a cool, dark place. Label it with the harvest date—seeds remain viable for 2-3 years if stored properly. Avoid plastic containers, as they trap moisture and shorten shelf life.
💧 Step 4: Plant or Store for Future Use
For immediate planting, sow seeds ¼ inch deep in well-draining soil during the fall or early spring. Whorled tickseed thrives in full sun to partial shade and tolerates poor soil, making it a low-maintenance native. Water lightly after sowing, then let nature take its course—these seeds germinate best with minimal interference.
If storing for later, keep the seeds in a sealed container with a desiccant packet (like silica gel) to absorb any lingering moisture. Check the seeds annually—if they feel damp or develop an off odor, dry them again before storing. Properly dried seeds will last long enough to share with fellow gardeners or replant in future seasons.
☀️ Step 5: Prevent Overcrowding in Future Plantings
Whorled tickseed self-seeds aggressively, so if you're growing it for its cheerful blooms, deadhead spent flowers in late spring to control spread. Simply pinch off the fading blooms before they set seed. This keeps the plant's energy focused on flowering rather than seed production, giving you more vibrant displays year after year.
Here's the thing—if you let it go to seed, you'll end up with a sea of seedlings next spring. I've seen entire garden beds taken over by tickseed in just one season. If you want to keep it contained, a little deadheading goes a long way.
Tips & tricks for perfect whorled tickseed seed harvesting
Mastering this delicate process takes patience—but these tricks will make all the difference between frustration and success.
Timing is Everything: The 3-5 day window in Step 1 is critical. I've learned to check seed heads every 2-3 days starting in late summer. A simple trick: hold the seed head up to a bright light—if you can see light shining through the bracts, they're ready. This visual cue helps avoid waiting too long when the heads become brittle and crumble.
Environmental Control: For Step 2, I've found that placing the paper bag on a mesh screen in a well-ventilated area (like a covered porch) creates ideal drying conditions. The key is maintaining airflow while preventing overheating—direct sunlight can cause the seeds to scorch. If you notice any dark spots developing within 1-2 weeks, move the bag to a cooler, shaded location immediately to prevent mold.
Storage Wisdom: When storing your clean seeds in Step 3, I recommend using glass jars with tight-sealing lids over paper envelopes. The glass provides better moisture protection while still allowing you to see the seeds. Add a small silica gel packet to the jar to absorb any residual moisture. Label each jar with the harvest date—this helps track viability since seeds remain good for only 2-3 years.
Seasonal Strategy: For Step 4, if you're storing seeds for future planting, I suggest dividing them into smaller portions before final storage. This way, you can plant just what you need each season without disturbing the entire batch. For example, store one portion for fall planting and another for spring, with each portion labeled accordingly. This prevents you from having to open and reseal containers multiple times, which can introduce moisture.
Pro Tips for Whorled Tickseed Seeds
- Mastering this delicate process takes patience—but these tricks will make all the difference between frustration and ...
- Timing is Everything: The 3-5 day window in Step 1 is critical. I've learned to check seed heads every 2-3 days start...
- Environmental Control: For Step 2, I've found that placing the paper bag on a mesh screen in a well-ventilated area (...
Frequently asked questions
Got questions about harvesting whorled tickseed seeds? You’re not alone! Here are some of the most common concerns—and their simple solutions—to keep your seed-collection process smooth and stress-free.
When is the best time to harvest whorled tickseed seeds?
Harvest seeds when the pappus (the fluffy, parachute-like part) turns light brown and the seed heads begin to dry out but haven’t yet scattered. This usually happens in late summer to early fall, depending on your climate. Wait too long, and the seeds may blow away—timing is everything!
What if my seeds won’t stay on the plant?
Whorled tickseed seeds are notorious for their lightweight, wind-dispersed nature. If they’re falling prematurely, try harvesting in dry, calm weather and use a paper bag or breathable mesh container to collect them. Alternatively, trim the seed heads and hang them upside down in a brown paper bag to dry indoors.
Can I collect seeds from store-bought whorled tickseed plants?
Unfortunately, no—store-bought plants are often sterile hybrids or treated with chemicals to prevent seed production. For viable seeds, grow whorled tickseed from open-pollinated or heirloom varieties or source seeds from reputable wildflower seed suppliers. Always check the label!
How do I store whorled tickseed seeds long-term?
Once fully dry, store seeds in a cool, dark place (like a sealed glass jar or airtight container) with a desiccant packet to absorb moisture. Label with the harvest date—they typically stay viable for 1–2 years. For extra longevity, refrigerate them in a ziplock bag with silica gel.
What if my seeds sprout mold or look discolored?
Mold or dark spots mean excess moisture or poor storage. Discard affected seeds immediately. To prevent this, ensure seeds are completely dry before storing (they should rattle when shaken). If humidity is high, use a dehumidifier or store in a sealed container with rice (a natural moisture absorber).
Wrapping up and next steps
Whorled tickseed seeds are a gardener’s dream—easy to grow, low-maintenance, and perfect for adding vibrant pops of color to any landscape. By following the right harvesting techniques, you can avoid the dreaded twist struggles and enjoy a bountiful, stress-free yield.
Whether you’re a seasoned gardener or just starting out, these tips will help you harvest with confidence and save seeds for future plantings.
Ready to take the next step? Try harvesting a small batch of whorled tickseed seeds this season and share your success—or challenges—with fellow gardeners! 🌱 Happy gardening!