
Lawn
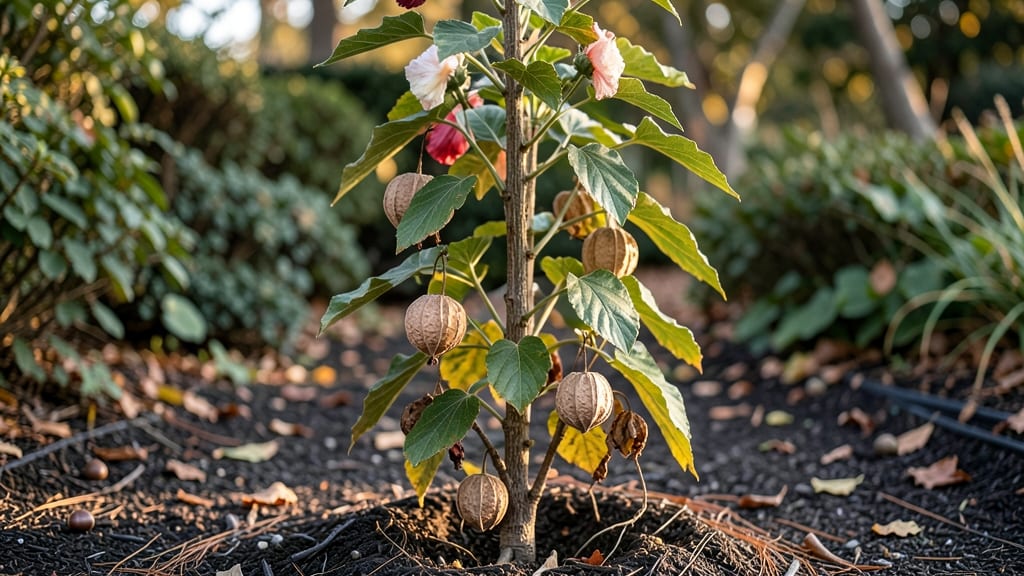
Hardy hibiscus seed pods are nature’s way of multiplying your garden’s beauty—if you know how to handle them. ✨ The twisty, woody pods can feel like a puzzle at first, but with the right technique, you’ll collect seeds without frustration and turn them into thriving plants that last for years.
Timing is everything: harvest pods when they turn brown and split open naturally, usually in late fall or early winter. You’ll need a pair of gloves (those pods are prickly!), a bucket, and a dry spot to process them.
The goal is to extract clean seeds without damaging the delicate embryos inside—no special tools required, just patience.
Once you’ve dried the seeds for a week or two, you’re ready to plant. Hardy hibiscus seeds germinate best in warm soil, so start them indoors in early spring or wait until after your last frost if you’re direct-sowing.
With the right light and moisture, you’ll see sprouts in about 2-4 weeks, and those first leaves will be your reward for the effort.
This method works for any hardy hibiscus variety, whether you’re growing them in containers or in the ground. The key is consistency—keep the soil moist but not soggy, and your seedlings will grow into robust plants that’ll bloom for years to come.
📚 In This Guide
- What you need
- Instructions
- Tips and common mistakes
- Wrapping up and next steps
What you need
- ● Mature hardy hibiscus plants – Ensure they’re at least 2-3 years old with fully developed seed pods (typically late summer/fall).
- ● Pruning shears or sharp scissors – Bypass-style (not anvil) to avoid crushing pods. Sterilize blades with rubbing alcohol first!
- ● Brown paper bags or seed envelopes – 1-2 per plant (or more if pods are abundant). Label each with the plant variety and date.
- ○ Glove – A gardening glove (optional but helpful if pods are spiky or your skin is sensitive).
- ● Small tray or bucket – To collect fallen pods or store harvested ones temporarily.
- ● Permanent marker – For labeling seed packets.
- ● Drying rack or screen – A mesh screen or paper towels to air-dry pods (avoid direct sunlight).
- ● Paper towels or newspaper – To line drying areas and catch stray seeds.
- ● Seed catalog or notebook – To track varieties and germination notes.
- ● Desiccant packets – For long-term seed storage (if pods take weeks to dry).
- ● Magnifying glass – To inspect pods for pests or mold before drying.
- ● Twist ties or rubber bands – To secure seed heads if harvesting in windy conditions.
How to harvest hardy hibiscus seed pods without the twist
Here’s the simple method I use to collect hibiscus seeds without wrestling with stubborn pods.
🌿 Step 1: Identify Mature Seed Pods
Wait until the pods turn a dry, papery brown and split open naturally—that’s your signal they’re ready. I check plants every 2-3 days in late fall, looking for pods that’ve cracked open slightly. If you pick them too early, the seeds won’t be fully developed.
Gently squeeze a pod between your fingers. If it crumbles easily and releases seeds, it’s ready. If it’s still firm, give it another week. Overripe pods will scatter seeds on their own, so timing matters—harvest before they open completely.
🪴 Step 2: Collect Seeds Without Damaging Plants
Use clean, sharp scissors to snip the entire pod from the stem, leaving about ½ inch of stem attached. This prevents the plant from wasting energy trying to heal a torn stem. Place the pods in a paper bag—this lets them dry further while trapping any seeds that might fall out.
Don’t twist or pull pods—they’re brittle and will break apart, making seed collection messy. If a pod resists, it’s not ready yet. I like to work on a dry day when the pods are less likely to stick to my hands.
☀️ Step 3: Dry and Clean the Seeds
Spread the pods on a clean, dry towel in a warm, dry spot (around 70°F) for 3-5 days. The seeds will rattle inside as they finish drying. Shake the pods gently over a bowl to release the seeds—most will fall out easily once fully dry.
For stubborn seeds, rub the pods between your palms or tap them lightly with a spoon. Avoid shaking them too hard, or you’ll crush the delicate seed coats. Once all seeds are out, sift through them to remove any chaff or empty pods.
⏰ Step 4: Store Seeds for Next Season
Place the clean seeds in a small envelope or airtight container with a packet of silica gel to absorb moisture. Label it with the variety and date—hibiscus seeds stay viable for 2-3 years if stored properly in a cool, dark place.
I keep mine in the fridge for extra protection against humidity. Before planting next spring, soak the seeds in warm water for 12 hours to soften the hard outer shell—this helps them germinate faster. Don’t skip this step, or you’ll wait weeks for sprouts.
Tips & tricks for perfect hardy hibiscus seed pod harvesting
These little tricks will turn your seed-harvesting from a frustrating puzzle into a smooth, satisfying process every time.
Timing is Everything: I can't stress this enough—those 2-3 day checks between harvests make all the difference. The pods go from perfect to overripe in a flash. I set a phone reminder for every third day in late fall to avoid missing the window. Watch for that papery brown color and slight cracking—those are your visual cues that say "pick me now!"
The Right Tools Make All the Difference: Skip the fingernails and use clean, sharp scissors instead. I've tried everything from pruners to my kitchen shears, but a small pair of floral scissors gives me the most control. That ½-inch stem attachment might seem minor, but it keeps your plants healthier for next season by preventing energy-draining stem damage. And for heaven's sake, don't use your hands—those pods will stick like glue!
Drying Secrets for Maximum Yield: That 70°F warm spot doesn't have to be fancy. I've used everything from my kitchen counter to a sunny windowsill. The key is consistency—don't rush it! If you're impatient and try to speed up drying, you'll crush seeds trying to shake them out too early. I like to give them the full 3-5 days, then give them one final gentle shake over a bowl before sifting. This catches any stragglers that might have missed the first round.
Storage Strategy for Next Year: Here's what nobody tells you—the silica gel packet is your secret weapon. I buy the little two-packet travel packs and use just one per container. The fridge adds that extra layer of protection, but if you don't have one, a cool pantry spot works too. Pro tip: Write the harvest date right on the container with a permanent marker—you'll thank yourself next spring when you're ready to plant!
Pro Tips for Hardy Hibiscus Seed Pods
- These little tricks will turn your seed-harvesting from a frustrating puzzle into a smooth, satisfying process every ...
- Timing is Everything: I can't stress this enough—those 2-3 day checks between harvests make all the difference. The p...
- The Right Tools Make All the Difference: Skip the fingernails and use clean, sharp scissors instead. I've tried every...
Frequently asked questions
When are hardy hibiscus seed pods ready to harvest?
Seed pods mature when they turn brown and papery (usually late summer to fall). They’ll split open on their own—collect them before seeds scatter! If pods stay green, they’re not ready yet. Pro tip: Harvest on a dry day to avoid mold.
What do I do if my seed pods won’t open naturally?
If pods stay closed, they may need a little help. Place them in a paper bag for 1–2 weeks—they’ll dry out and crack open. Avoid forcing them open; this can damage seeds. Bonus: Freeze pods for 24 hours to speed up drying!
Can I save seeds from hybrid hardy hibiscus plants?
Probably not! Hybrid varieties (like ‘Dwarf Red’) may not grow true from seed. For consistent blooms, buy seeds labeled “open-pollinated” or propagate from cuttings. Tip: Check seed packets for “heirloom” or “non-hybrid” labels.
How do I store harvested hardy hibiscus seeds?
Clean seeds thoroughly, then store them in a cool, dry place (like a sealed envelope or jar). They’ll stay viable for 2–3 years. For extra protection, add a desiccant packet to prevent moisture buildup.
Will seed pods grow back into plants next year?
Hardy hibiscus is a perennial—it’ll regrow from roots even if you harvest pods! Just leave some foliage intact. If you cut back too aggressively, the plant may need time to recover. Fun fact: Cold-hardy varieties survive winters in zones 5–9!
Wrapping up and next steps
Growing hardy hibiscus seed pods is a rewarding way to propagate these stunning plants—without the frustration of stubborn twists! 🌿 Whether you’re saving seeds for next season or simply enjoying their unique charm, the key lies in patience and gentle handling.
With the right tools and techniques, you’ll soon be watching new hibiscus blooms emerge from those dried pods.
Now that you’re armed with tips to effortlessly collect and store seeds, why not share your newfound knowledge? Try swapping seeds with fellow gardeners or experimenting with different varieties. Happy planting—and may your hibiscus garden thrive! 🌸