
Lawn
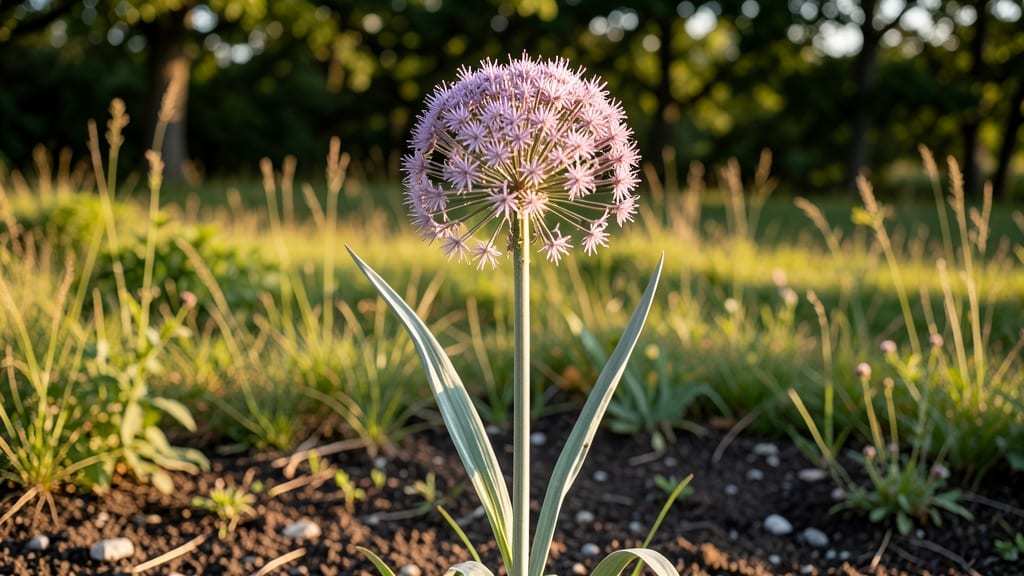
Those allium seed heads popping open in your garden are nature’s way of saying, "Keep me around—I’m free decor and zero-waste magic." 🌱 I’ve turned them into everything from rustic winter arrangements to unexpected garden accents, and they never fail to impress.
The spherical seed pods add texture and movement, even when everything else is dormant.
Start by harvesting stems when the seed heads turn brown but haven’t fully dried on the plant. Bundle them upside down in a dark, dry space for 2-3 weeks—they’ll crisp up beautifully while retaining their shape.
Once dry, you can use them as-is or paint them for a pop of color. I’ve seen them styled in vases, woven into wreaths, or even scattered along garden paths like tiny sculptures.
The best part? They pair effortlessly with other dried stems, evergreens, or even bare branches for a winter garden that feels alive. Try clustering them with eucalyptus, dried grasses, or berry-laden shrubs for a look that’s equal parts whimsical and elegant.
They also make stunning centerpieces—just add a few stems to a neutral container for instant drama.
No rules here: use them fresh, dried, or even as a playful contrast in summer arrangements. My favorite trick? Tucking a few into a bouquet of fresh flowers for a textural surprise that keeps giving long after the blooms fade. Zero waste, maximum impact—what’s not to love?
📚 In This Guide
- What you need
- Instructions
- Tips and common mistakes
- Wrapping up and next steps
What you need
- ● Mature allium seed heads (e.g., garlic chives, ornamental onions, or globe alliums) – Harvest when the papery outer layers turn brown and dry but haven’t yet released seeds.
- ● Scissors or pruning shears – Sharp, clean tools to snip stems without crushing the seed heads.
- ● Paper bags or brown lunch bags – 1–2 per seed head; opt for breathable material to prevent mold.
- ● Ruler or measuring tape – To check seed head dimensions (ideal: 1–3 inches wide).
- ● Pencil or marker – For labeling bags with plant names/varieties.
- ● Drying surface – A flat, dry area (e.g., kitchen counter, garage shelf) with indirect sunlight and good airflow.
- ● Small bowl or container – For collecting seeds once dry (e.g., a clean mason jar or envelope).
- ● Seed-saving labels – Pre-printed or DIY tags for long-term storage.
- ● Desiccant packets – For airtight containers to absorb moisture and extend seed viability.
- ● Magnifying glass – To spot tiny seeds or inspect for pests.
- ● Spray bottle with water – For gently loosening stubborn seeds from dried heads.
- ● Digital scale – To weigh seeds for planting consistency (e.g., 1 oz ≈ ~1,000 allium seeds).
Step-by-step guide for harvesting and saving allium seeds
Here’s how to turn those striking allium seed heads into next year’s plants—no waste, just pure gardening magic.
🌱 Step 1: Wait for Seed Heads to Fully Mature
Leave the seed heads on the plant until they turn brown and papery—this usually takes 6-8 weeks after flowering. You’ll know they’re ready when the outer layers dry out completely and the tiny seeds inside rattle when you shake the stem gently. If you harvest too early, the seeds won’t be viable.
I always wait until the first frost threatens before cutting them down. This ensures maximum seed development, and the dried stems add winter interest to the garden. Use clean, sharp scissors to snip the stems just above the foliage—this prevents disease from spreading through the base.
✂️ Step 2: Bundle and Dry the Seed Heads
Gather the seed heads and tie them in small bundles with twine or rubber bands, leaving the stems exposed. Hang them upside down in a dry, well-ventilated spot—a garage, shed, or even a kitchen cabinet works. The goal is to let them dry completely without mold or rot.
This drying process can take 2-4 weeks, depending on humidity. Check weekly by gently squeezing a seed head—if it crumbles easily, it’s ready. If moisture lingers, the seeds may spoil. I like to place a small fan nearby to speed things up in humid climates.
🪴 Step 3: Extract and Store the Seeds
Once fully dry, place a seed head over a piece of paper or cardboard and gently rub the dried head between your palms. The tiny seeds will rain down like confetti. Allium seeds are extremely lightweight, so a single head yields hundreds—enough to plant a whole row.
Store the seeds in a paper envelope (not plastic, which traps moisture) and label with the variety and harvest date. Keep them in a cool, dark place—a seed catalog or mason jar works. Properly stored, allium seeds stay viable for 2-3 years, though I’ve found they germinate best when used within a year.
💧 Step 4: Prepare for Next Year’s Planting
In early spring, sow the seeds ¼ inch deep in well-draining soil. Alliums thrive in full sun and moderate moisture, so water lightly after planting and keep the soil evenly moist until germination—usually 2-4 weeks. Thin seedlings to 6-12 inches apart, depending on the variety.
Here’s the thing—alliums are self-seeding, so if you leave some seed heads in the garden, you’ll get a surprise show of new blooms next year. But if you’re saving specific varieties, harvesting and storing ensures you get exactly what you planted.
Tips & tricks for perfect allium seed saving
These simple strategies will help you maximize your seed yield and avoid common pitfalls while working with allium seed heads.
Timing is Everything: The 6-8 week wait after flowering is non-negotiable for viable seeds. I learned this the hard way—harvesting too early gave me seeds that wouldn't germinate. If you're in doubt, wait until the first frost. The cold actually helps mature the seeds while giving you those beautiful dried stems for winter interest.
Drying Secrets: For the 2-4 week drying process, I've found that a small fan placed near the bundles works wonders in humid climates. The key is complete dryness—no moisture means no mold. Test readiness by squeezing a seed head; if it crumbles easily, your seeds are ready. If you're short on space, a mesh laundry bag works great for hanging bundles in a well-ventilated area.
Seed Extraction Hack: When extracting seeds in Step 3, I recommend placing the dried seed head over a dark-colored piece of paper or cardboard. The contrast makes those tiny black seeds stand out against the background, so you don't miss any. Also, use a fine-mesh sieve to catch any seeds that might fall through your fingers during extraction—you'll be surprised how many you collect this way.
Storage Wisdom: That paper envelope storage isn't just about keeping seeds dry—it's also about preventing light exposure, which can reduce viability. I like to add a silica gel packet to my seed envelopes for extra moisture control. And while seeds stay viable for 2-3 years, I've noticed they germinate best when used within a year, so prioritize planting your freshest seeds first.
Pro Tips for Allium Seed Heads
- These simple strategies will help you maximize your seed yield and avoid common pitfalls while working with allium se...
- Timing is Everything: The 6-8 week wait after flowering is non-negotiable for viable seeds. I learned this the hard w...
- Drying Secrets: For the 2-4 week drying process, I've found that a small fan placed near the bundles works wonders in...
Frequently asked questions
Got questions about allium seed heads? Here are some of the most common ones—and their answers—to help you master zero-waste seed saving with confidence!
When is the best time to harvest allium seed heads?
Harvest allium seed heads after they’ve fully dried on the plant and turned brown (usually late summer to early fall). Wait until the papery outer layers pop open easily—this signals seeds are mature and ready. Avoid harvesting too early, or seeds may not germinate well.
How long does it take for allium seed heads to dry?
Drying time varies by climate, but expect 2–4 weeks once seed heads form. In dry conditions, they may dry faster; in humidity, extend drying time. Hang heads upside down in a well-ventilated spot (like a garage or shed) to speed up the process.
Can I save seeds from store-bought alliums (like garlic or onions)?
Generally, no—store-bought alliums are often hybrid varieties, meaning seeds won’t grow true to the parent plant. For reliable seed saving, grow open-pollinated varieties from seed or heirloom plants. Check seed catalogs for “seed-saving friendly” labels!
What should I do if my seed heads get moldy or pests?
If seed heads develop mold or pests (like aphids), remove them immediately. Store heads in a paper bag (not plastic) in a cool, dry place to prevent moisture buildup. For pest issues, spray plants with neem oil early in the season or handpick critters.
Are allium seed heads edible, or just for seeds?
Yes! While the focus is on seeds, young, tender allium seed heads (like chive or garlic chive) are edible—strip the stems and use them like flowers in salads or garnishes. Just avoid mature, dried heads, as they’re tough and bitter.
Wrapping up and next steps
Allium seed heads aren’t just charming garden accents—they’re a zero-waste treasure for saving seeds and reducing food scraps! 🌱 From drying stems to harvesting seeds, these simple steps turn kitchen scraps into a sustainable cycle.
Whether you’re a seasoned gardener or a curious beginner, every seed saved is a step toward a greener future.
Ready to try it? Grab a few allium stems from your next meal, follow the guide, and watch your kitchen transform into a seed-saving station. Your garden—and the planet—will thank you! 🌟