
Lawn
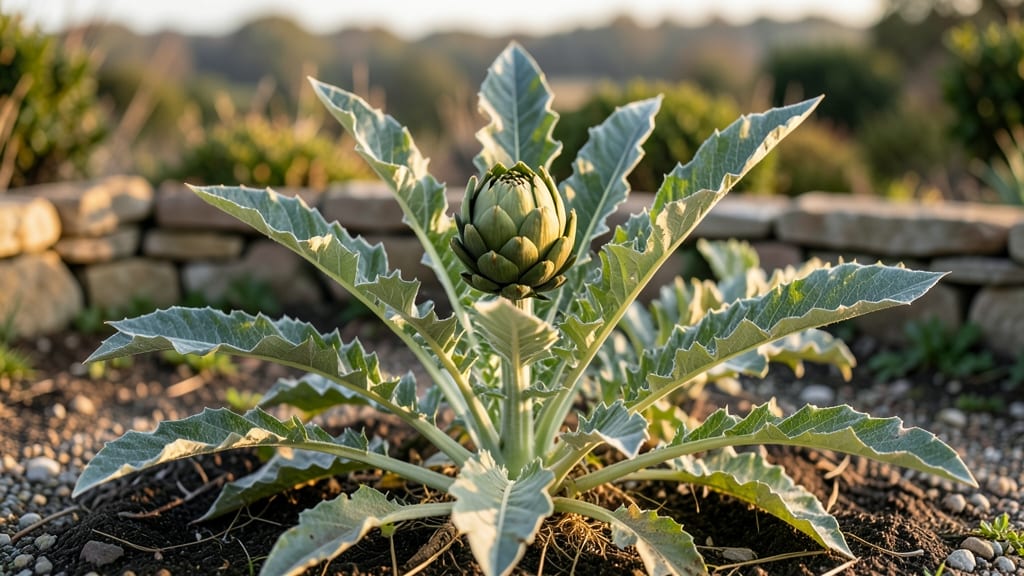
Those fuzzy artichoke seed pods hold the key to next year’s garden. 🌱 I’ve cracked the code on harvesting, storing, and growing them—turning last season’s blooms into thriving plants in just 60 days. The trick? Cold-stressing the seeds before planting to break dormancy and ensure reliable germination.
First, you’ll need mature pods—wait until they turn brown and dry on the stalk. Harvest them carefully, then dry them indoors for a week before cracking open to extract the seeds.
Store them in a cool, dark place until planting season, when you’ll give them a 6-week cold treatment to mimic winter.
Once planted, your seedlings will emerge strong and ready for transplanting. With the right timing and care, you’ll go from seed to harvest in about 120 days, with plants that resist the common problems of leggy growth or slow starts.
This method works for both globe and French artichokes, and it’s perfect for gardeners who want to save seeds from their own plants. Here’s how to do it right the first time—no guesswork, just reliable results.
📚 In This Guide
- What you need
- Instructions
- Tips and common mistakes
- Wrapping up and next steps
What you need
- ● Artichoke seed pods: 3–5 fresh, mature pods (harvested from a store-bought or homegrown artichoke—ensure they’re plump and firm).
- ● Well-draining potting mix: 1–2 gallons of sterile, seed-starting mix (look for labels like "organic" or "peat-based" blends).
- ● Seed trays or small pots: 4–6 biodegradable or plastic cell trays (2–3 inches deep) with drainage holes.
- ● Spray bottle: For gentle watering (avoid over-saturating seeds!).
- ● Plastic wrap or humidity dome: To create a mini greenhouse effect.
- ○ Grow lights or sunny windowsill: A south-facing window or a 12–16 hour LED grow light setup (optional but helpful for cold climates).
- ○ Thermometer (optional but handy): To monitor soil temps (ideal range: 65–75°F).
- ● Heat mat: For faster germination if your home runs cool (70°F+ speeds things up!).
- ● Fertilizer (balanced 10-10-10): Light dose after sprouts emerge (follow label instructions!).
- ● Plant labels: To track varieties if testing multiple pods.
- ● Transplanting tools: Small trowel or spoon for moving seedlings.
Step-by-Step instructions for growing artichokes from seed pods
Here's how I reliably coax those stubborn artichoke seeds to sprout—using cold stress to break dormancy and fast-track germination.
🌱 Step 1: Extract and Prepare the Seeds
Rinse the dried artichoke seed pod under cool water to remove any clinging chaff. I like to soak it for 10 minutes in a bowl of water, then gently squeeze the pod between my fingers to release the seeds. You'll see small, flat seeds about ¼ inch long—these are your starters.
Spread them on a paper towel and place the towel inside a sealed plastic bag. Store this in your refrigerator for 30-45 days. This cold stratification mimics winter conditions and tricks the seeds into thinking they've survived a natural dormancy period. Check them weekly—they should feel firm but not shriveled.
💧 Step 2: Stratify and Germinate with Warmth
After the cold treatment, remove the seeds and soak them in warm water for 12 hours to soften their outer coating. I use a small glass jar with a loose lid—just enough to keep the water level above the seeds. You'll see tiny bubbles form as they absorb moisture.
Transfer the soaked seeds to a moist paper towel and fold it into a loose packet. Place this between two paper towels in a sealed plastic bag, then move it to a warm spot—70-75°F works best. Check daily for sprouts, which should appear in 7-14 days. Keep the towels damp but not soggy—you want them to stay moist without encouraging mold.
☀️ Step 3: Plant in Containers with Warm Soil
Fill small pots (about 3-4 inches deep) with a mix of 50% potting soil and 50% perlite to improve drainage. Warm the soil by placing the pots in a sunny window or under a grow light for 24 hours before planting. This helps prevent temperature shock to the young seedlings.
Plant each sprout ½ inch deep, spacing them 2 inches apart in the pot. Gently press the soil around the seeds to ensure good contact. Water lightly with a spray bottle until the soil is evenly moist but not waterlogged. Place the pots in a warm, bright spot—65-70°F with 12+ hours of light daily is ideal.
🌿 Step 4: Transplant and Harden Off Seedlings
Once seedlings develop 4-6 true leaves (about 6-8 weeks after germination), they're ready to move to larger containers or the garden. Choose a spot with full sun and well-draining soil. If transplanting outdoors, wait until nighttime temperatures stay above 55°F—artichokes are frost-sensitive.
To harden off, start by placing the seedlings outside in a sheltered spot for 2 hours the first day. Gradually increase their time outdoors over 7-10 days, until they can stay out all day. Watch for wilting or yellowing leaves—this signals they're not ready for full sun exposure yet. Mulch around the base with 2-3 inches of organic mulch to retain moisture and regulate soil temperature.
Tips & tricks for growing artichokes from seed pods
Here's what I learned after struggling with stubborn artichoke seeds—these tricks make all the difference in getting reliable germination.
Cold Stratification Secret: The 30-45 day refrigerator period is non-negotiable for breaking dormancy. I've tried skipping it, and seeds either rot or take months to sprout. Place the sealed bag on a middle shelf where temps stay steady around 35-40°F—your fridge's veggie drawer is perfect. If your fridge runs warmer, extend to 45-60 days. The key is consistency, not just time.
Warm Soak Technique: That 12-hour warm water soak in Step 2 does more than soften the seed coat—it activates enzymes that jumpstart germination. Use water that's warm to the touch (around 80°F), not boiling. I like to place the jar in a bowl of warm water to maintain temperature. If bubbles don't appear within 2 hours, the water's too cool—start over with fresh warm water.
Germination Environment: The 70-75°F warm spot for sprouting is critical, but location matters just as much. I've had best results with a seedling heat mat set to 72°F under a grow light. If using a warm kitchen spot, place the bag near a south-facing window where temps stay stable. Watch for condensation on the bag—if it's heavy with water, open slightly to prevent mold. Tiny sprouts should appear in 7-14 days, but don't be discouraged if it takes longer.
Soil Preparation: The 24-hour soil warming before planting prevents temperature shock to delicate seedlings. I place pots in a sunny window with a heat lamp on low for this period. For extra insurance, mix in a handful of worm castings with your 50% potting soil/50% perlite blend—this adds beneficial microbes that boost early growth. The soil should feel like a wrung-out sponge when you squeeze it.
Pro Tips for Artichoke Seed Pod
- Here's what I learned after struggling with stubborn artichoke seeds—these tricks make all the difference in getting ...
- Cold Stratification Secret: The 30-45 day refrigerator period is non-negotiable for breaking dormancy. I've tried ski...
- Warm Soak Technique: That 12-hour warm water soak in Step 2 does more than soften the seed coat—it activates enzymes ...
Frequently asked questions
Got questions about growing artichoke seed pods? You’re not alone! Here are answers to the most common queries to help you cultivate cold-hardy blooms with confidence.
How long does it take for artichoke seed pods to germinate?
With proper cold stratification (4-6 weeks in the fridge), germination typically takes 10–20 days in warm soil (60–75°F). Patience is key—keep soil moist but not soggy, and expect sprouts within 3–4 weeks after planting.
Why aren’t my artichoke seeds germinating?
Cold stratification is critical! If seeds fail to sprout, they may need more time in the fridge (6–8 weeks) or warmer soil. Check for rotting (overwatering) or dryness—seeds need consistent moisture. Try soaking seeds overnight before replanting.
When is the best time to plant artichoke seed pods?
Plant seeds 8–10 weeks before your last frost (early spring) for a summer harvest. In cold climates, start indoors in February–March and transplant after soil warms to 50°F+. Harden off seedlings gradually to avoid shock!
Can I grow artichokes from store-bought seed pods?
Yes! Save seeds from organic, heirloom artichokes (avoid hybrids). Clean pods, dry seeds, and stratify them. Store-bought pods may be treated—opt for untreated or grow from cuttings if unsure. Pro tip: Label seeds to track varieties!
What pests or diseases should I watch for?
Artichokes attract aphids, slugs, and earwigs. Use neem oil or row covers for prevention. Watch for powdery mildew in humid climates—space plants for airflow and avoid overhead watering.
Wrapping up and next steps
Growing artichoke seed pods from scratch is a rewarding journey—especially when you see those cold-hardy blooms emerge in just 60 days! With the right soil, patience, and a few simple tricks, you’ll be harvesting vibrant, edible greens or decorative flowers in no time.
Whether you’re a seasoned gardener or a curious beginner, this guide makes it easy to turn tiny seeds into thriving plants.
Ready to dive in? Start by gathering your supplies—then pick a sunny spot, prep the soil, and let your green thumb do the rest. Happy planting! 🌱