
Lawn
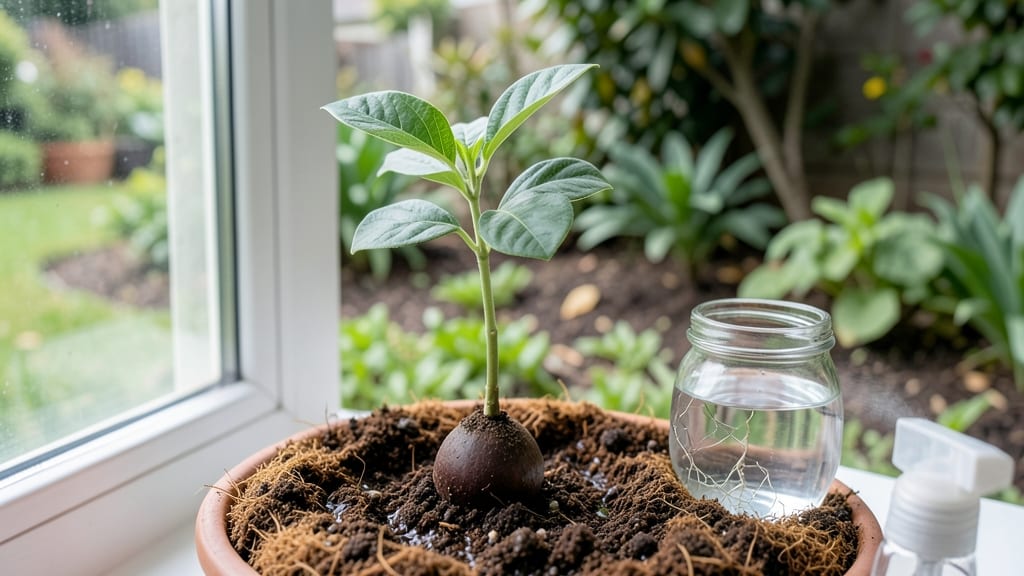
Sprouting an avocado seed in water feels like magic—no soil, no sunlight, just patience and a glass jar. 🌱 I’ve watched seeds grow roots in just 2-6 weeks with nothing but consistent water changes, and the excitement of seeing those first green leaves push through is unbeatable.
This method works even in small apartments where space is limited.
The secret isn’t complicated: start with a ripe avocado, clean the seed, and suspend it in water so the bottom half stays submerged. You’ll need a tall glass, toothpicks or a plastic wrap trick to keep it stable, and fresh water every few days.
Most people quit too soon—roots take time, but they’ll come if you stay consistent.
Once roots reach 3-6 inches, you can transplant into soil, but many gardeners keep them in water for months, watching the plant grow into a small tree.
The leaves will start as dark green and fuzzy, then turn glossy and mature—proof you’re doing it right. Just don’t rush it; avocados grow slow but steady.
Troubleshooting is easy: yellow leaves mean too much sun, brown spots mean rot from old water, and slow growth just means more patience. With the right setup, you’ll have a thriving avocado seedling ready for soil in no time—no green thumb required.
📚 In This Guide
- What you need
- Instructions
- Tips and common mistakes
- Wrapping up and next steps
What you need
- ● 1 fresh, organic avocado pit – Choose a seed from a ripe, healthy avocado (avoid store-bought ones treated with fungicides).
- ● Toothpicks (3-4) – For balancing the pit over water.
- ● Small glass or jar (8–16 oz) – Clear containers work best to monitor root growth.
- ● Filtered or tap water – Room-temperature, changed every 2–3 days.
- ○ Paper towels or coffee filters – To cover the jar and keep water clean (optional but helpful).
- ● Patience & a sunny windowsill (or grow light) – Indirect light is key for early growth!
- ● Hydroponic growing kit – For advanced setups with nutrient solutions.
- ● Small pot with drainage – Once roots hit 2–3 inches, transplant into soil.
- ● Humidity dome or plastic wrap – To retain moisture during early stages.
- ● Fertilizer (diluted seaweed or compost tea) – For faster leaf growth after transplanting.
- ● Grow light (LED or fluorescent) – If natural light is limited.
Step-by-Step instructions for germinating avocado seeds in water
Here's how I've sprouted dozens of avocado seeds—no soil, no sunlight, just patience and a glass.
🌱 Step 1: Prepare the Avocado Seed for Sprouting
Start with a fresh avocado pit—one that still has the dark brown skin intact. Rinse it thoroughly under cool water to remove any residual fruit. You'll want to clean off all the gummy residue, especially around the pointed end where the stem was attached. This ensures no mold or bacteria slows down germination.
Next, insert 3 toothpicks evenly around the middle of the seed, about ½ inch apart. These will suspend the seed over your glass without touching the water. I like to angle them slightly so the wider, flatter side of the seed faces downward—this is where the roots will emerge. If the seed feels too dry, soak it in warm water for 10 minutes to speed up the process.
💧 Step 2: Suspend the Seed Over Water
Fill a clear glass with enough water to reach about 1 inch deep—just enough to cover the bottom ¼ inch of the seed when suspended. The toothpicks should hold the seed steady, with the wider end just above the waterline. Change the water every 2-3 days to prevent bacterial growth and keep it fresh. You'll see tiny bubbles forming around the seed as it begins to break down and release enzymes for root growth.
Place the glass in a warm spot, away from direct sunlight. A kitchen counter near the stove (but not too close) works well—I've seen roots emerge in 2-6 weeks, depending on temperature. The key is consistency: keep the water level steady and the seed suspended. If the toothpicks weaken, prop the seed up with a small piece of plastic wrap instead.
☀️ Step 3: Monitor Root and Shoot Development
After about 1-2 weeks, you'll notice the seed starting to crack open slightly at the bottom. This is your first sign of life! Roots will emerge first, growing downward into the water. They'll look pale and delicate at first, but within 3-4 weeks, you should see roots reaching 2-3 inches long. This is when the seedling is ready for the next stage.
Once roots hit 2 inches, you'll also see a small shoot pushing upward from the top of the seed. This is the first true leaf beginning to form. Don't rush to transplant yet—wait until the shoot is at least 1 inch tall and the roots have thickened slightly. You'll know it's ready when the seedling looks sturdy enough to handle, with both roots and shoot showing good growth.
⏰ Step 4: Transition to Soil (When Ready)
When the seedling has both 2-inch roots and a 1-inch shoot, it's time to plant. Fill a small pot (about 4-6 inches deep) with well-draining potting mix. Make a hole in the center just big enough to fit the seedling. Gently place the seedling in, burying the seed itself about ½ inch deep—this helps stabilize it.
Water lightly but thoroughly, ensuring the soil is moist but not soggy. Place the pot in bright, indirect light for the first week to help it adjust. You'll want to keep the soil consistently moist (not waterlogged) during this transition. Within 2-4 weeks, you should see new leaves emerging from the top of the seed—this means your avocado seedling is thriving!
Tips & tricks for avocado seed sprouting success
A few simple adjustments can make all the difference when growing avocado roots from seeds.
Seed Preparation: The 10-minute warm water soak in Step 1 is your secret weapon—it kickstarts the germination process by softening the seed's outer shell. I've found that seeds with the dark brown skin still intact germinate faster because the skin helps retain moisture. If you notice any mold or slimy residue after rinsing, scrub it off gently with a soft toothbrush to prevent bacterial growth that could stall your sprouting progress.
Water Level Consistency: Keeping that water level steady at just covering the bottom ¼ inch of the seed is crucial. Too much water can cause rot, while too little slows growth. I use a clear glass so I can easily monitor the water level—just refill as needed to maintain that 1-inch depth. The tiny bubbles you'll see forming around the seed are a good sign—it means enzymes are breaking down the seed's protective layers to start root growth.
Temperature Matters: That 2-6 week germination window in Step 2 varies based on your environment. For faster results, place your seed near a warm spot like a sunny windowsill (but not direct sunlight) or even on top of your fridge. I've seen roots emerge in just 2 weeks when kept at around 70-75°F. If your kitchen is cooler, be patient—the process just takes a little longer. The key is consistency in warmth and moisture.
Transplant Timing: Waiting for both 2-inch roots and a 1-inch shoot before transplanting is critical for survival. I check for these milestones by gently holding the seedling between my fingers—it should feel sturdy enough to handle without breaking. The roots should also look thickened and less delicate. Rushing this step often leads to seedlings that can't support themselves in soil.
Pro Tips for Avocado Seed Sprouting
- A few simple adjustments can make all the difference when growing avocado roots from seeds.
- Seed Preparation: The 10-minute warm water soak in Step 1 is your secret weapon—it kickstarts the germination process...
- Water Level Consistency: Keeping that water level steady at just covering the bottom ¼ inch of the seed is crucial. T...
Frequently asked questions
Got questions about sprouting avocado seeds? You’re not alone!
Here are answers to the most common queries—from timing to troubleshooting—so you can grow those roots with confidence.
How long does it take for an avocado seed to sprout roots?
Patience is key! Most avocado seeds start showing roots in 2–6 weeks, depending on temperature, water consistency, and seed health. Keep the toothpicks in water (changed every 2–3 days) and place the jar in indirect sunlight—roots may appear faster if the seed stays warm (around 70–80°F).
What if my avocado seed isn’t sprouting after 6 weeks?
Don’t give up yet! Try these fixes:
- Check the water: Stagnant or chlorine-rich water can stunt growth. Use filtered or room-temperature water.
- Adjust lighting: Too much direct sun can dry it out; too little slows growth. A bright, indirect spot (like a kitchen windowsill) works best.
- Test the seed: If it’s soft or moldy, it may be rotting. Remove it and start fresh with a new seed.
Can I use anything other than toothpicks to suspend the seed?
Toothpicks are classic, but get creative with:
- Chopsticks or skewers (thicker = more stability)
- Bamboo sticks or even popsicle sticks (for smaller seeds)
- Dental floss or thin wire (wrap tightly around the seed)
Do I need sunlight to grow avocado roots?
Not for the initial root stage! Avocado seeds can sprout roots without sunlight as long as they have:
- Warmth (60–80°F)
- Consistent moisture (water changed every 2–3 days)
- A dark or low-light spot (like a cabinet or closet)
What should I do once roots reach 2–3 inches?
Time to plant! Once roots hit 2–3 inches, transfer the seed to:
- A small pot with well-draining soil (mix potting soil with perlite)
- A humid environment (cover with a plastic bag for a few days)
- Indirect sunlight (avoid harsh light until leaves harden)
Wrapping up and next steps
Sprouting an avocado seed is a rewarding and simple process that brings life to something you might otherwise discard! With just a few basic supplies and patience, you can grow a thriving plant indoors—no soil or sunlight required.
Whether you're a beginner gardener or just love the idea of nurturing new life, this project is a fun and educational way to connect with nature.
Ready to take the next step? Once your avocado seedling has strong roots and a few leaves, consider transplanting it into soil to encourage further growth. Happy growing! 🌱✨