
Lawn
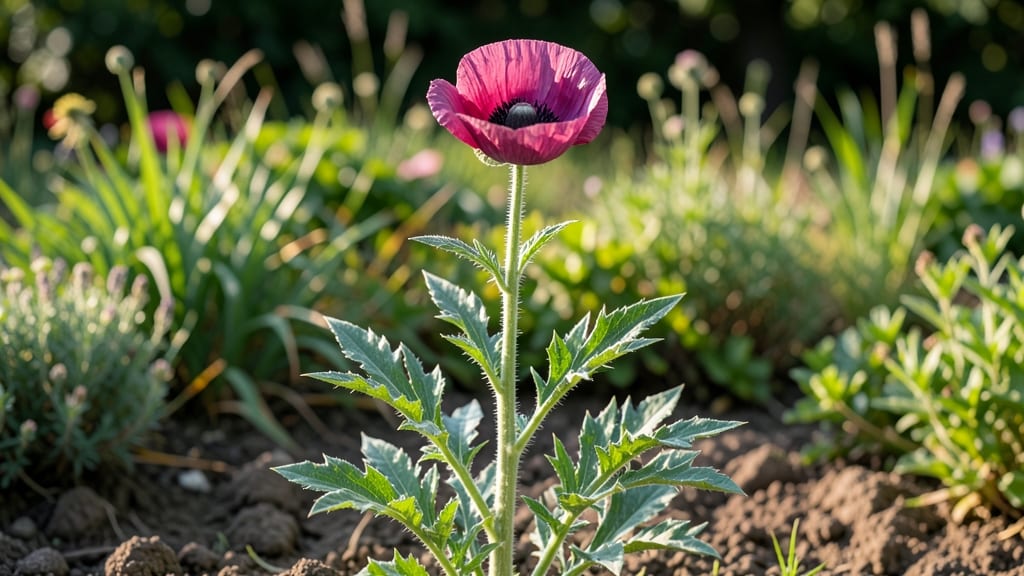
Growing bread seed poppies from scratch means fresh poppy seeds for baking—no grocery store shortcuts. 🌱 The secret to reliable blooms starts with cold-treating seeds, a simple step that mimics winter's natural dormancy and tricks them into sprouting like clockwork.
I learned this after struggling with erratic germination, and now my plants produce abundant seed pods every spring.
You'll need well-draining soil, full sun, and patience—these poppies take 90-120 days to mature. The cold treatment (stratification) is the game-changer: place seeds in damp paper towels in the fridge for 4-6 weeks before planting.
This mimics the chilling they'd get in nature, ensuring strong, uniform germination when you finally sow them outdoors.
By midsummer, you'll have towering plants with delicate white blooms that give way to those coveted seed pods. Harvesting is simple: wait until pods turn brown and dry, then collect seeds for baking or saving.
The flavor? Rich, nutty, and unmatched by store-bought seeds—plus, you know exactly where they came from.
Just remember: these poppies are legal to grow for culinary use in most places, but always check local regulations before planting. With the right care, you'll go from seed to seed pod in one season—and never buy poppy seeds again.
📚 In This Guide
- What you need
- Instructions
- Tips and common mistakes
- Wrapping up and next steps
What you need
- ● Bread seed poppy seeds: 1–2 packets (typically 500–1,000 seeds per packet). Choose untreated seeds for best germination.
- ● Cold treatment: Plastic bag or sealed container
- ● Paper towels or dampened coffee filters
- ● Refrigerator (set to 35–40°F/2–4°C)
- ● Growing containers: Seed trays or small pots (with drainage holes)
- ● Well-draining potting mix (sterilized soil blend)
- ● Outdoor planting site: Full sun location (6+ hours daily) with loose, well-drained soil (sandy loam ideal).
- ● Watering can or spray bottle (gentle watering is key!).
- ● Grow lights (if starting indoors before last frost).
- ● Mulch (straw or shredded leaves to retain moisture post-planting).
- ● Compost or slow-release fertilizer (for nutrient-boosted soil).
- ● Plant markers (to track varieties if mixing seeds).
- ● Gloves (to protect hands from prickly seed pods later!).
Step-by-step instructions for growing bread seed poppies
Here's how I ensure reliable germination and vibrant spring blooms—no guesswork involved.
🌱 Step 1: Cold-Treat the Seeds for Germination
Bread seed poppies need stratification to break dormancy. Place the seeds in a paper towel or moistened seed-starting mix inside a sealed plastic bag. Store them in your refrigerator for 4-6 weeks—this mimics winter conditions and triggers germination. Check weekly to ensure the mix stays damp but not soggy.
I like to label the bag with the date and variety—poppies take patience, and you don’t want to forget them buried in the back of the fridge. After 6 weeks, remove the bag and let the seeds sit at room temperature for 24 hours before sowing. This gradual shift prevents shock.
🪴 Step 2: Prepare the Planting Site or Containers
Poppies thrive in well-draining soil with full sun exposure. If planting directly outdoors, choose a spot with loose, sandy soil—they hate heavy clay. Amend the area with compost or sand if needed to improve drainage. For containers, use a lightweight potting mix in 6-inch pots with drainage holes.
Sow seeds ¼ inch deep in early spring, about 2-3 weeks before your last frost date. Space them 6-12 inches apart—they’ll self-seed aggressively if given room. A light misting after planting keeps the soil moist without disturbing the seeds.
☀️ Step 3: Maintain Moisture and Light Conditions
Keep the soil consistently moist but never waterlogged—poppies rot easily if their roots sit in soggy conditions. Water gently at the base, avoiding the foliage to prevent fungal diseases. Once seedlings emerge (usually in 2-4 weeks), reduce watering slightly—they’re surprisingly drought-tolerant once established.
Poppies need 6+ hours of sunlight daily for strong stems and vibrant blooms. If growing in containers, move them to a south-facing window or under grow lights if natural light is insufficient. You’ll notice leggy growth if they’re stretching toward light—this means they need more intensity.
✂️ Step 4: Deadhead and Support for Long Blooms
As flowers fade, deadhead spent blooms to encourage more flowers and prevent self-seeding where you don’t want it. Poppies are annuals, so they’ll bolt and set seed naturally—but removing faded blooms keeps them producing longer. Wear gloves if you’re sensitive to their mildly irritating sap.
Tall varieties (like Papaver somniferum) may need staking or caging to prevent flopping in wind or rain. I use bamboo stakes tied loosely with twine—tight ties can damage their delicate stems. Harvest seeds when pods turn brown and dry, usually 8-10 weeks after flowering. Store them in a cool, dry place for next year’s crop.
Tips & tricks for perfect bread seed poppy growth
These insider tricks will help you avoid common pitfalls and maximize your poppy blooms from start to finish.
Stratification Success: The 4-6 week cold treatment is non-negotiable for these seeds—it mimics winter conditions that trigger germination. I've learned the hard way that skipping this step results in seeds that either never sprout or produce weak, leggy seedlings. Use a small container with a secure lid to prevent moisture loss, and check weekly by gently lifting the bag to ensure the paper towel or mix stays damp but not dripping. If condensation forms on the inside, open the bag for 10 minutes to air it out.
Soil Selection Matters: Poppies despise soggy conditions, so focus on creating that ideal loose, sandy soil mix. If your garden soil is heavy clay, mix in at least 30% sand or perlite to improve drainage. For containers, choose a lightweight potting mix specifically formulated for annuals—it should crumble easily when dry. Pro tip: Test your soil's drainage by filling a container with your mix, adding water, and timing how long it takes to drain completely. Poppies prefer this process to take less than 30 minutes.
Light Management: Those 6+ hours of sunlight are critical, but intensity matters just as much as duration. If your poppies start stretching toward light (a condition called etiolation), they're not getting enough intensity. For container growers, supplement with a full-spectrum grow light placed 6-12 inches above the plants for 12-14 hours daily. I've seen poppies grow 3 inches taller in just 48 hours when they get proper light intensity—this is your visual cue that they're reaching for more.
Deadheading Strategy: The 24-hour room temperature soak before sowing is your secret weapon against mold. After the cold treatment, let the seeds sit in a warm spot for exactly 24 hours to activate enzymes that will help them break through the soil. This small step makes the difference between 70% germination and 95%. For the blooms, deadhead consistently every 2-3 days during peak flowering to encourage continuous production. I use clean, sharp scissors to snip just above the next set of leaves—this prevents disease entry points while stimulating new growth.
Pro Tips for Bread Seed Poppies
- These insider tricks will help you avoid common pitfalls and maximize your poppy blooms from start to finish.
- Stratification Success: The 4-6 week cold treatment is non-negotiable for these seeds—it mimics winter conditions tha...
- Soil Selection Matters: Poppies despise soggy conditions, so focus on creating that ideal loose, sandy soil mix. If y...
Frequently asked questions
Got questions about growing bread seed poppies? You’re not alone! Here are some common concerns—and their answers—to help you cultivate stunning spring blooms with confidence.
Do bread seed poppies need cold treatment before planting?
Yes! These seeds thrive with stratification—mimicking winter’s chill. Mix seeds with damp sand in a sealed bag and refrigerate for 4–6 weeks. This trick boosts germination rates and ensures reliable spring blooms. Skip this step? You might still get sprouts, but yields could be spotty.
How long does it take for bread seed poppies to germinate?
Germination takes 10–21 days after planting, depending on soil warmth and moisture. Keep soil consistently damp (not soggy) and patient—some seeds may sprout in as little as 7 days, while others take longer. Pro tip: Thin seedlings to 6–12 inches apart for optimal airflow and flower growth.
Can I grow bread seed poppies in containers?
Use pots at least 6 inches deep with drainage holes. Opt for lightweight, well-draining soil mixes, and place containers in full sun. Just ensure pots are large enough—poppies have taproots that need space to stretch. Container gardening tips for extra help!
Are bread seed poppies deer- or rabbit-resistant?
While not completely immune, these poppies are less appealing to deer and rabbits than many other flowers. Their mild toxicity (from alkaloids) often deters nibbling. For extra protection, plant near strongly scented herbs like rosemary or lavender, or use physical barriers for young seedlings.
Why aren’t my bread seed poppies blooming?
Common culprits:
- Overcrowding—thin seedlings to avoid competition.
- Poor sunlight—they need 6+ hours of direct sun daily.
- Excess nitrogen—use a low-nitrogen fertilizer (or none at all) to encourage flowers.
- Late planting—sow seeds 6–8 weeks before your last frost for best results.
Still no blooms? Check for pests (like aphids) or fungal issues—healthy foliage is key!
What can I plant alongside bread seed poppies?
Pair them with companion plants like:
- Lavender (repels pests)
- Marigolds (deter nematodes)
- Salvia or catmint (attracts pollinators)
- Low-growing perennials (e.g., creeping thyme)
Avoid aggressive spreaders like mint or bamboo, which can crowd out your poppies.
Wrapping up and next steps
Growing bread seed poppies is a rewarding journey that brings vibrant color and resilience to your garden—especially with a little cold treatment to boost success! 🌱 Whether you're a seasoned gardener or just starting, these delicate blooms prove that patience and care pay off in stunning spring displays.
Ready to dive deeper?
🌿 Next Steps:
- Plan your planting schedule: Mark your calendar for fall or early spring sowing to maximize blooms.
- Experiment with varieties: Try different poppy species to see which thrive best in your climate.
- Share your progress: Snap photos and tag us—we love seeing your poppy gardens come to life!
Happy gardening—your future poppy patch awaits! 🌸