
Transplanting
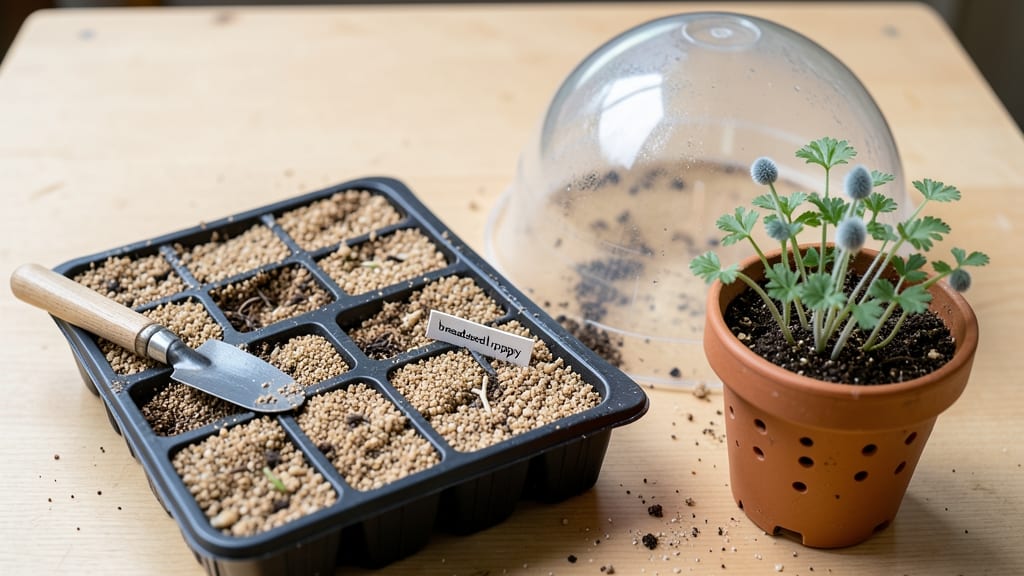
Growing breadseed poppy seedlings is the secret to next year's vibrant red meadows—if you transplant them right. 🌱 I've learned the hard way that these delicate seedlings need special care, or they'll bolt too soon or flop in the garden.
The trick is patience: let them grow strong indoors first, then move them when they're ready. Start with a shallow tray of seed-starting mix, barely covering those tiny seeds. Keep them in a warm spot (around 65-70°F) until sprouts appear in 7-14 days.
Too much moisture causes damping-off, so water from below and keep the tray in bright light—not direct sun. Once they have two true leaves, they're ready for their first move to individual pots. By early spring, your seedlings will be sturdy and ready for the garden.
Plant them in well-drained soil, spacing them 12-18 inches apart—they'll spread naturally. The payoff? A cloud of bright blooms by next summer, with seeds that self-sow for years to come. Avoid transplanting too early or too late—aim for when soil temps hit 50°F and nighttime frosts are over.
Breadseed poppies (Papaver rhoeas) are different from oriental poppies—they're tougher, self-seeding, and perfect for cottage gardens or wildflower mixes. Here's how to keep them thriving!
📚 In This Guide
- What you need
- Instructions
- Tips and common mistakes
- Wrapping up and next steps
What you need
- ● Breadseed poppy seeds: 1 packet (typically 1,000–2,000 seeds, depending on the variety). Choose Papaver somniferum for culinary or ornamental use.
- ● Seed-starting trays or biodegradable pots: 1–2 trays (50+ cells) or 100+ small pots (2–3 inches in diameter). Opt for peat-based or coconut coir pots for eco-friendly transplanting.
- ● High-quality seed-starting mix: 1–2 bags (1–2 cubic feet). Use a sterile, well-draining mix (e.g., 50% peat moss, 30% perlite, 20% vermiculite).
- ● Grow lights or sunny windowsill: A full-spectrum LED grow light (12–16 hours/day) or a south-facing window with 6+ hours of direct sunlight.
- ● Spray bottle: 1 (for gentle watering). Avoid over-saturating the soil.
- ● Misting nozzle or watering can: 1 (with a fine rose attachment). Keep soil consistently moist but not soggy.
- ● Hardening-off tray or flat: 1 (for acclimating seedlings before transplanting). Use a shallow tray with drainage holes.
- ● Transplanting tools: Small hand trowel or spoon
- ○ Gloves (optional, for cleanliness)
- ● Seedling heat mat: 1 (to maintain soil temps between 65–75°F for faster germination).
- ● Humidity dome or plastic wrap: 1 (to retain moisture during germination). Remove once sprouts appear.
- ● Fertilizer: A balanced, water-soluble fertilizer (e.g., 5-5-5 or 10-10-10) for post-transplant care. Dilute to half-strength.
- ● Compost or worm castings: 1 bag (for enriching transplanting soil). Mix in at a rate of 10–20%.
- ● Labeled plant markers: 100+ (to track varieties if growing multiple types).
- ● Row cover or shade cloth: 1 (for protecting seedlings from strong winds or pests after transplanting).
Instructions for transplanting breadseed poppy seedlings
Here's how I handle these delicate seedlings to ensure strong, blooming plants next season.
🌱 Step 1: Prepare the Transplant Site
Choose a location with full sun exposure—breadseed poppies need at least 6-8 hours of direct sunlight daily to thrive. The soil should be well-draining but moist, so I always test it first by squeezing a handful. If it holds together tightly, I mix in 2-3 inches of compost to loosen the texture. Poppies hate soggy roots, so avoid low spots where water pools.
Work the soil to a depth of 12 inches, breaking up any compacted layers. I like to use a broadfork to aerate without disturbing the soil structure too much. If your soil is heavy clay, add a 50/50 mix of sand and compost to improve drainage. The goal is loose, crumbly soil that won't suffocate young roots.
🪴 Step 2: Acclimate Seedlings Before Moving
Breadseed poppy seedlings are sensitive to shock, so I start hardening them off 7-10 days before transplanting. Move them outdoors to a shaded, sheltered spot for 1-2 hours the first day, gradually increasing exposure by 1 hour daily. Watch for wilting or yellowing leaves—this signals they're not ready for longer outdoor time.
On the final day, leave them outside all day in partial shade if temperatures exceed 80°F. Poppies can handle heat, but seedlings need time to adjust. If nighttime temps drop below 50°F, cover them with a lightweight row cover to prevent chilling. You'll know they're ready when they stand upright and continue growing steadily.
☀️ Step 3: Transplant with Care
Dig holes twice as wide as the root ball but no deeper—poppy roots are shallow and resent being buried too deeply. Space seedlings 12-18 inches apart in rows 18-24 inches apart to allow for their mature spread. Gently remove each seedling from its container, supporting the stem with one hand while loosening the roots with the other.
Place the seedling in the hole so the top of the root ball sits level with the soil surface. Poppies dislike being planted too deep, which can cause rot. Fill the hole with soil, pressing lightly around the base to eliminate air pockets. Water deeply immediately after transplanting to help settle the roots and reduce shock. Use a fine-mist spray to avoid disturbing the soil around the stems.
💧 Step 4: Maintain Moisture and Light
Keep the soil consistently moist but not soggy for the first 2-3 weeks after transplanting. I water in the early morning to allow foliage to dry before evening, which prevents fungal diseases. Poppies are drought-tolerant once established, but seedlings need steady moisture to root deeply. You'll see new growth within 10-14 days if conditions are right.
After the initial settling period, reduce watering to once every 5-7 days, depending on rainfall. Mulch around the base with 1-2 inches of straw to retain moisture and suppress weeds. Avoid letting mulch touch the stems—poppies are prone to rot in damp conditions. By mid-summer, your seedlings will be sturdy enough to handle dry spells.
✂️ Step 5: Protect and Encourage Growth
If pests like aphids or slugs appear, address them immediately—poppy seedlings are tender and can be overwhelmed quickly. I use a neem oil spray for aphids and set out beer traps for slugs. Avoid chemical pesticides, as they can harm beneficial insects that pollinate poppies. Healthy seedlings will develop deep green leaves and a strong central stem within a few weeks.
By late summer, your poppies will start sending up flower stalks. Pinch back the first blooms if you want larger, more abundant flowers next year—this encourages the plant to focus on root and foliage growth. Poppies are biennials, so they'll bloom in their second year if given proper care. Mark their location now so you can enjoy their vibrant blooms come spring.
Tips & tricks for transplanting breadseed poppy seedlings
These little details make all the difference between delicate seedlings that thrive and ones that struggle to take root.
Soil Preparation Secret: In Step 1, when you're testing soil moisture by squeezing a handful, look for a crumbly texture that falls apart easily—this is ideal. If your soil is too dense, I recommend adding 2-3 inches of compost and mixing in 1 part perlite to 2 parts compost for extra drainage. This creates the perfect airy environment breadseed poppies love, preventing that dreaded "soggy root" problem that leads to rot. The 12-inch depth you work to is crucial—it gives roots room to establish without competing with compacted layers.
Hardening Off Hack: During the 7-10 day hardening process in Step 2, I've found that placing seedlings on a mesh tray rather than a solid surface improves air circulation around the roots. This helps prevent fungal issues while they adjust. On days when temps exceed 80°F, move them to partial shade by 10 AM to avoid heat stress. I also recommend doing a "finger test" daily—gently press a leaf. If it springs back immediately, they're ready for longer exposure.
Transplanting Technique: When you're handling those delicate stems in Step 3, here's what I do: After loosening the roots, I dip the entire root ball in a water-compost slurry (equal parts water and compost) for 10 seconds before planting. This gives them an instant nutrient boost while helping soil particles stick to the roots. The 12-18 inch spacing might seem generous, but it prevents overcrowding that leads to weak stems and poor air circulation—critical for preventing fungal diseases.
Post-Transplant Care: That 2-3 week moisture window in Step 4 is your best chance to establish strong roots. I use a soaker hose set to low flow in the morning to maintain consistent moisture without disturbing seedlings. The 1-2 inches of straw mulch should be spread in a donut shape around each plant, keeping it 1 inch away from stems to prevent rot. This mulch ring also creates a natural barrier against weeds that compete for nutrients.
Pro Tips for Breadseed Poppy Seedlings
- These little details make all the difference between delicate seedlings that thrive and ones that struggle to take root.
- Soil Preparation Secret: In Step 1, when you're testing soil moisture by squeezing a handful, look for a crumbly text...
- Hardening Off Hack: During the 7-10 day hardening process in Step 2, I've found that placing seedlings on a mesh tray...
Frequently asked questions
Got questions about nurturing your breadseed poppy seedlings? You’re not alone—these delicate plants need just the right care to thrive! Below, we’ve answered the most common queries to help you avoid pitfalls and set your seedlings up for success.
When is the best time to transplant breadseed poppy seedlings outdoors?
Transplant your seedlings after the last frost when soil temps reach at least 50°F (10°C). Poppies are frost-sensitive, so rushing too early can stunt growth. Aim for late spring or early summer in most climates. Pro tip: Harden off seedlings for 7–10 days before transplanting to reduce shock!
How long does it take for breadseed poppy seedlings to germinate?
Germination typically takes 7–14 days in warm, moist conditions (70–75°F or 21–24°C). If your soil is cool or dry, germination may take up to 3 weeks. Avoid overwatering—poppy seeds need consistent moisture but not soggy soil. Patience pays off!
What’s the ideal spacing for transplanting breadseed poppy seedlings?
Space seedlings 12–18 inches apart in rows 18–24 inches apart for full, airy blooms. Crowding leads to leggy stems and fewer flowers. If growing for seeds, give them extra room (24 inches apart) to prevent disease. Bonus: Thin seedlings early to avoid root competition!
Why are my breadseed poppy seedlings turning yellow or wilting?
Yellowing leaves often signal overwatering or poor drainage—poppies hate soggy roots! Wilting can also mean underwatering or heat stress. Check soil moisture (top inch should dry between waterings) and ensure well-draining soil. Fix it: Adjust watering and mulch to retain moisture without suffocating roots.
Can I grow breadseed poppies from seed indoors, or should I direct-sow?
While you can start seeds indoors, poppies germinate best outdoors due to light requirements. If sowing indoors, use bright light (or a grow lamp) and transplant quickly to avoid leggy seedlings. Direct-sowing is easier—just scatter seeds thinly on prepared soil and let nature do the work!
What’s a good alternative if breadseed poppies don’t thrive in my climate?
Try California poppies (drought-tolerant) or corn poppies (similar care, brighter colors). For cooler climates, Iceland poppies are hardy and low-maintenance. Each offers stunning blooms with minimal fuss—just check their specific light and soil needs!
Wrapping up and next steps
Growing breadseed poppy seedlings is a rewarding journey that sets the stage for stunning blooms next season! With the right timing, gentle handling, and a little patience, you’ll soon be enjoying a garden bursting with vibrant color. 🌸
Ready to take the next step? Mark your calendar for transplanting day and gather your supplies—your future poppy patch is just weeks away! Whether you’re a seasoned gardener or a beginner, every careful step you take now will pay off in a sea of cheerful flowers. Happy planting! 🌱