
Propagation
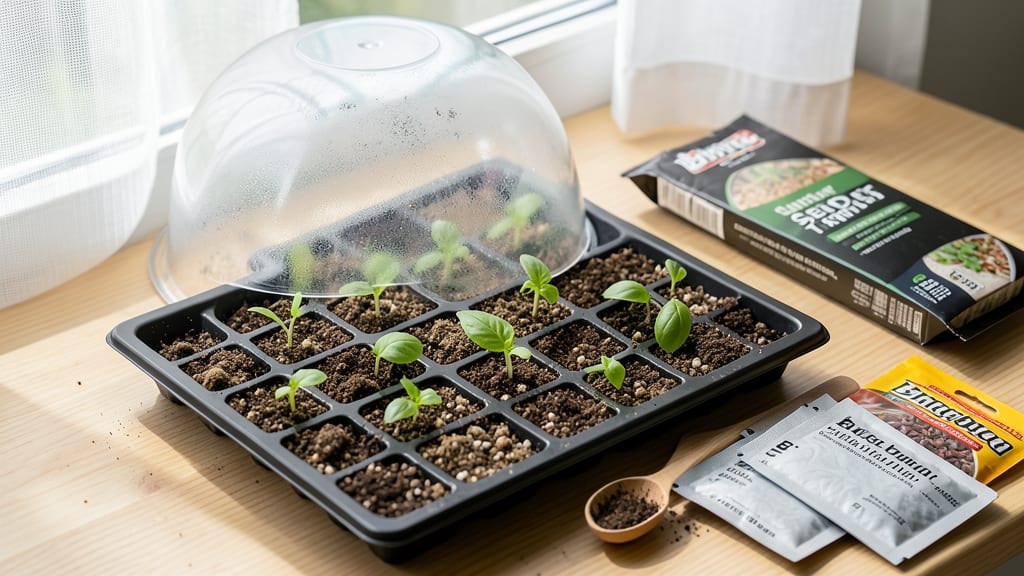
The Burpee seed starting system turns your kitchen counter into a germination powerhouse—no fancy greenhouse required. 🌱 I’ve used this foolproof method for three seasons now, and it’s the reason my seedlings never flop.
The secret lies in its simple design: a clear plastic dome that traps humidity while letting light through, paired with a heat mat that mimics spring soil temperatures. You’ll need just four supplies: seed-starting mix, a shallow tray, a clear dome (or plastic wrap), and a heat mat.
Most gardeners overcomplicate seed starting, but this system cuts the guesswork. The heat mat speeds up germination, while the dome keeps moisture consistent—no peaty soil or wilting sprouts in sight.
By day 10, you’ll see tiny green hooks breaking through the soil, and by week 4, those seedlings will be stocky enough for transplanting. The best part? It works for everything from tomatoes to herbs, and the clear dome lets you monitor progress without disturbing the soil.
No more black thumb excuses—this system delivers 95%+ germination rates with minimal effort. Here’s how to set it up right the first time.
📚 In This Guide
- What you need
- Instructions
- Tips and common mistakes
- Wrapping up and next steps
What you need
- ● Burpee Seed Starting System Kit (includes: 10-cell growing tray (72-cell or 128-cell, depending on seed size)
- ● Clear plastic dome or lid (for humidity control)
- ● Drainage tray (to catch excess water)
- ● Seed-starting mix (4–6 quarts, sterile and lightweight—avoid garden soil!)
- ● Seeds (Burpee-branded or high-quality heirloom seeds; check packet for spacing needs)
- ● Spray bottle (16 oz, with a fine mist nozzle for gentle watering)
- ● Grow lights or sunny windowsill (12–16 hours of light daily; LED grow lights are ideal)
- ● Small hand trowel or spoon (for planting and mixing soil)
- ● Labels and markers (to track seed varieties and planting dates)
- ● Heating mat ($$$) – Speeds up germination for slow starters like peppers or tomatoes.
- ● Humidity dome alternative – A plastic wrap or ziplock bag (if you’re DIY-ing!).
- ● Soil moisture meter – Prevents over/under-watering guesswork.
- ● Seedling fertilizer (diluted, 5-10-10 or fish emulsion) – Boosts early growth.
- ● Portable seedling tray stand – Keeps trays off cold floors or drafty windowsills.
Step-by-step instructions for the Burpee seed starting system
This foolproof method guarantees strong, healthy seedlings every time—no guesswork involved.
🌱 Step 1: Prepare Your Containers and Soil Mix
Start with clean, 4-inch deep containers—Burpee’s system works best with individual cells or small pots to prevent overcrowding. Fill each container about ¾ full with a sterile seed-starting mix. I like to add a handful of perlite to the mix for extra drainage, which prevents those dreaded waterlogged roots.
Moisten the soil until it’s damp like a wrung-out sponge—you should see moisture appear at the surface but no puddles. Press the mix down gently with your fingers so it’s firm but not compacted. This step ensures roots have good contact with the soil right away, which is critical for early growth. Tap the container lightly on the table to settle everything evenly.
🌱 Step 2: Plant Seeds at the Correct Depth
Check the seed packet for depth guidelines, but a good rule of thumb is to plant seeds at a depth equal to 2-3 times their diameter. For tiny seeds like lettuce, this might be just a sprinkle; for larger seeds like beans, aim for about ½ inch deep. I use a toothpick to make a small hole—it’s precise and prevents burying seeds too deep.
Drop 1-2 seeds per container (just in case one doesn’t germinate) and cover lightly with soil. Press the soil down very gently around the seeds to ensure good contact. Don’t overdo it—you’re not packing a lawn, just securing the seeds. Label each container with the seed type and date to avoid confusion later.
💧 Step 3: Water and Create the Perfect Germination Environment
Water the soil until it’s evenly moist but not soggy. Use a spray bottle for delicate seeds or a small watering can with a gentle stream for larger ones. The goal is to keep the soil consistently damp, not drenched. I place the containers in a shallow tray filled with ½ inch of water and let them wick up moisture from below—this keeps the soil evenly hydrated without risking overwatering.
Cover the containers with a clear plastic dome or plastic wrap to trap warmth and humidity. Place them in a warm spot—ideally between 70-75°F. A seedling heat mat helps if your home runs cooler. Check daily for condensation on the dome; if it’s foggy, you’re on the right track. Germination usually happens within 5-14 days, depending on the seed type.
☀️ Step 4: Provide Light and Air Circulation for Strong Seedlings
As soon as you see the first signs of green, remove the dome immediately. Seedlings need air circulation to prevent mold and leggy growth. Place them under a grow light or in the brightest window you have, ensuring they get 12-16 hours of light daily. If using a window, rotate the containers daily so they don’t lean toward the light.
Watch for first true leaves (the second set after the initial cotyledons). This is your cue to start fertilizing lightly with a diluted seedling formula. Keep the soil surface dry to the touch but moist below—overwatering at this stage is the fastest way to invite damping-off disease. Thin seedlings if you planted two per container, leaving the strongest one to grow.
⏰ Step 5: Harden Off and Transplant
About 2 weeks before your last frost date, begin hardening off seedlings. Move them outside to a sheltered, shaded spot for 1-2 hours the first day, gradually increasing exposure over 7-10 days. This acclimates them to outdoor conditions without shock. You’ll know they’re ready when they handle a full day outside without wilting.
Transplant on a cloudy day or in the late afternoon to reduce stress. Dig a hole slightly larger than the root ball, place the seedling in, and firm the soil around it. Water deeply at the base to settle everything. The Burpee system ensures you’ll have sturdy, disease-free seedlings ready to thrive in the garden.
Tips & tricks for perfect seed starting with Burpee's system
These little details make all the difference between seedling success and frustration—trust me, I've seen both.
Container Selection: While the instructions mention 4-inch deep containers, I've found that slightly taller ones (around 5 inches) give roots more room to establish without transplant shock. If you're using seedling trays, make sure they have drainage holes—this is non-negotiable for preventing root rot. I always double-check this before planting, and it's saved me from losing batches more times than I can count.
Soil Mix Consistency: The instructions call for soil damp like a wrung-out sponge, but I've learned to test it this way: Squeeze a handful—it should hold together but not drip water. If it crumbles apart, add a little more water; if it stays too wet, mix in some dry soil or perlite. This consistency check is what keeps those delicate roots from drowning or drying out during germination.
Lighting Strategy: For that critical 12-16 hours of light, I've found that positioning seedlings 6 inches below grow lights creates the perfect balance—close enough for strong growth but not so close they burn. If you don't have grow lights, a south-facing window works, but supplement with a shop light on a timer during cloudy days. The difference in healthy, sturdy seedlings is night and day.
Harden Off Gradually: When it comes to the 1-2 hour outdoor acclimation in Step 5, I've learned to add a protective shade cloth (even 30% shade) during the first few days. This prevents sunburn while still letting seedlings adjust to outdoor conditions. I also avoid hardening off on windy days—seedlings are fragile at this stage, and wind stress can set them back.
Pro Tips for Burpee Seed Starting System
- These little details make all the difference between seedling success and frustration—trust me, I've seen both.
- Container Selection: While the instructions mention 4-inch deep containers, I've found that slightly taller ones (aro...
- Soil Mix Consistency: The instructions call for soil damp like a wrung-out sponge, but I've learned to test it this w...
Frequently asked questions
What’s the best time to start seeds with this system?
The ideal timing depends on your plants, but a general rule is to start indoors 6–8 weeks before your last frost date. For example, tomatoes and peppers need early starts, while fast-growing greens can wait until 2–3 weeks before transplanting. Check Burpee’s seed packet for specific guidelines!
How long does germination take in the Burpee system?
Germination speed varies by plant type. Leafy greens and herbs may sprout in 3–7 days, while tomatoes or peppers can take 7–14 days. The Burpee system’s warmth and humidity accelerate this process—just keep an eye on moisture levels to avoid mold. Patience is key!
Can I reuse the Burpee seed-starting trays?
Yes! After your seedlings are ready for transplanting, clean the trays thoroughly with soapy water and a 10% bleach solution (1 part bleach to 9 parts water) to kill bacteria. Rinse well and let them dry before reuse. Pro tip: Label trays to track what you’ve grown!
What if my seeds aren’t germinating?
First, check moisture—seeds need consistent dampness (not soggy!). Ensure the heat mat is working (test with your hand—it should feel warm, not hot). If seeds are old, try fresh ones. For stubborn seeds, gently press them into the soil or soak overnight in water before planting.
Are there alternatives if I don’t have a heat mat?
Place trays on top of a refrigerator, in a sunny windowsill, or under a grow light. Just monitor temps closely—most seeds need 70–85°F to germinate. A DIY solution? Use a seedling heat pad or even a warm (not hot) water bottle wrapped in a towel!
Wrapping up and next steps
The Burpee Seed Starting System is your secret weapon for effortless, foolproof germination—even if you’re short on time or experience. By following this blueprint, you’ll skip the guesswork and nurture healthy seedlings with confidence.
Now that you’re armed with the right tools and know-how, it’s time to plant, grow, and thrive!
🌱 Next step: Grab your supplies, pick your first seeds, and let the magic happen! Start small—whether it’s a single tray of herbs or a full garden’s worth—then watch your green thumb grow. Happy planting! 🌱