
Lawn
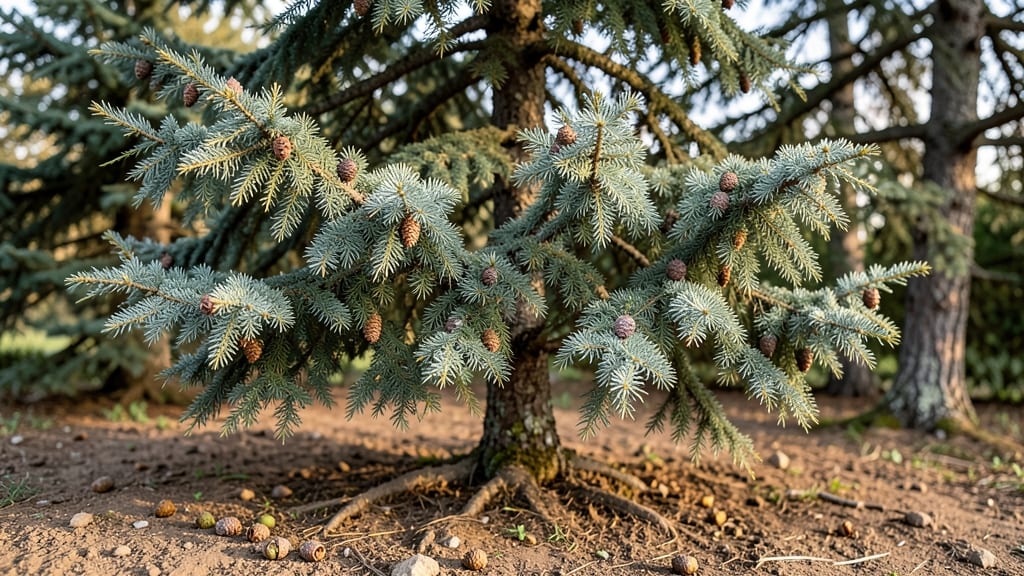
Cold-stressed cedar seed pods hold the key to growing sturdy trees that thrive for decades. 🌲 I’ve learned that the secret to reliable germination isn’t just planting—the timing and treatment of those tiny seeds make all the difference.
Most gardeners overlook the cold stratification step, which tricks seeds into breaking dormancy naturally, just like they would in the wild.
The process starts with identifying mature seed pods—look for the small, papery cones that open when dry. Collect them in late summer or early fall, then store them in a moist, cold environment (like a sealed bag in the fridge) for 60-90 days.
This mimics winter conditions, and when you plant them in well-draining soil, you’ll see sprouts within 4-8 weeks.
What you’ll end up with are hardy young cedars that resist disease and pests better than nursery-grown trees. The scent of fresh pine needles and the sight of new growth in just a few months make the effort worth it.
Plus, you’ll save money and get trees perfectly suited to your climate.
This method works for Eastern red cedar, white cedar, and even junipers—just adjust the cold treatment time based on your specific species. Whether you’re restoring a windbreak or adding privacy, these seeds give you a head start on a low-maintenance, long-lived tree.
📚 In This Guide
- What you need
- Instructions
- Tips and common mistakes
- Wrapping up and next steps
What you need
- ● Cedar seed pods: Collect fresh or dried pods from Western red cedar (Thuja plicata) or another suitable cedar species. Aim for 50–100 pods to maximize germination success.
- ● Plastic storage bags: 2–4 quart-sized bags (resealable, like Ziploc) to mimic cold stratification.
- ● Potting soil: 1–2 gallons of well-draining, sterilized potting mix (avoid garden soil—it may harbor pests or diseases).
- ● Seed-starting trays or small pots: 6–12 (2–3 inch diameter) containers with drainage holes.
- ● Spray bottle: For gentle watering to keep soil moist without over-saturating.
- ● Plastic wrap or humidity dome: To create a mini greenhouse effect during germination.
- ● Pruning shears or scissors: For carefully opening seed pods to extract seeds.
- ○ Fine-mesh strainer (optional): Helps separate seeds from chaff if pods are fibrous.
- ○ Thermometer (optional): To monitor cold stratification temps (35–45°F is ideal).
- ○ Heat mat (optional): For post-stratification warmth (70–75°F) to speed up germination.
- ○ Gloves (optional): Cedar seeds can be slightly irritating—wear them if you’re sensitive!
- ● Patience: Cedar seeds are slow germinators—expect 4–12 weeks (or longer!) for sprouts.
- ● Consistent moisture: Keep soil evenly damp (not soggy) throughout the process.
- ● Indoor space: A cool, dark spot (like a fridge) for stratification, then a sunny windowsill or grow light for seedlings.
- ● Knowledge of cedar care: Research light requirements and transplanting tips for young cedar seedlings.
How to germinate cedar seed pods using cold stratification
Cold-stressed germination unlocks cedar seeds' natural dormancy—here's how to do it right.
🌱 Step 1: Harvest and Prepare the Seed Pods
Collect mature cedar seed pods when they've turned a deep brown and opened slightly—this usually happens in late summer or early fall. Avoid green or unripe pods, as they won't germinate properly. Gently shake the pods over a clean cloth to release the seeds, or split them open with a small knife if they're stubborn. You'll need about 40-50 seeds to start your 4 plants.
Once you've collected the seeds, spread them out on a paper towel to dry for 24 hours in a well-ventilated area. This prevents mold and ensures they're ready for stratification. Store them in a sealed container with a damp paper towel until you're ready to start the cold treatment. The seeds should feel slightly moist but not soggy—like a wrung-out sponge.
❄️ Step 2: Stratify Seeds in the Refrigerator
Place the sealed container of seeds in the refrigerator and store them at 35-40°F for 6-8 weeks. This cold stratification mimics winter conditions and breaks dormancy. I like to use a small plastic container with holes in the lid to allow for minimal airflow—just enough to prevent condensation buildup, which can cause rot.
Check the seeds every 2 weeks to ensure the paper towel remains damp but not wet. If it dries out, lightly mist it with water and reseal the container. You'll know the stratification is working when the seeds start to soften slightly and lose some of their hard outer coating. This is the moment that matters: the seed's natural defenses are weakening, preparing it for germination.
☀️ Step 3: Plant Stratified Seeds in Moist Soil
After the cold treatment, fill small pots or seed trays with a well-draining seed-starting mix. Moisten the soil until it's damp but not saturated—you should be able to squeeze a handful and have it hold together without dripping. Plant the seeds ¼ inch deep, spacing them about 1 inch apart to avoid overcrowding as they grow.
Cover the pots with plastic wrap or a humidity dome to retain moisture and warmth. Place them in a warm spot, ideally between 65-75°F, until germination begins. You'll see the first signs of life in 2-4 weeks, when tiny green sprouts push through the soil. Keep the soil consistently moist during this time—never let it dry out completely, but avoid soggy conditions that can cause rot.
🌿 Step 4: Transplant Seedlings to Individual Pots
Once the seedlings have developed 2-3 sets of true leaves—the second pair of leaves that look like the mature plant's foliage—it's time to transplant them. Gently remove each seedling from the tray, being careful not to damage the delicate roots. Place them in individual pots filled with a well-draining potting mix, burying the stem up to the first set of leaves.
Water the seedlings lightly after transplanting to help settle the soil around the roots. Place them in a spot with bright, indirect light for the first week to help them adjust. After that, gradually introduce them to more direct sunlight, increasing exposure by 1-2 hours daily. You'll know they're thriving when they develop a deeper green color and start to grow more vigorously.
⏰ Step 5: Acclimate and Plant Outdoors
After 4-6 weeks of growing indoors, your cedar seedlings will be ready for their final move outdoors. Choose a location with full sun exposure and well-draining soil. Before planting, harden off the seedlings by placing them outside in a sheltered spot for 1-2 hours the first day, gradually increasing their outdoor time over 7-10 days.
Plant the seedlings in the ground or their final containers, spacing them 3-4 feet apart to allow for growth. Water them deeply after planting to help the roots establish. Cedar seedlings are tough once established, but they'll need consistent moisture for their first growing season. You'll see strong, healthy growth as they adapt to their new home, setting the stage for future blooms.
Tips & tricks for perfect cedar seed germination
These little-known tricks will help you bypass the most common pitfalls and get those cedar seeds sprouting reliably.
Pod Selection Matters: The key to success starts with the pods themselves. Look for ones that are fully mature—deep brown and slightly open—because these contain seeds that are ready to break dormancy. Green or tightly closed pods won't germinate properly, no matter how long you stratify them. I've learned this the hard way after wasting weeks with immature pods that never sprouted.
Temperature Consistency: Maintain that 35-40°F range during the 6-8 weeks of cold stratification like your life depends on it. Even a few degrees warmer can prevent dormancy from breaking, while colder temps might slow down the process. Use a thermometer in your fridge to monitor the temperature—some fridges have cold spots that can affect your seeds. I keep mine on the middle shelf where it's most stable.
Moisture Management: The damp paper towel trick is crucial, but finding the right balance is an art. The towel should stay moist—not wet—throughout the entire stratification period. If it dries out, the seeds can desiccate; if it's too wet, you risk mold. I like to use a spray bottle to mist the towel every time I check it, then seal the container tightly to lock in that perfect moisture level.
Light Exposure After Germination: Once your seeds sprout and you're ready to plant them in soil, don't rush them into bright sunlight. Start with bright, indirect light for the first week to help them acclimate. Direct sunlight can scorch delicate seedlings. I use a sheer curtain to diffuse the light during this critical adjustment period, which gives them time to develop stronger stems before facing full sun exposure.
Pro Tips for Cedar Seed Pods
- These little-known tricks will help you bypass the most common pitfalls and get those cedar seeds sprouting reliably.
- Pod Selection Matters: The key to success starts with the pods themselves. Look for ones that are fully mature—deep b...
- Temperature Consistency: Maintain that 35-40°F range during the 6-8 weeks of cold stratification like your life depen...
Frequently asked questions
Got questions about cedar seed pods and their germination? You’re not alone!
Here are some of the most common queries—plus clear, actionable answers to help you master cold-stressed germination for those dreamy blooms.
Why do cedar seed pods need cold treatment before planting?
Cedar seed pods (like those from Juniperus species) often have a hard, waxy coating that prevents water absorption. Cold-stratification mimics winter conditions, breaking dormancy by softening the seed coat. Think of it as a natural "wake-up call" for seeds—without it, germination rates plummet. Pro tip: Skip this step, and you might wait years for sprouts!
How long should I cold-stratify cedar seed pods?
Most cedar seeds need 60–90 days in the fridge (34–40°F) for best results. Place them in a damp paper towel or moist sand inside a sealed bag—check weekly to avoid mold. Too short? Seeds may not sprout; too long? They risk rotting. Patience pays off with stronger seedlings!
Can I plant cedar seed pods directly outside without cold treatment?
Technically yes, but success is hit-or-miss. Direct sowing works best in cold climates (Zones 4–7) where natural winter temps handle stratification. For warmer areas, cold-stratify first or risk sparse germination. Alternative: Try soaking seeds in warm water for 24 hours before planting—though results vary by species.
What if my cedar seeds don’t sprout after cold treatment?
Don’t toss them yet! Try these fixes:
- Check moisture: Seeds need consistent dampness (not soggy). Adjust your paper towel or sand mix.
- Test viability: Cut open a few seeds—look for a green embryo. If none appear, they may be too old.
- Extend stratification: Add 30 more days in the fridge or try a second cycle.
- Use a heat mat: After cold treatment, place trays on a 70–75°F mat to speed germination.
Still no luck? Your seeds might need scarification (lightly sanding the pod) to break dormancy further.
Are there faster alternatives to cold-stratifying cedar seed pods?
Yes! While cold treatment is the gold standard, you can try:
- Boiling water: Pour boiling water over seeds (in a heat-safe container), let cool, then plant immediately. Warning: This can reduce viability if overdone.
- Mechanical scarification: Lightly nick the seed pod with sandpaper or a knife to mimic natural wear.
- Oven method: Place seeds on a tray, bake at 140°F for 30–60 minutes, then cool and plant.
Cold-stratification remains the most reliable, but these shortcuts can work for stubborn seeds!
Wrapping up and next steps
Cedar seed pods hold the promise of lush, reliable blooms—but only if you unlock their potential with the right cold-stressed germination techniques. By mimicking nature’s chilling process, you’re not just planting seeds; you’re nurturing the future of your lawn or garden. 🌱
Ready to take the next step? Start by gathering your supplies, following the cold-stressing method, and giving your cedar seeds the care they deserve. With patience and precision, you’ll soon be rewarded with vibrant, thriving plants. Happy gardening!