
Propagation
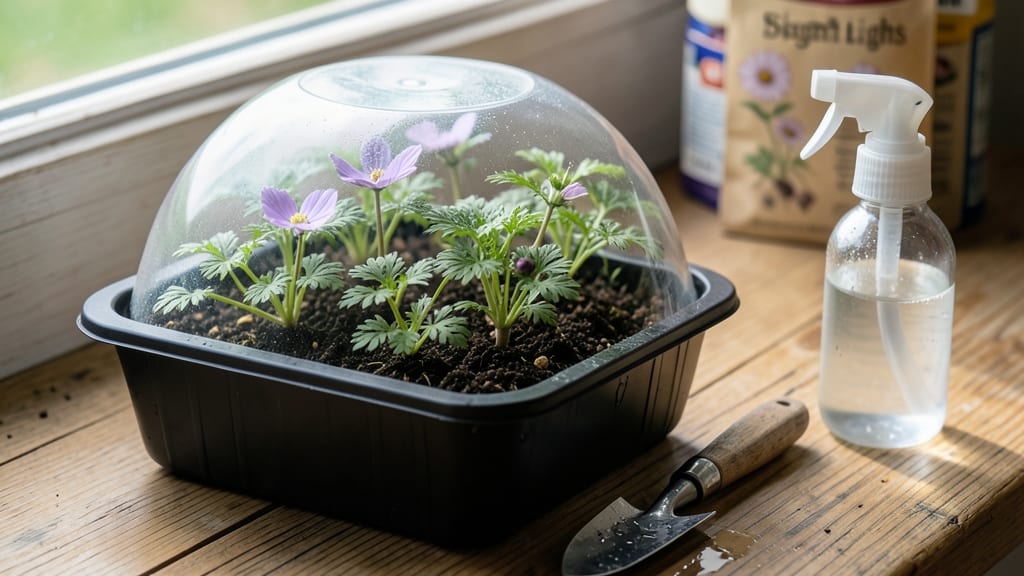
Starting cosmos seeds in lightweight loam feels like magic—those delicate fern-like seedlings appear in just 5-10 days, defying the "slow starter" reputation of many flowers. ✨ I learned the hard way that skipping soil prep leads to leggy, weak plants, but once I cracked the code (lightweight mix, shallow planting, and consistent warmth), germination became foolproof.
The secret lies in mimicking their natural environment: cosmos thrive in well-draining soil that stays moist but never soggy. You’ll need a seed-starting tray, a mix of potting soil and perlite (or coconut coir), and a sunny windowsill or grow light.
No fancy equipment—just patience and a spray bottle for gentle watering. By the time those first true leaves unfurl, you’ll be hooked on how easy cosmos are to grow. They handle transplanting like pros, too, so you can move them outdoors after the last frost without stress.
The payoff? A summer of effortless blooms that attract butterflies and hummingbirds. Works for both indoor starters and direct outdoor sowing in warm climates. Here’s how to avoid the most common pitfalls and get every seed to sprout.
📚 In This Guide
- What you need
- Instructions
- Tips and common mistakes
- Wrapping up and next steps
What you need
- ● Cosmos seeds: 1–2 packets (choose Cosmos bipinnatus or Cosmos sulphureus for vibrant blooms).
- ● Lightweight loam or seed-starting mix: 1–2 gallons (sterilized, well-draining, and peat-free if possible).
- ○ Seed trays or small pots: 4–6" deep (with drainage holes). Optional: Use biodegradable pots for transplant ease!
- ● Grow lights or sunny windowsill: 6–8 hours of indirect light daily (or a seedling heat mat for extra warmth).
- ● Spray bottle: For gentle watering (avoid over-saturating!).
- ● Plastic wrap or humidity dome: To retain moisture during germination.
- ● Tweezers or pencil: For precise seed placement (cosmos seeds are tiny!).
- ● Small hand trowel: To gently firm soil around seeds.
- ○ Thermometer (optional): Ideal germination temp: 65–75°F (18–24°C).
- ● Fertilizer (after sprouting): Diluted fish emulsion or seaweed extract (1/2 strength).
- ● 💡 Pre-soak seeds: Place seeds in a damp paper towel for 12 hours to speed up germination.
- ● 🌡️ Keep it cozy: A clear plastic bag over the tray acts like a greenhouse—just remove it once sprouts appear!
- ● ✨ Thin seedlings: Once 2" tall, snip weaker stems to give strong plants room to thrive.
Step-by-Step instructions for starting cosmos seeds indoors
Cosmos seeds are eager to sprout—here's how to coax them into strong, vibrant seedlings without fuss.
🌱 Step 1: Prepare Your Lightweight Loam Mix
Cosmos seeds thrive in airy, crumbly soil that drains well. Mix equal parts of your seed-starting mix with perlite or vermiculite—this creates the perfect lightweight loam. Fill your seed trays or small pots to within ½ inch of the rim, leaving room for seeds and water. Tap the tray gently to settle the mix, then moisten it until damp but not soggy.
Here's the thing—cosmos seeds are tiny, so I like to press them into the soil surface rather than burying them. This ensures they won't dry out before germinating. Use a spray bottle to mist the soil until it's evenly moist, but avoid creating a muddy mess. The goal is dampness, not a swimming pool.
🌱 Step 2: Sow Seeds and Maintain Moisture
Sprinkle the cosmos seeds lightly over the soil surface, spacing them about ¼ inch apart. You can plant them directly in the tray or use toothpicks to create tiny divots for each seed—this keeps them organized. Gently press them into the soil with your fingertip, just enough to make contact. Cover them with a thin layer of fine vermiculite or a sprinkle of additional mix, no more than ⅛ inch deep.
Place the tray in a warm spot, ideally between 65-75°F. Germination happens quickly—usually within 7-14 days. Keep the soil consistently moist by misting it daily, but avoid overwatering. You'll know it's right when the soil feels like a damp sponge, not a soggy rag. A clear plastic dome or plastic wrap helps retain moisture and warmth, but remove it as soon as you see the first sprouts.
☀️ Step 3: Provide Bright, Indirect Light
Once the seeds sprout, move them to a bright spot with indirect light. Cosmos seedlings are sensitive to harsh sunlight, which can scorch their delicate leaves. A south-facing window with sheer curtains works well, or place them under a grow light for 12-14 hours daily. You'll notice the seedlings start to stretch toward the light—this is normal, but don't let them get too leggy.
If the stems look thin and stretched, your light source isn't strong enough. Move the seedlings closer to the light or increase the duration. Strong seedlings will have compact stems and dark green leaves. Once they develop their first true leaves (the second set after the initial seed leaves), you can gradually introduce them to more direct sunlight for 2-3 hours daily to harden them off.
🌿 Step 4: Thin Seedlings for Stronger Growth
When the seedlings are about 2 inches tall and have developed their first true leaves, it's time to thin them. Use a small pair of scissors or your fingers to snip or gently pull out the weaker seedlings, leaving the strongest one in each spot. Cosmos plants need space to grow, so aim to space them about 12-18 inches apart once transplanted outdoors.
Thinning might seem harsh, but it prevents competition for nutrients and light, leading to healthier, more robust plants. After thinning, give the remaining seedlings a light watering to help them recover. Keep them in bright light and maintain consistent moisture until they're ready to transplant. You'll see a noticeable difference in their growth—stronger stems and fuller foliage within a few days.
⏰ Step 5: Acclimate and Transplant Outdoors
About 2-3 weeks before your last frost date, start hardening off your cosmos seedlings. Place them outside in a sheltered spot for 1-2 hours the first day, gradually increasing their time outdoors over 7-10 days. This helps them adjust to wind, sun, and temperature changes. By the time you're ready to transplant, they should be able to handle a full day outside without wilting.
Choose a sunny spot in your garden with well-draining soil. Dig holes slightly larger than the seedlings' root balls and transplant them, making sure the soil line on the stem is level with the surrounding soil. Water them deeply after transplanting to help them establish. Cosmos are drought-tolerant once established, but keeping the soil moist for the first week will give them the best start. You'll see new growth within a few days—proof that they're thriving!
Tips & tricks for perfect cosmos seed starting
Between us, these little details make all the difference when coaxing cosmos seeds to sprout reliably.
Soil Texture Matters: For that perfect airy loam, I sift both the seed-starting mix and perlite/vermiculite separately before combining. This eliminates clumps that could suffocate tiny seeds. After mixing, press the soil gently into your trays—just enough to create a firm surface for seeds to cling to, but not so tight it becomes compacted. Think "damp sponge" consistency, not "wet sand."
Germination Timing Secret: The 7-14 day window for germination is your best bet, but here's what I've learned: If your space stays consistently above 75°F, you'll likely see sprouts on the earlier end of that range. Below 65°F, germination can drag out to 21 days or longer. Place your seed tray on top of the fridge (not inside!) for a gentle, steady warmth boost if your room runs cool.
Light Transition Strategy: When introducing those 2-3 hours of direct sunlight in Step 3, start with just 30 minutes on the first day. Watch for any leaf curling or yellowing—these are signs your seedlings are getting sunburned. If you notice this, move them back to indirect light immediately. A sheer curtain acts like natural sunscreen for delicate seedlings.
Hardening Off Hack: For the 1-2 hour outdoor acclimation in Step 5, I use a small mesh bag or old pillowcase to protect seedlings from wind. Place them on a shady patio or under a tree where they'll experience natural light and airflow without harsh conditions. This mimics their future garden environment while keeping them safe during their first outdoor adventure.
Pro Tips for Cosmos Seed Starting
- Between us, these little details make all the difference when coaxing cosmos seeds to sprout reliably.
- Soil Texture Matters: For that perfect airy loam, I sift both the seed-starting mix and perlite/vermiculite separatel...
- Germination Timing Secret: The 7-14 day window for germination is your best bet, but here's what I've learned: If you...
Frequently asked questions
Got questions about jumpstarting your cosmos seeds? You’re not alone! Here are answers to the most common queries—so you can grow a vibrant garden with confidence.
What’s the best time of year to start cosmos seeds indoors?
For most climates, start cosmos seeds 6–8 weeks before your last frost date—typically in late winter or early spring. Cosmos thrive in warm soil, so avoid early starts; they germinate best when soil temps hit 60–70°F (15–21°C). If you’re in a hot zone, you can even direct-sow after frost risk passes!
How long do cosmos seeds take to germinate?
Cosmos seeds are fast germinators—expect sprouts in 5–14 days, usually within a week if conditions are ideal. Keep soil consistently moist (not soggy) and warm for speedy results. If nothing appears after 2 weeks, try gently pressing a toothpick into the seed to check for life!
Can I use regular potting soil for cosmos seeds?
While you can use standard potting mix, cosmos seeds prefer lightweight, well-draining soil to prevent damping-off. Mix in perlite or vermiculite (20–30%) for airiness, or use a seed-starting blend for best results. Avoid heavy garden soil—it compacts and slows germination.
Why aren’t my cosmos seeds sprouting? Troubleshooting tips.
Too cold?
Move trays to a warmer spot (e.g., near a sunny window or under grow lights).
Too wet/dry?
Cosmos need consistent moisture—mist lightly daily or use a humidity dome.
Buried too deep?
Cosmos seeds need just ¼ inch of soil—no deeper!
Old seeds?
Cosmos seeds stay viable for 2–3 years, but fresh seeds germinate faster.
Pro tip: If all else fails, try scarifying seeds (lightly nicking the shell) to break dormancy.Can I grow cosmos from seed outdoors instead of indoors?
Cosmos are hardy and self-seeding, so you can direct-sow after frost danger passes (when soil is at least 50°F/10°C). Scatter seeds thinly on top of the soil—no need to cover—and water gently. They’ll pop up quickly, often blooming 60–70 days later!
Wrapping up and next steps
Starting cosmos seeds is a rewarding journey that rewards patience with stunning, low-maintenance blooms—perfect for beginners and seasoned gardeners alike! By using lightweight loam and following these stress-free steps, you’ll set your seeds up for success with minimal fuss.
Now that you’re armed with the right knowledge, grab those seeds and get planting! Your next step? Watch your garden transform as those delicate seedlings emerge, ready to brighten up your space with vibrant color.