
Lawn
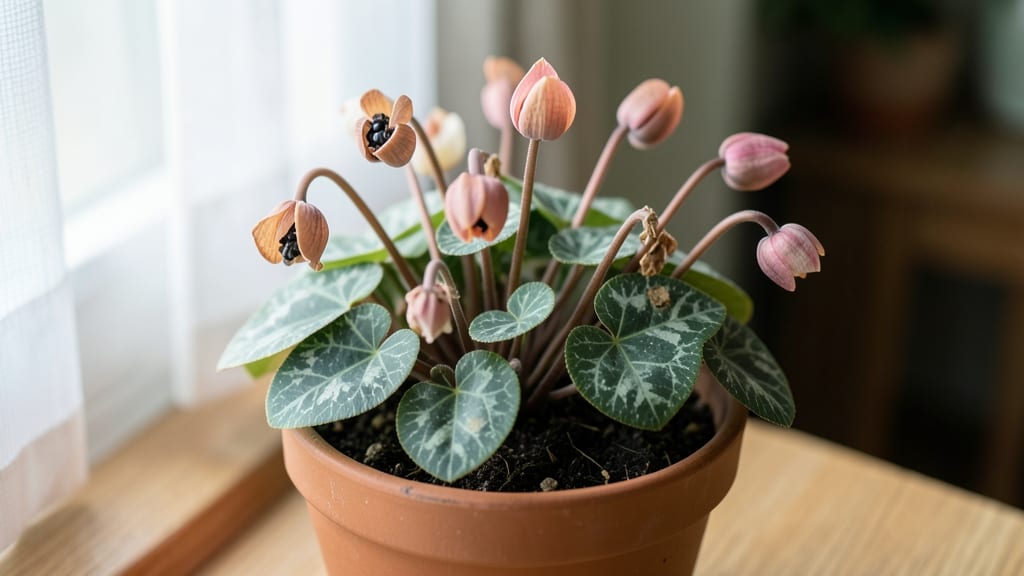
Your cyclamen seed pods hold the secret to next spring's blooms—but only if you handle them right. 🌱 These delicate pods need a cold-moist treatment to break dormancy, and timing is everything.
I learned the hard way that skipping this step means waiting years for germination, if it happens at all. The process starts in late summer when pods turn papery and split open.
Extract the tiny seeds, mix them with damp sand or peat moss, then store them in a sealed container in the fridge for 8-12 weeks. This mimics winter conditions and tricks the seeds into thinking spring has arrived.
By spring, you'll see plump seedlings pushing through the soil, ready for their first real light. The key is patience—these little plants grow slowly at first but reward you with vibrant white, pink, or purple blooms by next summer. Works for both indoor cyclamen and hardy outdoor varieties.
Here's how to do it without losing any seeds along the way.
📚 In This Guide
- What you need
- Instructions
- Tips and common mistakes
- Wrapping up and next steps
What you need
- ● Mature cyclamen seed pods: 5–10 pods (harvest when they’re slightly dry but still firm, usually late summer/early fall).
- ● Plastic storage bag or airtight container: 1 quart-sized bag with a zip-top closure (or a small Tupperware).
- ● Moistened sphagnum peat moss or coconut coir: Enough to fill the container halfway (about 1–2 cups). Keep it damp (not soggy).
- ● Labeling tags or masking tape + marker: To track seed pods by variety/date.
- ● Refrigerator or cool basement: Space to store the setup at 35–40°F (2–4°C) for 6–8 weeks.
- ● Fine-mesh strainer or colander: For rinsing pods if debris is present.
- ● Spray bottle with water: To mist the moss without over-saturating.
- ○ Small fan (optional): For gentle airflow if storing in a humid environment.
- ● Notebook: To log storage dates and germination progress.
Step-by-Step instructions for prepping cyclamen seed pods
Here's how I get cyclamen seeds to germinate reliably next spring—no guesswork.
🌱 Step 1: Harvest and Clean the Seed Pods
Wait until the seed pods turn brown and papery before harvesting—usually late summer or early fall. Gently twist them off the stems to avoid damaging the plant. Inside, you'll find flat, disk-shaped seeds surrounded by a cottony membrane. Remove the seeds carefully, using tweezers if needed, to avoid tearing the delicate membranes.
Spread the seeds on a clean paper towel and let them air-dry for 24 hours in a shady spot. This prevents mold from forming during storage. I keep them in a small envelope labeled with the variety and harvest date—this way, I don’t mix them up with next year’s pods.
💧 Step 2: Moisten the Seeds and Prepare the Cold Stratification Mix
Place the dried seeds in a small container and cover them with distilled water for 12 hours. This softens the hard outer shell and kickstarts germination. After soaking, drain the water completely and let the seeds sit uncovered for another 24 hours to dry slightly—this prevents rot during cold treatment.
Fill a seed tray or small pot with a mix of equal parts peat moss and perlite (about 2 inches deep). Moisten the mix until it’s damp but not soggy—you should be able to squeeze a handful without water dripping out. This lightweight blend prevents the seeds from sitting in waterlogged soil.
❄️ Step 3: Stratify the Seeds in the Fridge
Sprinkle the seeds sparingly over the damp mix—don’t cover them with soil. Instead, press them lightly into the surface so they make contact with the medium. Place the tray in a ziplock bag and seal it loosely (leave a tiny gap for airflow). This keeps humidity high while preventing mold.
Store the bag in your refrigerator for 8-12 weeks at 35-40°F. Check the seeds every 2 weeks—if the mix dries out, mist it lightly with water. The cold period mimics winter conditions, breaking seed dormancy. You’ll know it’s working when the seeds start to plump up slightly—that’s your signal germination is about to begin.
☀️ Step 4: Move to Warmth for Germination
After 8-12 weeks, transfer the tray to a warm, bright spot (around 65-70°F). Place it under grow lights or near a south-facing window—cyclamen seeds need 12-14 hours of light daily to sprout. Keep the mix consistently moist (not wet) by misting lightly every 2-3 days. Germination can take 4-12 weeks, so patience is key.
Once the first true leaves appear (not the tiny cotyledons), transplant the seedlings into small pots with well-draining potting mix. I use 2-inch pots for the first few months—cyclamen hate being crowded. Keep them in bright, indirect light until spring, when you can gradually introduce them to outdoor conditions.
Tips & tricks for perfect cyclamen seed germination
These simple strategies will help you maximize your chances of success with cyclamen seeds—no gardening experience required.
Harvest Timing: The 24-hour drying period in Step 1 is crucial for preventing mold, but don't rush it. If your climate is particularly humid, extend this to 36 hours to ensure complete dryness. I've learned the hard way that skipping this step leads to moldy seeds before they even get to the fridge. Store your dried seeds in a cool, dark place until you're ready to start stratification.
Soaking Technique: During the 12-hour soak in Step 2, use distilled water to avoid mineral buildup that could inhibit germination. After draining, let the seeds air-dry completely before placing them in the mix—this prevents rot during the cold treatment. I like to spread them on a clean coffee filter for better airflow during this drying phase.
Cold Stratification Check: When you're checking your seeds every 2 weeks during the 8-12 week fridge period, look for that slight plumping as your signal. If the mix feels dry to the touch, mist it lightly with distilled water—never soak it. The goal is to keep it damp, not wet. I've found that using a small spray bottle makes this much easier than trying to pour water without over-saturating.
Light Requirements: For the 12-14 hours of light in Step 4, if you don't have grow lights, place your tray near a south-facing window where it gets bright but indirect sunlight. Rotate the tray every few days so all seeds get equal exposure. I've seen cyclamen seedlings grow toward the light source, so this rotation helps prevent them from becoming lopsided.
Pro Tips for Cyclamen Seed Pods
- These simple strategies will help you maximize your chances of success with cyclamen seeds—no gardening experience re...
- Harvest Timing: The 24-hour drying period in Step 1 is crucial for preventing mold, but don't rush it. If your climat...
- Soaking Technique: During the 12-hour soak in Step 2, use distilled water to avoid mineral buildup that could inhibit...
Frequently asked questions
Got questions about cyclamen seed pods?
You’re not alone! Here are some of the most common concerns—and their solutions—to help you prep those pods like a pro for next spring’s germination.
When should I harvest cyclamen seed pods?
Harvest pods when they’re dry but not brittle—usually 4–6 weeks after flowering. Overripe pods may crack open and scatter seeds prematurely. Aim for late summer to early fall for best results. Store them in a cool, dry place until your cold-moist prep in winter.
How long do seed pods need to stay cold-moist?
For reliable germination, mimic nature’s cycle: 6–8 weeks of cold-moist stratification works best. Place pods in a sealed container with damp peat moss or paper towels, then refrigerate (35–40°F). Pro tip: Check moisture weekly—soggy pods rot, while dry ones fail to break dormancy.
Can I skip cold stratification and still grow cyclamen?
Technically yes, but germination rates will plummet! Cyclamen seeds require cold treatment to break dormancy. If you’re impatient, try a warm-moist pre-treatment (4–6 weeks) first, then cold-stratify. Still, expect slower and less consistent sprouts compared to full stratification.
Why aren’t my seed pods opening after cold treatment?
Don’t panic—pods may need a second push. Try these fixes:
- Extend cold stratification by 2–4 weeks.
- Soak pods in lukewarm water for 24 hours before replanting.
- Scratch the pod surface gently with sandpaper to mimic natural wear.
What’s the best soil mix for sowing cyclamen seeds?
Use a light, airy blend to prevent rot:
- 50% peat moss or coconut coir
- 30% perlite or coarse sand
- 20% compost (well-aged)
Wrapping up and next steps
Growing cyclamen from seed pods is a rewarding journey that rewards patience with stunning blooms! By mastering the cold-moist prep method, you’re setting the stage for reliable germination next spring.
Whether you’re a seasoned gardener or just starting out, this technique ensures your seed pods thrive—so roll up your sleeves and give it a try! 🌱✨
Ready to take the next step? Start collecting seed pods after your cyclamen flowers fade, and keep them in a cool, dry place until your cold-moist prep schedule begins. Happy planting—and may your garden bloom brighter than ever! 🌸