
Lawn
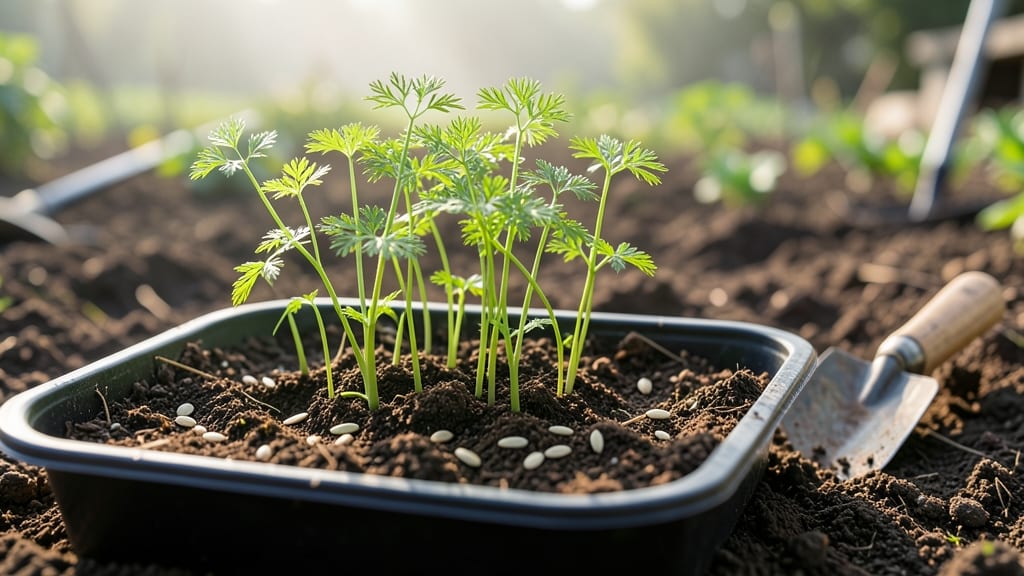
Dill seed sprouts pop up in 14 days—faster than most herbs, and the secret to luring pollinators to your garden. 🌱 I’ve watched my dill seedlings outpace even my most impatient basil, and the key lies in a few simple tricks: soaking seeds overnight, keeping soil warm, and avoiding overwatering.
The first true leaves smell like sunshine and promise a harvest of feathery fronds that bees adore.
You’ll need just three things: a sunny spot (indoors or out), well-draining soil mix, and patience for a week or two. Dill thrives in average garden soil but hates soggy roots—think "moist, not wet."
For indoor starters, a seed tray with bottom heat (like a heating mat) cuts germination time by half. The real magic happens when those first pale green shoots break through the soil, signaling success.
By day 14, you’ll have a stand of lush, fern-like dill ready to transplant or attract pollinators. The plants grow tall and sturdy, perfect for borders or containers. Just be ready to thin seedlings to 12 inches apart—they’ll crowd each other if left too close.
Snip the outer stems for fresh dill while leaving the center to keep flowering.
Works in partial shade too, though full sun speeds up growth. The biggest mistake? Letting seedlings dry out. A light misting keeps them happy until they’re established. Once they’re up, you’ll wonder why you didn’t grow dill every year—it’s that easy.
📚 In This Guide
- What you need
- Instructions
- Tips and common mistakes
- Wrapping up and next steps
What you need
- ● Dill seeds: 1–2 tablespoons (about 15–30 grams) of organic, non-GMO dill seeds (e.g., Anethum graveolens). Look for seeds labeled for sprouting or gardening.
- ● Sprouting container: A glass jar (16–32 oz) with a mesh lid (or a clean, breathable lid + cheesecloth secured with a rubber band).
- ● OR a dedicated sprouting tray with drainage holes (for larger batches).
- ● Water: Filtered or tap water (chlorine-free if possible). Use room-temperature water for soaking.
- ● Colander or strainer: For rinsing (if using a jar without a built-in mesh lid).
- ● Paper towels or sprouting lid liner: 2–3 sheets (unbleached, food-grade).
- ● Dark, breathable cover: A small cloth or paper towel to block light during the first 24–48 hours.
- ○ Seedling heat mat (optional): If your space is <18°C (65°F), a small mat keeps seeds cozy during germination.
- ○ Grow light (optional): A full-spectrum LED (12–16 hrs/day) if natural light is limited (e.g., windowsill in winter).
- ○ Spray bottle (optional): For gentle misting if humidity drops below 50%.
- ○ Notebook & pen (optional): To track germination progress or adjust conditions.
- ○ Outdoor pot or garden bed (optional): For transplanting mature sprouts (after 14 days) if you want to establish a pollinator-friendly garden patch.
Step-by-Step instructions for growing dill seed sprouts
Here’s how to coax those feathery dill plants from tiny seeds in record time.
🌱 Step 1: Prep Seeds for Faster Germination
Dill seeds have a hard outer shell that slows things down, but soaking them first cuts germination time in half. Fill a small bowl with lukewarm water and add the seeds. Let them soak for 12-24 hours—you’ll know they’re ready when they plump up and sink to the bottom.
Drain the seeds in a fine-mesh strainer, then gently pat them dry with a paper towel. This keeps them moist enough to sprout but prevents mold from forming. I like to do this the night before planting so the seeds are ready to go first thing in the morning.
🪴 Step 2: Fill Containers With Light, Airy Soil
Use a well-draining potting mix—dill hates soggy roots. Fill your containers (I use 4-inch pots for each sprout) to about 1 inch below the rim, leaving room for watering. Press the soil down lightly so it’s firm but not packed.
Make a small hole with your finger—just deep enough to nestle the soaked seeds. Drop 2-3 seeds per container (you’ll thin later) and cover them with a thin layer of soil, no more than ¼ inch deep. Press gently to ensure good seed-to-soil contact.
💧 Step 3: Create a Humid, Warm Germination Environment
Dill seeds thrive in warmth, so place your containers on a seedling heat mat set to 70-75°F or in a sunny windowsill where temps stay above 60°F. Cover the pots loosely with plastic wrap or a humidity dome to trap moisture—this mimics the damp conditions dill loves.
Check daily for condensation on the plastic. If it’s foggy inside, you’re golden; if it’s dry, mist the soil lightly. Germination should start in 3-5 days, but don’t be surprised if some pop up in as little as 24 hours—that’s dill’s fast track!
☀️ Step 4: Uncover and Move to Bright Light
Once you see the first green shoots, remove the plastic immediately. Too much humidity now invites damping-off, a fungal disease that turns seedlings to mush overnight. Place the pots under grow lights or in the sunniest window—dill needs 6+ hours of light daily to avoid leggy growth.
Keep the soil lightly moist (never soggy) by watering at the base when the top inch feels dry. You’ll notice the seedlings develop two small leaves first—those are the "true leaves" that signal it’s safe to thin. Use scissors to snip the weakest sprout, leaving the strongest one per pot.
🌿 Step 5: Transplant and Encourage Pollinators
When seedlings reach 3-4 inches tall (about 2-3 weeks after sowing), transplant them into the garden or larger containers. Dill loves full sun and well-drained soil—pick a spot where bees and butterflies can find it. Space plants 12 inches apart to give them room to spread.
Water deeply after transplanting to help roots establish. Within days, you’ll see the feathery foliage emerge—this is your cue that the pollinators are on their way. Dill’s aromatic flowers are a magnet for beneficial insects, so sit back and enjoy the buzz!
Tips & tricks for growing dill seed sprouts
Here's what I learned the hard way after watching my first batch of dill seeds fail to sprout—don't let these simple tricks slip by!
Soaking Secret: The 12-24 hour soak is your best friend for breaking dill's tough seed coat. I've found that using lukewarm water (not hot) prevents seed damage while still softening the shell. After soaking, I give them one last gentle squeeze in the strainer to remove excess water—this prevents mold while keeping them hydrated enough to germinate quickly.
Container Size Matters: While 4-inch pots work, I've discovered that smaller 2-3 inch pots actually work better for dill sprouts because they encourage faster root development. The key is keeping the soil volume minimal—just enough to support the tiny root system without becoming waterlogged. You'll notice the sprouts emerge faster when they're not struggling with excess soil.
Lighting Timeline: The transition from humidity dome to bright light in Step 4 is critical. I recommend moving your sprouts to their final light source immediately after the first green shoots appear—no waiting. Dill seedlings are sensitive to light deprivation, and even a few hours delay can cause leggy growth. If you're using a windowsill, rotate the pots daily to ensure even light exposure on all sides.
Thinning Technique: When it's time to thin to one strong sprout per pot, I use clean scissors to snip at soil level rather than pulling. This prevents disturbing the roots of your remaining plant. The two small "true leaves" are your perfect signal—once they appear, you know the plant has established enough to survive on its own without competition.
Pro Tips for Dill Seed Sprouts
- Here's what I learned the hard way after watching my first batch of dill seeds fail to sprout—don't let these simple ...
- Soaking Secret: The 12-24 hour soak is your best friend for breaking dill's tough seed coat. I've found that using lu...
- Container Size Matters: While 4-inch pots work, I've discovered that smaller 2-3 inch pots actually work better for d...
Frequently asked questions
Got questions about growing dill seed sprouts?
You’re not alone! Here are answers to the most common queries—whether you're a first-time gardener or a seasoned green thumb looking for quick tips.
How long do dill seed sprouts take to grow?
Dill seed sprouts are one of the fastest-growing herbs—expect sprouts in 3–5 days and full germination in about 14 days with proper care. Keep them warm (60–75°F) and moist for speedy results!
Can I grow dill sprouts indoors without sunlight?
Yes! Use a grow light (12–16 hours/day) or a sunny windowsill (south-facing is best). Place seeds on a damp paper towel in a shallow tray—no soil needed. Just keep them consistently moist and watch them sprout in days!
What if my dill sprouts turn yellow or wilt?
Yellowing or wilting usually means overwatering, poor drainage, or lack of air circulation. Let them dry slightly between waterings, and ensure they’re in a well-ventilated spot. If mold appears, toss them and start fresh with sterilized seeds/trays.
Are dill sprouts safe to eat raw? Can kids eat them?
Dill sprouts are safe and delicious raw—add them to salads, sandwiches, or yogurt. They’re mild and kid-friendly, but always start with small amounts to check for allergies. Bonus: They’re packed with vitamin K and antioxidants!
What’s a good alternative if dill sprouts don’t germinate?
Try cilantro, fennel, or anise sprouts—they’re just as easy and share a similar flavor profile. For a different texture, alfalfa or radish sprouts are great pollinator-friendly swaps too. Just adjust soaking times (e.g., alfalfa needs 8–12 hours).
Still stumped? Drop your question in the comments—we’re happy to help your dill sprouts thrive!
Wrapping up and next steps
Growing dill seed sprouts is a rewarding way to boost your lawn’s beauty, support pollinators, and enjoy a fast, low-maintenance harvest—all in just 14 days! 🌱 Whether you’re a beginner or a seasoned gardener, these hardy sprouts thrive with minimal effort, making them the perfect addition to your outdoor space.
Ready to transform your lawn into a buzzing, vibrant ecosystem? Start your seeds today and watch your garden flourish!
🌟 Next Steps:
- Grab your supplies and review the checklist.
- Plant your dill seeds this weekend for a head start!
- Share your progress with the gardening community—tag us @YourLawnLife!