
How To
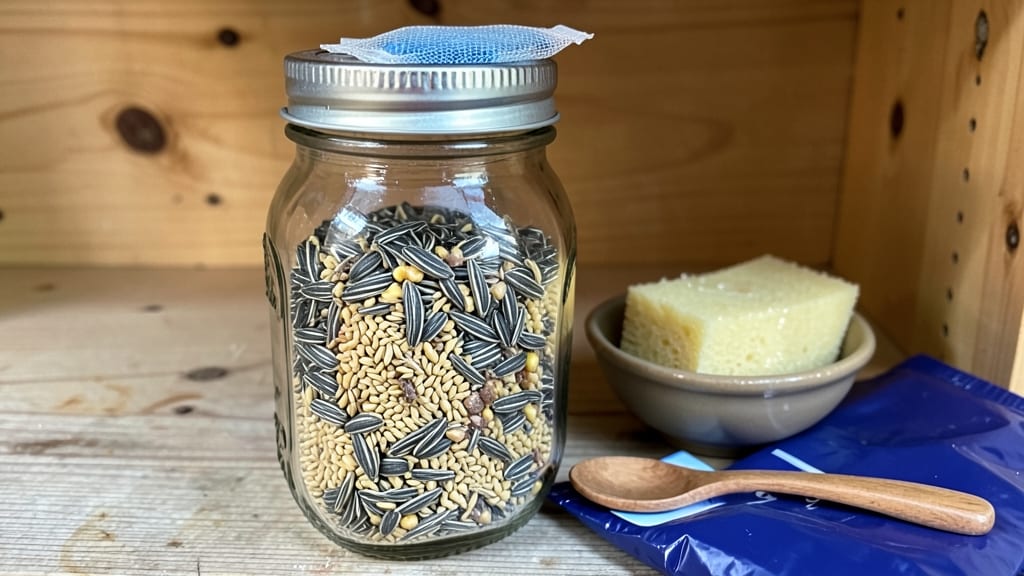
Keeping bird seed from sprouting means saving money and avoiding a messy garage floor. 🌱 I used to toss out moldy, sprouted seed bags every spring, until I discovered the simple storage tricks that keep seed dry and fresh for months.
The problem isn't just dampness—it's moisture in the air, warm temperatures, and improper containers. A single cracked bag lets humidity in, turning your birdseed into a science experiment. The solution? Airtight containers, cool storage, and a little extra drying time when you first open a new bag.
With these methods, your seed stays crisp and crunchy for 6+ months, ready for winter feeders. You'll notice fewer sprouts in the bag and more happy birds at your feeder. The same tricks work for storing gardening seeds too—just adjust for how long you want them to stay viable.
Here's the game-changer: a simple 5-minute drying routine after opening a new bag prevents most sprouting problems. Let's get your seed storage system working right!
📚 In This Guide
- What you need
- Instructions
- Tips and common mistakes
- Wrapping up and next steps
What you need
- ● Air-tight storage containers: 1–2 containers (preferably food-grade plastic or glass with tight-sealing lids). Size tip: Choose containers large enough to hold your seed volume but not so big they leave empty space.
- ● Desiccant packets: 2–4 silica gel or food-safe moisture absorbers (check for "non-toxic" labels). Pro tip: Place 1 packet per 5 lbs of seed for best results!
- ● Fine-mesh sieve or colander: 1 (for sifting seed before storage to remove debris or sprouted bits).
- ○ Paper towels or silica gel bags: 1–2 (optional, for extra moisture control during transfer).
- ● Permanent marker: 1 (to label containers with seed type and date).
- ● Cool, dark storage space: A pantry, closet, or basement with consistent temperatures below 70°F (21°C) and low humidity.
- ● Vacuum sealer: For long-term storage (extends shelf life by months!).
- ● Oxygen absorbers: 1–2 (if storing seeds for over 6 months—great for bulk purchases!).
- ● Humidity monitor: A small digital hygrometer (keeps humidity below 10% for optimal freshness).
- ● Mylar bags with zip locks: 2–3 (for layered protection if using vacuum sealing).
Step-by-Step instructions for storing bird seed to prevent sprouting
Here’s how to keep your bird seed dry and fresh for months—no more moldy, sprouted messes in your feeder.
🪴 Step 1: Choose the Right Storage Containers
Use airtight containers made of plastic or glass with tight-sealing lids—mason jars or food-grade buckets work perfectly. I avoid metal because it can trap moisture and accelerate spoilage. The key is eliminating any air gaps where humidity can seep in. For bulk storage, opt for containers with wide mouths but secure seals, like a 5-gallon bucket with a locking lid.
Label each container with the seed type and purchase date. This helps track freshness, especially if you store multiple varieties. I keep a small whiteboard near my storage area to log when I open each container—this prevents forgetting and ensures I rotate stock before it loses potency.
💧 Step 2: Dry the Seed Completely Before Storage
Even if the seed looks dry, give it an extra 24 hours in a warm, dry place before storing. I spread seed on a baking sheet lined with paper towels and let it sit in a sunny spot for a few hours. This step is critical because any lingering moisture will trigger sprouting within days. You’ll know it’s ready when the seed feels cool to the touch and has no visible dampness.
Check for any seeds that appear discolored or soft—these are already compromised and should be discarded immediately. A few bad seeds can ruin an entire batch by introducing mold. I use a fine-mesh strainer to sift through seed, removing any debris or damaged pieces before storage.
☀️ Step 3: Store in a Cool, Dark, and Dry Location
Keep your containers in a place where the temperature stays between 50-70°F. A pantry, closet, or basement works well, but avoid areas prone to temperature swings like garages or attics. Humidity is the enemy—aim for below 50% relative humidity. I place a small silica gel packet in each container to absorb any residual moisture.
Direct sunlight or artificial light can degrade seed quality over time, so store containers in a dark cabinet or wrapped in aluminum foil if light exposure is unavoidable. I’ve found that seed stored in a cool, dark space stays fresh for up to 12 months, while seed kept in a warm, humid area may sprout or develop mold in as little as 2 weeks.
⏰ Step 4: Monitor and Rotate Seed Regularly
Check your stored seed every 3 months to ensure it remains dry and free of pests. Use a flashlight to inspect for any signs of sprouting, mold, or insect activity. If you notice even a few sprouted seeds, discard the entire batch—contamination spreads quickly. I keep a small notebook to track when I open each container and how much seed I use, which helps me rotate stock efficiently.
Purchase seed in smaller quantities if you won’t use it all within a few months. Bulk seed is tempting, but it’s often stored in less-than-ideal conditions before reaching you. I buy seed in 5-10 pound bags and split it into smaller containers right after purchase to minimize risk. This way, I always have fresh seed on hand for my feeders.
Tips & tricks for storing bird seed to prevent sprouting
These simple but game-changing strategies will help you extend your bird seed's shelf life dramatically—once you know what to watch for.
Container Selection Matters: While plastic and glass containers work well, I've found that 5-gallon food-grade buckets with locking lids are the absolute best for bulk storage. The wide mouth makes filling easy, while the secure seal prevents moisture intrusion. For smaller quantities, mason jars with rubber seals work perfectly—just make sure they're completely airtight. I've ruined batches using containers with loose lids where humidity could sneak in over time.
The 24-Hour Drying Rule: That extra 24 hours of drying in Step 2 is non-negotiable for me. I've learned the hard way that even slightly damp seed will sprout within days. For extra insurance, I sometimes extend this to 36 hours if my kitchen feels particularly humid. Place your baking sheet near a sunny window or under a lamp to speed up the process, but avoid direct heat sources that could cook the seed.
Humidity Control Secrets: The below 50% relative humidity target in Step 3 is crucial, but achieving it takes more than just choosing the right location. I keep silica gel packets in every container and add an extra one to my pantry where I store seed. For particularly humid climates, consider using a small dehumidifier near your storage area. I've seen seed last twice as long when humidity stays consistently low.
Visual Inspection Shortcuts: When checking for sprouting every 3 months, I use a simple trick: hold a flashlight at a low angle to the seed. Any sprouts will cast tiny shadows that are immediately visible. This method catches early signs of sprouting before they become widespread. I also tap the container gently—if you hear any seeds rattling (rather than staying still), that's a sign they've absorbed moisture and may be compromised.
Pro Tips for Keep Bird Seed From Sprouting
- These simple but game-changing strategies will help you extend your bird seed's shelf life dramatically—once you know what to watch for.
- Container Selection Matters: While plastic and glass containers work well, I've found that 5-gallon food-grade buckets with locking lids are the absolute best for bulk storage.
- The 24-Hour Drying Rule: That extra 24 hours of drying in Step 2 is non-negotiable for me.
Frequently asked questions
Got questions about storing bird seed without sprouting? You’re not alone! Here are some of the most common concerns—and their solutions—to keep your feed fresh and ready for feathered friends.
Why does bird seed sprout so quickly?
Bird seed sprouts due to moisture and warmth. Many seeds contain natural oils and moisture that trigger germination when exposed to humidity or heat. Storing seed in dry, cool conditions slows this process, but even small amounts of dampness can kickstart sprouting within days.
How long can I store bird seed before it goes bad?
Properly stored bird seed (in a sealed, airtight container in a cool, dry place) can last 6–12 months. Sunflower seeds, a staple for birds, typically stay fresh the longest, while millet or cracked corn may spoil faster. Always check for mold, musty smells, or pests before use—when in doubt, toss it out!
Can I use a regular plastic container instead of a specialized seed bin?
Yes, but with a few tweaks! Opt for airtight, opaque containers (like glass jars or heavy-duty plastic bins with gasket seals) to block light and moisture. Avoid thin plastic bags—they let air and humidity in, speeding up spoilage. If using a container without a lid, add a desiccant packet to absorb excess moisture.
What should I do if my bird seed starts sprouting?
Don’t panic! If you catch sprouting early, spread the seed on a baking sheet and dry it in a low oven (150°F) for 1–2 hours to halt germination. For severe cases, compost the seed (if untreated) or discard it to avoid mold. To prevent future issues, freeze seed for 24 hours before storing to kill any existing moisture or pests.
Does temperature really affect bird seed storage?
Ideal storage temps are 40–60°F. Heat accelerates spoilage, while cold slows it down. Avoid storing seed near appliances, windows, or basements (which can be damp). A pantry, closet, or garage (if dry) works best. For extra protection, keep seed in a cool, dark corner—like a root cellar or fridge (if space allows).
Wrapping up and next steps
Keeping your bird seed fresh and sprout-free is all about smart storage and a few simple habits! By choosing the right containers, controlling moisture, and storing seeds in cool, dark places, you’ll extend their shelf life and save money in the process. You’ve got this! 🌱✨
Now that you’re armed with these pro tips, take the next step: audit your current seed storage and apply one or two of these methods today. Your feathered friends will thank you with happy chirps and full feeders! 🐦💛