
Lawn
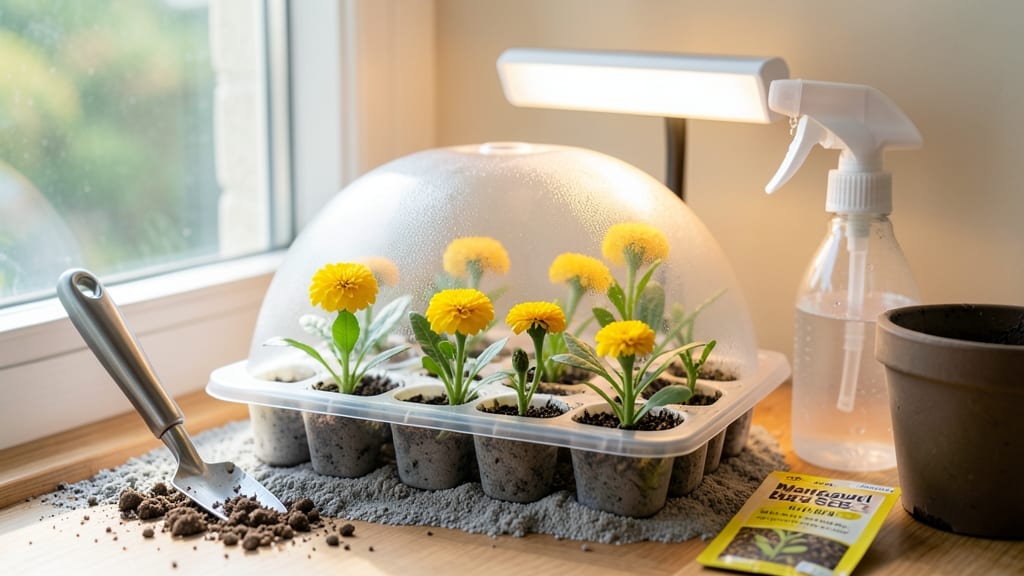
How to use seed starter cuts your growing season in half—fast, healthy sprouts mean you’re harvesting sooner than neighbors who wait for store-bought seedlings. 🌱 I’ve lost count of how many times I’ve watched tiny seedlings emerge in just 5-7 days with the right setup, something I never saw with my old "poke holes in a plastic tray" method. The magic comes down to three things: the right starter (soil blocks, trays, or peat pots), a warm spot with bright but indirect light, and a watering routine that keeps soil damp but never soggy. Most beginners drown their seeds—don’t be that person. A spray bottle and a clear lid (or plastic wrap) are your best friends here. By the time you’re ready to transplant, those fragile sprouts will be stocky and strong, with true leaves ready to handle the great outdoors. The payoff? A garden that starts blooming or producing weeks ahead of schedule, and fewer sad, leggy seedlings that never make it. Works for any seed—veggies, flowers, even herbs—and adapts to windowsills, grow lights, or a sunny basement shelf. Here’s exactly how to do it right the first time.
📚 In This Guide
- What you need
- Instructions
- Tips and common mistakes
- Wrapping up and next steps
What you need
- ● Seed starter kit (or DIY alternative: small pots, trays, or even egg cartons with drainage holes)
- ● High-quality seed-starting mix (sterile, lightweight, and well-draining—avoid garden soil!)
- ● Seeds (choose fast-growing varieties like lettuce, herbs, or microgreens for quick results)
- ● Watering can or spray bottle (gentle watering prevents disturbing seeds)
- ● Grow lights or sunny windowsill (6–8 hours of light daily is ideal)
- ● Humidity dome or plastic wrap (to retain moisture while seeds germinate)
- ● Seedling heat mat (speeds up germination for cold-sensitive plants)
- ● pH testing kit (ensure your mix is slightly acidic, pH 6.0–7.0)
- ● Fertilizer (low-dose) (like fish emulsion or diluted compost tea for early growth)
- ● Label markers (track seed varieties and planting dates)
- ● Tweezers or small spoon (for delicate seed handling)
Step-by-step guide to using seed starters for reliable germination
Skip the guesswork—these tools turn weak sprouts into sturdy seedlings year-round.
🌱 Step 1: Prepare Your Seed Starter and Trays
Fill your seed starter trays with moistened seed-starting mix—never garden soil—until it reaches just below the rim. Press lightly to eliminate air pockets but don’t compact it. I like to run a finger through the mix to check moisture: it should feel like a damp sponge, not dripping or bone-dry. This ensures roots get oxygen while staying hydrated.
Place the trays in your seed starter’s base and snap on the clear dome or lid. The humidity inside mimics a greenhouse, which is critical for fast germination. If your starter has a built-in heat mat, turn it on now—most seeds germinate best at 75-85°F. You’ll see condensation form on the inside of the dome within hours—that’s your confirmation the environment is right.
💧 Step 2: Plant Seeds at the Correct Depth and Spacing
Follow the seed packet’s depth guidelines, but here’s the rule I swear by: plant seeds twice as deep as their diameter. For tiny seeds like lettuce, that’s just a sprinkle; for large ones like beans, aim for ½ inch. Use the starter’s built-in seedling markers to space seeds properly—crowding leads to weak, leggy seedlings later.
After planting, mist the surface with water until evenly damp, but don’t soak it. Overwatering now can bury seeds too deep or wash them away. Place the trays back under the dome and position them where they’ll receive indirect light for the first 24-48 hours. Direct light can dry out the soil surface too quickly before germination begins.
☀️ Step 3: Monitor Germination and Adjust Light
Check daily for sprouts, but resist opening the dome unless condensation disappears—you’ll lose too much humidity. Most seeds emerge within 5-10 days, though some (like parsley) can take 2-3 weeks. When you see the first true leaves (not the initial seed leaves), remove the dome immediately. This prevents damping-off, a fungal disease that collapses seedlings overnight.
Move the trays under grow lights positioned 2-4 inches above the seedlings. Without enough light, they’ll stretch toward any available source, creating weak stems. You’ll know the light is right when seedlings grow compact and dark green, not pale and elongated. Rotate trays daily so all sides get even exposure—this ensures uniform growth.
✂️ Step 4: Thin and Harden Off Seedlings
Once seedlings have 2-3 sets of true leaves, thin them to the strongest one per cell using clean scissors. Snip at soil level to avoid disturbing roots of remaining plants. This might seem cruel, but crowded seedlings compete for nutrients and grow poorly. After thinning, water gently from below—lift the trays and let water soak up through the drainage holes.
Two weeks before transplanting outdoors, start hardening off. Place trays in a sheltered spot outside for 1-2 hours the first day, gradually increasing time over 7-10 days. Watch for wilting—if leaves droop, they’re not ready. Hardened-off seedlings handle temperature swings and wind much better, so they’ll recover faster after moving to the garden.
🪴 Step 5: Transplant with Confidence
Choose an overcast day to transplant, and water the seedlings thoroughly the night before. Gently remove them from the seed starter cells, keeping the root ball intact—this minimizes transplant shock. Dig holes slightly larger than the root ball, place seedlings at the same depth they grew in the starter, and firm soil around the base.
Water immediately after transplanting to settle the soil and eliminate air pockets. Mulch lightly with ¼ inch of compost to retain moisture and regulate soil temperature. Your seedlings will now grow with the strength they developed in the starter, ready to thrive in their permanent home.
Tips & tricks for perfect seed starter success
Real talk: I've watched too many seedling experiments fail from skipping these key steps. Here's what nobody tells you about maximizing your seed starter's potential.
Humidity Control: The condensation you see inside the dome during the first 24-48 hours isn't just normal—it's essential. If you notice condensation disappearing before germination, that's your cue to mist the soil surface lightly and seal the dome back on. I've learned this the hard way after watching trays dry out completely overnight, leaving seeds high and dry. The goal is to maintain that greenhouse effect without creating a swamp—aim for soil that stays damp but never soggy.
Light Positioning: That 2-4 inch distance between your grow lights and seedlings isn't arbitrary—it's the sweet spot for preventing leggy growth. I recommend starting closer (2 inches) for the first week, then gradually increasing to 4 inches as seedlings mature. Watch for that telltale sign: if leaves turn pale and stems elongate dramatically, you're not providing enough light intensity. Most LED grow lights need this adjustment as seedlings grow taller.
Temperature Consistency: While the instructions mention 75-85°F as ideal, here's what I've discovered about maintaining it: Place your seed starter on a stable surface away from drafts, and if you're using a heat mat, keep it plugged in continuously. I've found that even small temperature fluctuations below 70°F can delay germination by days. For cold climates, consider using a seedling heat mat with a built-in thermostat to maintain consistent warmth throughout the process.
Thinning Technique: When you reach the 2-3 sets of true leaves stage and need to thin, here's my game-changer: Use sterilized scissors and make your cuts at soil level, but at a slight angle. This prevents disturbing the roots of neighboring seedlings while creating a clean cut that minimizes stress. I've also found that thinning in the morning gives seedlings the entire day to recover before nightfall, which makes a noticeable difference in their resilience.
Pro Tips for Use Seed Starter
- Real talk: I've watched too many seedling experiments fail from skipping these key steps. Here's what nobody tells yo...
- Humidity Control: The condensation you see inside the dome during the first 24-48 hours isn't just normal—it's essent...
- Light Positioning: That 2-4 inch distance between your grow lights and seedlings isn't arbitrary—it's the sweet spot ...
Frequently asked questions
Got questions about seed starters? You’re not alone! Here are some common concerns—and quick answers—to help you grow like a pro.
How long does it take for seeds to germinate in a seed starter?
Germination time varies by seed type! Fast growers like radishes or lettuce sprout in 3–7 days, while slower seeds (tomatoes, peppers) may take 7–21 days. Check your seed packet for specifics—consistent warmth (70–85°F) and moisture speed things up!
Can I use a seed starter indoors year-round?
Seed starters work anytime—indoors or outdoors—so you can jumpstart your garden even in winter. Just add a grow light (12–16 hours/day) if natural light is weak. Pro tip: Rotate trays weekly for even growth!
What if my seeds aren’t sprouting? Troubleshooting tips?
Don’t panic! First, check moisture—soil should stay consistently damp (not soggy). If seeds still won’t sprout, try:
- Scratch the seed coat gently with sandpaper (for hard shells).
- Warm the soil slightly (a heating mat helps).
- Test seed viability—plant a few in soil to see if they wake up.
Are seed starters better than just planting seeds directly outside?
Seed starters give you control over conditions (light, heat, moisture) and help young plants avoid pests or harsh weather. However, some hardy seeds (like beans or peas) thrive when planted directly. Use starters for delicate or slow-starting seeds—then transplant!
How do I reuse or repurpose seed starter trays?
Clean trays with soapy water and rinse well to remove residue. For plastic trays, sanitize with a 10% bleach solution (rinse thoroughly!). Get creative: Use them for herb propagation, cutting gardens, or even seedling gifts for friends!Wrapping up and next steps
Mastering seed starters is your ticket to faster, healthier sprouts—no matter the season! 🌱 With the right setup, you’ll enjoy consistent germination, space efficiency, and cost savings while giving your plants a head start.
Whether you’re a beginner or a seasoned gardener, these techniques make growing easier and more rewarding.
Ready to take the next step? Start small—try a single tray with your favorite herbs or veggies, then expand as you gain confidence. Soon, you’ll be harvesting fresh, homegrown goodness year-round! Happy planting! 🌿