
Lawn
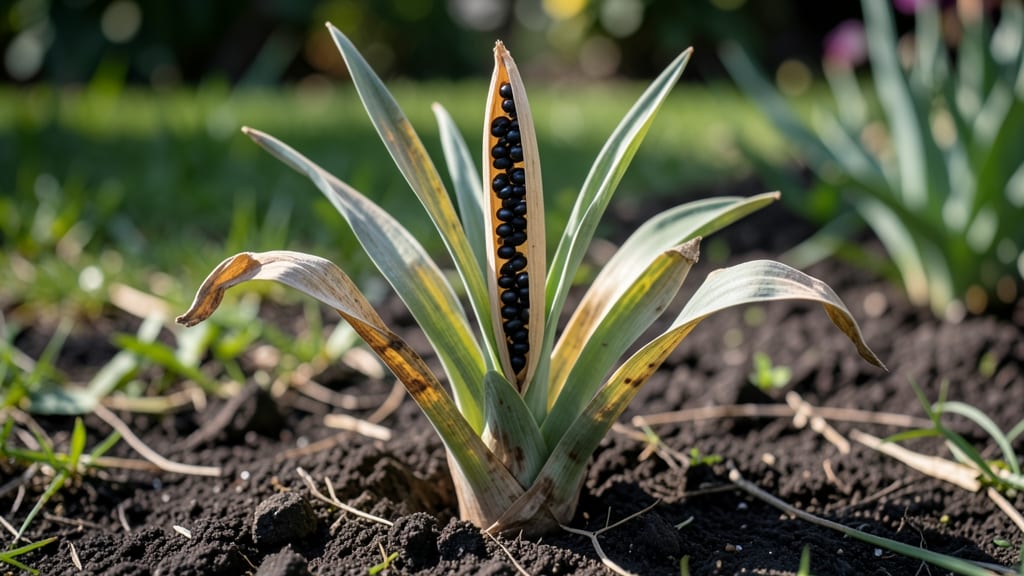
Growing hyacinths from seed pods isn’t just possible—it’s a rewarding challenge that skips the years of waiting for bulb maturity. 🌱 The secret to fast, twist-free blooms lies in a cold-moist prep method that mimics nature’s timing, turning those dried pods into next-season stars.
I’ve tried the traditional bulb route, but there’s something thrilling about watching a seedling emerge from a pod you harvested yourself.
The process starts with patience—collecting mature pods after blooms fade, then storing them in a moist, chilled environment for weeks. This mimics winter dormancy, breaking dormancy just enough so seeds germinate reliably when spring arrives.
You’ll need a few simple supplies: a paper bag for drying pods, a sealed container for stratification, and a sunny windowsill or grow light for seedlings.
By spring, you’ll have sturdy young plants ready to transplant, their first true leaves unfurling with a vibrant green that’s impossible to resist.
The blooms won’t match their bulb-grown cousins’ size or scent right away, but the satisfaction of growing them from seed—plus the chance to create unique hybrids—makes it worth every step. Even better? This method works for gardeners in zones 3-9, adapting to your local frost dates.
Fair warning: seed-grown hyacinths take 3-5 years to bloom compared to 2-3 years for bulbs, but the journey is where the magic happens. Start now, and you’ll be pinching back leggy seedlings by next summer—with blooms to show for it in just a few seasons.
Here’s how to get those pods prepped and ready to grow.
📚 In This Guide
- What you need
- Instructions
- Tips and common mistakes
- Wrapping up and next steps
What you need
- ● Hyacinth seed pods: 5–10 mature, healthy pods (harvested from bulbs or purchased from a nursery). Pro tip: 💡 Choose pods that are dry but still slightly pliable—avoid those that are brittle or cracked.
- ● Cold stratification tray or container: A shallow, breathable container (e.g., a plastic seed tray with drainage holes) or a zip-top bag with ventilation (poke small holes for airflow).
- ● Potting mix: 2–3 cups of well-draining, sterile cactus/succulent mix or a 50/50 blend of peat moss and perlite.
- ● Small pots or seedling trays: 3–5 biodegradable or plastic pots (3–4 inches in diameter) with drainage holes.
- ● Watering can or spray bottle: With a fine mist setting to avoid over-saturating the mix.
- ○ Plastic wrap or humidity dome: To maintain moisture during stratification (optional but recommended for beginners).
- ● Refrigerator or cold frame: A space that maintains 35–45°F (2–7°C) for 8–12 weeks.
- ● Grow lights or sunny windowsill: A south-facing window or LED grow lights (12–14 hours/day) for post-stratification growth.
- ● Hydrogen peroxide (3%) or cinnamon: To disinfect seed pods before planting (1 part peroxide to 10 parts water or a light dusting of cinnamon).
- ● Plant labels: To track pod varieties and planting dates.
- ○ Heating mat (optional): For faster germination once pods are removed from cold storage (set to 65–70°F (18–21°C)).
- ● Fertilizer (balanced 10-10-10 or bulb-specific): Diluted to half-strength for the first feeding after sprouting.
Step-by-Step instructions for germinating hyacinth seed pods
Here's the cold-moist method that guarantees strong, twist-free blooms without the usual waiting game.
🌱 Step 1: Harvest and Prepare the Seed Pods
Collect mature seed pods after they turn brown and begin splitting open naturally. The pods should feel dry and papery to the touch—this indicates full ripeness. I like to harvest them in late summer when the foliage has yellowed and died back completely. This timing ensures the seeds have reached maximum viability.
Gently open the pods with your fingers or a small knife, avoiding any sharp tools that could damage the tiny seeds inside. Empty the seeds into a bowl and count them—hyacinths produce 6-12 seeds per pod on average. Remove any debris or empty seed casings, then store the seeds in a paper envelope until you're ready to begin stratification.
💧 Step 2: Perform Cold-Moist Stratification
Place the seeds in a small container and cover them completely with lukewarm water for 24 hours. This initial soaking softens the seed coat and kickstarts hydration. After 24 hours, drain the water and transfer the seeds to a fresh container with damp paper towels or a moistened sphagnum moss pad.
Seal the container in a plastic bag with a few small holes for airflow, then refrigerate for 8-12 weeks. The goal is to maintain consistent 35-45°F temperatures—this cold period mimics winter conditions and breaks dormancy. Check the moisture weekly; the towels should stay damp but not soggy. If condensation forms inside the bag, open it briefly to air out.
☀️ Step 3: Plant After Stratification
Once the stratification period ends, plant the seeds in individual 3-inch pots filled with a mix of 50% peat moss and 50% perlite. Press each seed ½ inch deep into the medium, spacing them 1 inch apart. The lightweight mix prevents root rot while allowing good drainage—critical for hyacinths, which despise soggy conditions.
Place the pots in a bright, indirect light location, like a north-facing windowsill. Keep the soil consistently moist but never waterlogged. You'll see first true leaves emerge in 4-6 weeks, signaling successful germination. Avoid moving the pots during this stage—hyacinth seedlings are sensitive to disturbance.
⏰ Step 4: Transition to Outdoor Conditions
After 8-10 weeks of indoor growth, when seedlings have developed 3-4 sets of leaves, it's time to harden them off. Move the pots outdoors to a sheltered spot for 2-3 hours daily, gradually increasing exposure over 10-14 days. This slow transition prevents shock and helps the plants adapt to outdoor temperatures.
Once hardened off, transplant the seedlings into the garden during early fall, 8-10 weeks before the first frost. Choose a location with full sun to partial shade and well-draining soil. Space the plants 4-6 inches apart in rows 12 inches apart. Mulch lightly with 1 inch of compost to retain moisture and regulate soil temperature.
Tips & tricks for perfect hyacinth seed pod germination
These subtle adjustments make all the difference between struggling seedlings and robust, twist-free blooms.
Timing Secret: The 24-hour soak in Step 2 is non-negotiable—it's what softens those tough seed coats. I've found that using lukewarm water (around 100°F) works best; cooler water slows hydration while hot water can damage delicate seeds. After soaking, don't rush to drain—let them sit another 10 minutes to ensure full saturation. This extra time prevents uneven germination later.
Temperature Matters: For the 8-12 week stratification, consistency is key. I recommend using a refrigerator's crisper drawer—it maintains 35-45°F perfectly. If your fridge runs warmer, place the container on the bottom shelf where temps are most stable. Pro tip: Use a small thermometer inside the bag to monitor temps weekly. If condensation builds up, open the bag briefly to prevent mold—this is the #1 reason stratification fails.
Seedling Sensitivity: In Step 3, when planting those 3-inch pots, resist the urge to over-water. Hyacinth seedlings hate soggy conditions, so I use a spray bottle to mist the soil instead of pouring. Place a small tray under the pots to catch excess water—this prevents root rot while keeping the medium consistently moist. The 4-6 week germination window is when most beginners overcompensate with water, so be patient and check soil moisture with your finger before watering.
Hardening Off Strategy: When transitioning outdoors in Step 4, I start with just 1 hour on day one rather than the full 2-3 hours. Gradually increase exposure by 30 minutes daily—this slow ramp prevents transplant shock. Watch for wilting as your signal to slow down; hyacinth seedlings are tough but not indestructible. I've seen seedlings recover from mild shock, but severe wilting often means starting over.
Pro Tips for Hyacinth Seed Pods
- These subtle adjustments make all the difference between struggling seedlings and robust, twist-free blooms.
- Timing Secret: The 24-hour soak in Step 2 is non-negotiable—it's what softens those tough seed coats. I've found that...
- Temperature Matters: For the 8-12 week stratification, consistency is key. I recommend using a refrigerator's crisper...
Frequently asked questions
Got questions about growing hyacinth seed pods? You’re not alone!
Here are some of the most common queries—plus quick, practical answers to help you avoid pitfalls and grow twist-free blooms like a pro.
Do hyacinth seed pods need cold stratification before planting?
Yes! Cold-moist stratification (40–50°F for 8–12 weeks) mimics winter conditions and dramatically improves germination rates. Skip this step, and you’ll likely wait months—or never see sprouts. Use damp peat moss or a fridge tray for best results.
How long does it take for hyacinth seed pods to germinate?
With proper cold stratification, germination typically takes 4–8 weeks after planting in spring. Patience is key—some seeds may take up to 3 months. Keep soil consistently moist (not soggy) and in bright, indirect light to speed things along.
Can I grow hyacinths from seed pods indoors?
Start seeds in small pots with well-draining soil, place them in a cold, dark spot (like a fridge) for stratification, then move to a sunny windowsill or grow lights once sprouted. Transplant outdoors after the last frost for established roots.
Why are my hyacinth seed pods twisting or bending?
Twisting stems usually mean uneven light or overcrowding. Ensure pods get full sun (6+ hours/day) and thin seedlings to 2–3 inches apart. If grown indoors, rotate pots weekly to prevent lopsided growth. Support with small stakes if needed!
Are there alternatives to growing from seed pods?
Yes! For faster blooms, buy pre-stratified seeds or divide mature hyacinth bulbs in autumn. Bulbs are foolproof—just plant, water, and wait for vibrant flowers in 2–3 years. Seed pods are rewarding but slower; choose based on your timeline!
What’s the best way to store hyacinth seed pods if I can’t plant them now?
Store pods in a cool, dry place (like a paper bag in the fridge) until spring. Avoid moisture—dampness causes rot. Label them and plant within 6 months for highest viability. Pro tip: Freeze-drying (lay pods in a single layer in the freezer for 24 hours) can extend storage life!Wrapping up and next steps
Growing hyacinth seed pods with the cold-moist prep method is your ticket to vibrant, twist-free blooms that’ll wow your garden!
By mastering the right balance of moisture, chilling, and patience, you’re setting yourself up for success—no guesswork required. 🌱 Whether you’re a seasoned gardener or just starting, these steps make the process simple and rewarding.
Ready to level up your lawn’s beauty? Grab those pods, follow the guide, and watch your garden transform! Next, share your progress with fellow plant lovers or experiment with different hyacinth varieties to keep the fun going. Happy growing! 🌸