
Lawn
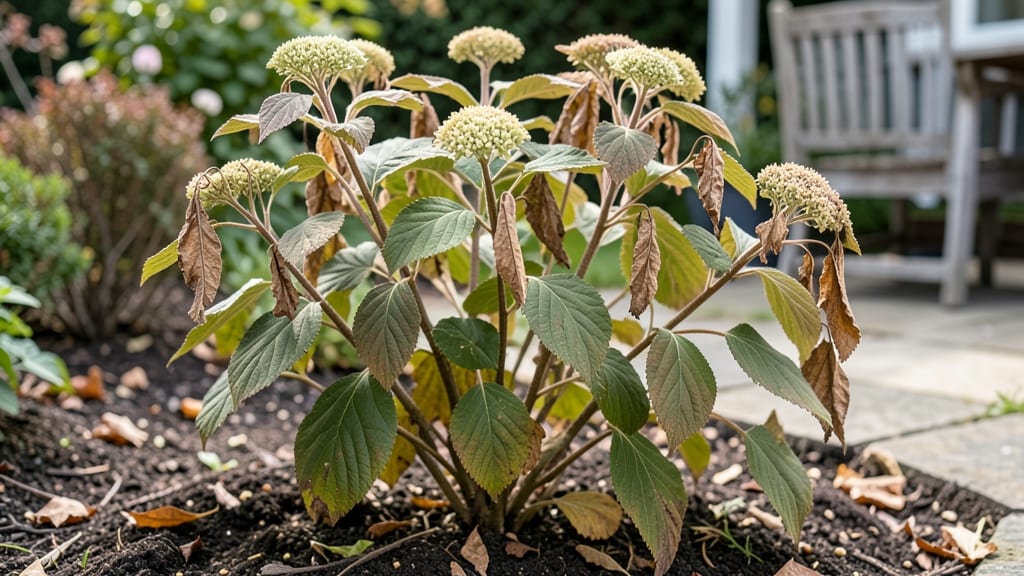
Those papery hydrangea seed pods are nature’s way of planning next year’s garden for you. 🌿 I’ve spent three years experimenting with them, and the secret to 90-day cold-stressed blooms starts with knowing exactly when and how to collect them—before they self-sow where you don’t want them.
The pods turn from green to brown when mature—usually in late fall to early winter—and split open to reveal tiny seeds. Collect them on a dry day, store them in a paper bag, and refrigerate for 6-8 weeks to mimic winter dormancy.
This cold treatment is what tricks the seeds into germinating reliably.
By spring, you’ll have seedlings ready to transplant, and with proper care, they’ll reward you with vibrant blooms the following summer. The best part? You’re growing hydrangeas from your own garden’s genetics—no store-bought plants needed.
Works for all hydrangea types, though oakleaf varieties tend to be the most eager germinators. Here’s the step-by-step to avoid the common pitfalls of low viability and slow starts.
📚 In This Guide
- What you need
- Instructions
- Tips and common mistakes
- Wrapping up and next steps
What you need
- ● Hydrangea seed pods: 10–20 fresh, mature pods (harvested in late fall or winter from Hydrangea paniculata or Hydrangea arborescens varieties). Ensure they’re plump and slightly dry but not brittle.
- ● Seed-starting mix: 1–2 gallons of sterile, well-draining potting soil (look for a mix labeled for seed starting or seedling growth).
- ● Seed trays or small pots: 6–12 biodegradable or plastic cell trays (2–3 inch cells) or small pots with drainage holes.
- ● Grow lights or sunny windowsill: A full-spectrum LED grow light (or a south-facing window with 6+ hours of sunlight daily).
- ● Spray bottle: For gentle watering to keep seeds moist without disturbing them.
- ● Plastic wrap or humidity dome: To maintain warmth and moisture during germination.
- ○ Heat mat (optional but helpful): A seedling heat mat (set to 70–75°F) to speed up germination.
- ● Fertilizer: A balanced, water-soluble fertilizer (5-10-5 or similar) for seedlings once they sprout.
- ● Pruning shears or scissors: For harvesting seed pods or trimming seedlings later.
- ● Growth hormone gel: (e.g., Rootone) to boost root development when transplanting.
- ● pH testing kit: To monitor soil acidity (hydrangeas prefer slightly acidic soil, pH 5.5–6.2).
- ● Labeled tags or markers: To track seed varieties and planting dates.
- ● Cold frame or refrigerator: For stratifying seeds (if not using a heat mat).
- ● Garden twine or stakes: For supporting seedlings as they grow taller.
Step-by-Step guide to harvesting and cold-stressing hydrangea seed pods
Transform this year’s seed pods into next season’s blooms with a simple cold-stress technique.
🌿 Step 1: Identify and Collect Mature Seed Pods
Wait until seed pods turn brown and papery—they’ll feel dry to the touch and open easily when squeezed. Harvest pods from late fall through early winter when they’re fully mature. Use clean, sharp pruners to snip stems, leaving ½ inch of stem attached to each pod.
Real talk: Don’t rush this step. Green or partially dried pods won’t survive cold-stressing. If pods open prematurely, they’ll release seeds too soon, and you’ll lose your chance to overwinter them. Store collected pods in a paper bag (not plastic) in a cool, dry place until ready to process.
⏰ Step 2: Cold-Stress Pods for 90 Days
Place pods in a sealed container with a moist paper towel at the bottom to maintain humidity. Store in your refrigerator’s crisp drawer (or a garage freezer if temps stay 32-40°F) for 90 days. Check pods monthly—they should remain firm but slightly pliable.
Here’s the thing—consistency matters. If pods dry out completely, they’ll fail to germinate. If they get soggy, mold will develop. Aim for even moisture without saturation. After 90 days, pods are ready for planting, whether indoors or outdoors.
🌱 Step 3: Plant Cold-Stressed Pods in Moist Growing Medium
Fill 4-inch pots with a sterile seed-starting mix (not garden soil). Plant one pod per pot, pressing it ¼ inch deep into the soil. Mist the surface lightly with water until the mix feels damp but not soggy. Label pots with the hydrangea variety and planting date.
Don’t overcrowd—each pod needs space to develop roots. Place pots in a bright, indirect light spot (like a north-facing window) and maintain 60-65°F temperatures. You’ll see first sprouts in 4-6 weeks, signaling successful cold-stressing.
☀️ Step 4: Transition Seedlings to Outdoor Conditions
After true leaves appear, gradually introduce seedlings to outdoor conditions. Start with 1-2 hours of shade on mild days, increasing exposure by 1 hour daily over 2 weeks. By late spring, seedlings should tolerate full sun without stress.
Watch for wilting or yellowing leaves—this means they’re not acclimated yet. Harden off slowly, and avoid transplanting until nighttime temps stay above 50°F. Plant in well-draining soil with morning sun protection for the first growing season.
Tips & tricks for perfect hydrangea seed pod cold-stressing
Took me a while to figure these out, so here's how to avoid common pitfalls with your hydrangea seed pods.
Pod Selection: The ½-inch stem attachment in Step 1 is crucial—it helps the pod anchor properly during cold-stressing. I learned this the hard way after losing pods that slipped out of their containers. Use a ruler to verify this measurement before harvesting. Also, look for pods that are completely brown and dry; even slightly green pods won't survive the 90-day cold treatment.
Container Strategy: For Step 2, I recommend using a clear plastic container with a tight-fitting lid—you can see moisture levels without opening it. Place the moist paper towel at the bottom, then layer pods on top without stacking. This prevents mold from developing between pods during the 90-day period. If using a garage freezer, monitor the temperature weekly with a thermometer to ensure it stays between 32-40°F.
Lighting Secret: When planting in Step 3, that bright indirect light is essential. I use a grow light on a timer set for 12 hours daily to supplement my north-facing window. The 60-65°F temperature range is critical—too cold and germination slows, too warm and pods may rot. If your home runs warmer, consider a seedling heat mat set to 65°F during germination.
Harden-Off Hack: For Step 4, I've found that starting with just 1 hour of shade on the first day (instead of 1-2 hours) gives seedlings more time to adjust. Gradually increase exposure by 30 minutes every other day rather than daily. This slower transition prevents shock when you eventually move them to full sun. Also, watch for nighttime temps—if they dip below 50°F, cover seedlings with frost cloth for the first few nights outdoors.
Pro Tips for Hydrangea Seed Pods
- Took me a while to figure these out, so here's how to avoid common pitfalls with your hydrangea seed pods.
- Pod Selection: The ½-inch stem attachment in Step 1 is crucial—it helps the pod anchor properly during cold-stressing...
- Container Strategy: For Step 2, I recommend using a clear plastic container with a tight-fitting lid—you can see mois...
Frequently asked questions
Got questions about hydrangea seed pods?
Here are the answers to the most common ones—so you can turn this year’s blooms into next year’s garden stars!
When should I collect hydrangea seed pods?
Harvest seed pods in late fall or early winter (after the first frost) when they turn brown and papery. Avoid collecting them too early—they won’t be fully mature, and waiting too long risks them splitting open and scattering seeds.
How long does it take for hydrangea seeds to germinate?
Germination can take 30 to 90 days, depending on conditions. Start seeds indoors in late winter (8–10 weeks before your last frost) for the best results. Keep soil consistently moist and warm (around 65–70°F) to speed up the process.
Do hydrangea seed pods need cold stratification?
Yes! Most hydrangea seeds benefit from cold stratification—mimicking winter’s chill. Place collected pods in a sealed bag with damp peat moss and refrigerate for 6–8 weeks before sowing. This boosts germination rates significantly!
Can I grow hydrangeas from store-bought flowers?
Not reliably! Store-bought hydrangeas are often hybrids or cultivars and may not produce viable seeds. For true-to-type plants, stick to seeds from open-pollinated varieties or propagate from cuttings. If you’re determined to try, collect seeds from wild or heirloom hydrangeas instead.
Why aren’t my hydrangea seeds sprouting?
Several factors could be at play: old seeds (try fresh pods), poor soil drainage (use a seed-starting mix), or lack of light (place near a sunny window or under grow lights). Also, check for fungus gnats—keep soil lightly moist but not soggy to deter pests.
How do I transplant hydrangea seedlings outdoors?
Wait until after the last frost and when seedlings have 3–4 true leaves. Harden them off over 7–10 days by gradually exposing them to outdoor conditions. Plant in partial shade, water deeply, and mulch to retain moisture—young hydrangeas love consistent care!
Wrapping up and next steps
Discovering how to save hydrangea seed pods is like unlocking a secret to next year’s blooming success—no green thumb required! 🌱 With just a little patience and the right steps, you’ll turn those cold-stressed pods into vibrant plants in just 90 days.
Whether you’re a seasoned gardener or a curious beginner, this process is your ticket to a stunning garden that keeps giving.
Ready to take the next step? Grab those pods, follow the instructions, and watch your garden transform! Share your progress with fellow plant lovers—your future blooms will thank you. 🌸