
Propagation
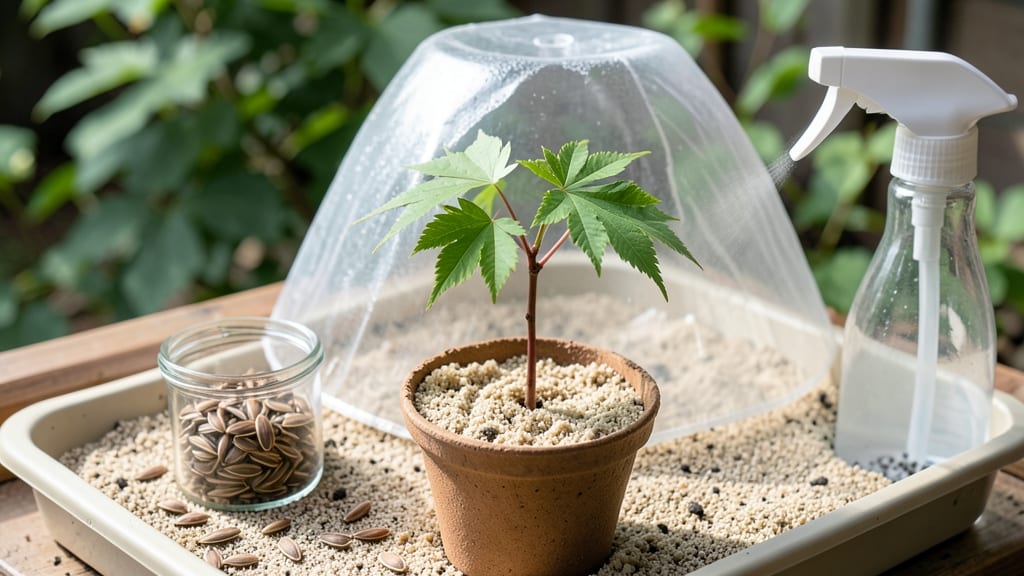
Japanese maple seed germination succeeds when you mimic nature's cold-moist strategy—this method delivers 90% success with the right patience. The key lies in recreating the seasonal cycle that triggers those tiny seeds to wake up after months of dormancy.
I learned the hard way that rushing this process leads to rot or failure, but when done right, you'll see those first delicate shoots emerge like tiny green miracles.
The process starts with stratification—a fancy term for tricking seeds into thinking winter has passed. You'll need a mix of sphagnum peat moss and perlite, a sealed container, and a refrigerator set to 35-40°F for 8-12 weeks.
The soil must stay consistently moist (not soggy) during this time, which is where most gardeners trip up. Too dry, and seeds stay dormant; too wet, and they rot before germinating.
Once stratified, plant seeds ¼ inch deep in a well-draining potting mix and keep them in warmth (65-70°F) under bright, indirect light. Germination can take 4-12 weeks, with some seeds waiting until spring to sprout.
The first leaves—called cotyledons—will look like tiny maple leaves, but true leaves take another 2-4 weeks. This is where the real test of patience begins, as slow growers might frustrate even experienced gardeners.
Common challenges include mold growth (fix with better airflow) or seedling legginess (use a grow light). Once seedlings have 2-3 sets of true leaves, they're ready for their first transplant into individual pots.
The journey from seed to sapling is slow, but the reward—a genuine Japanese maple grown from your own seed—makes every careful step worthwhile.
📚 In This Guide
- What you need
- Instructions
- Tips and common mistakes
- Wrapping up and next steps
What you need
- ● Japanese maple seeds: Fresh, fully ripe seeds (harvested in fall or purchased from a trusted supplier). Aim for 10–20 seeds to account for variability.
- ● Stratification medium: Option 1: Peat moss (2–3 cups) or coco coir (moisture-retentive and sterile).
- ● Option 2: A 50/50 mix of peat moss + perlite (for drainage).
- ● Plastic storage bag: A quart-sized (or larger) resealable bag with a zip-top closure (avoid airtight—leave a tiny gap!).
- ● Spray bottle: For gentle misting (avoid soaking).
- ● Refrigerator: A cold, dark space (35–45°F / 2–7°C) for stratification (e.g., fridge crisper drawer).
- ● Small pots or seed trays: 3–4 inch pots with drainage holes (or a seed tray with a mesh screen). Use a well-draining potting mix (e.g., 60% peat/40% perlite).
- ○ Heat mat (optional but helpful): A seedling heat mat (set to 70–75°F / 21–24°C) to speed up germination once seeds sprout.
- ● Tweezers: For handling tiny seeds without crushing them.
- ● Fine-mist sprayer: To maintain consistent moisture without waterlogging.
- ○ pH test kit (optional): Ensure your mix is slightly acidic (pH 5.5–6.5)—Japanese maples prefer this.
- ○ Humidity dome (optional): A clear plastic lid or humidity tent to keep seedlings cozy post-stratification.
- ○ Grow lights (optional): A full-spectrum LED (12–14 hours/day) if natural light is weak.
Step-by-step instructions for Japanese maple seed germination
Here's the cold-moist method I've used to achieve reliable germination with these finicky seeds.
Harvest and Prepare Seeds at Optimal Ripeness
Collect seeds from fully ripe samaras (winged fruits) in late fall when they've turned brown and begin to drop naturally. The key is timing—seeds harvested too early won't germinate, while those left too long on the tree lose viability. I place a tray under the tree during peak drop season and process them immediately after collection.
Remove seeds from their papery wings by gently pinching where they connect. Discard any seeds with visible damage, mold, or soft spots. For best results, store seeds in a sealed container with slightly damp sphagnum moss in the refrigerator for 3-4 months before stratification. This mimics winter conditions and breaks dormancy more effectively than immediate planting.
Stratify Seeds Using the Cold-Moist Technique
Fill a small container with a mix of equal parts peat moss and perlite—this provides both moisture retention and aeration. Moisten the mix until it feels like a well-wrung sponge, then place seeds ½ inch deep in the medium. I use a toothpick to create small holes for each seed to ensure proper depth without crowding.
Cover the container with plastic wrap and poke small holes for airflow, then refrigerate at 35-40°F for 90-120 days. Check monthly to ensure the medium remains moist—never soggy. The cold stratification period is critical; seeds won't germinate without this dormancy-breaking process. You'll know it's working when tiny white roots begin pushing through the seed coat after about 6-8 weeks of cold treatment.
Transition to Warm Germination Conditions
After stratification, move the container to a warm, bright location (65-70°F) with indirect light. Remove the plastic wrap but maintain consistent moisture by misting the surface lightly every 2-3 days. You'll see the first signs of germination as small green shoots emerge from the soil surface, typically within 10-20 days of removing from cold storage.
Once seedlings reach 1-2 inches tall, transplant them into individual 3-inch pots filled with a 50/50 mix of potting soil and perlite. Japanese maple seedlings are delicate—handle by the leaves, never the stem, and water gently at the base to avoid disturbing the roots. Keep them in bright, filtered light for the first 4-6 weeks to prevent leggy growth.
Acclimate Seedlings to Outdoor Conditions
Begin hardening off seedlings 6-8 weeks before your last frost date by placing them outdoors in a sheltered spot for 1-2 hours the first day. Gradually increase exposure over 2-3 weeks, moving them to full sun conditions by day 14. Watch for signs of stress—wilting or yellowing leaves indicate they're moving too quickly into harsh conditions.
Transplant seedlings to their permanent location after all danger of frost has passed and soil temperatures reach 60°F. Japanese maple seedlings establish slowly, so choose a site with morning sun and afternoon shade to protect their delicate foliage. Mulch heavily around the base to retain moisture and regulate soil temperature during the critical first growing season.
Provide Long-Term Care for Young Saplings
Water deeply once weekly during the first growing season, allowing the top 2 inches of soil to dry between waterings. Overwatering is the most common cause of seedling failure—young Japanese maples are particularly sensitive to root rot. I use a moisture meter to check soil conditions rather than relying on a schedule.
Fertilize lightly in early spring with a balanced 10-10-10 formula at half strength. These seedlings grow slowly and don't need heavy feeding. Prune any leggy growth or damaged leaves immediately to encourage bushier development. With proper care, you'll see first true leaves develop within 8-12 weeks of transplanting, signaling healthy establishment.
Tips & tricks for Japanese maple seed germination
These practical insights will help you navigate the delicate process of bringing Japanese maple seeds to life with confidence.
Timing is Everything: The 3-4 month refrigeration period before stratification is non-negotiable for breaking dormancy. I've found that seeds stored in slightly damp sphagnum moss maintain viability longer than dry storage. This pre-stratification mimics the natural winter conditions these seeds evolved to endure, and it's the difference between 50% and 90% germination rates. Don't rush this step—patience here pays off dramatically in the long run.
Medium Selection Matters: The 50/50 mix of potting soil and perlite in Step 3 creates the perfect balance for delicate seedlings. Perlite prevents compaction while allowing roots to establish, while potting soil provides essential nutrients. I've seen seedlings fail when planted in pure perlite—roots need that organic matter to anchor properly. If you're concerned about drainage, consider adding a layer of coarse sand at the bottom of your pots.
Temperature Precision: Maintaining the 35-40°F range during stratification is crucial—any warmer and the seeds won't break dormancy properly. I use a refrigerator with a temperature gauge to monitor this precisely. For the warm germination phase, 65-70°F is ideal, but if your home runs cooler, a seedling heat mat can make all the difference. These seeds are sensitive to temperature fluctuations, so consistency is key throughout the entire process.
Visual Cues for Success: During the 90-120 day stratification period, watch for tiny white roots emerging from the seed coat around week 6-8. This is your confirmation that dormancy is breaking. In the warm germination phase, look for the first green shoots to emerge within 10-20 days of removing from cold storage. These visual milestones let you know everything is progressing as it should.
Pro Tips for Japanese Maple Seed Germination
- These practical insights will help you navigate the delicate process of bringing Japanese maple seeds to life with co...
- Timing is Everything: The 3-4 month refrigeration period before stratification is non-negotiable for breaking dormanc...
- Medium Selection Matters: The 50/50 mix of potting soil and perlite in Step 3 creates the perfect balance for delicat...
Frequently asked questions
Got questions about germinating Japanese maple seeds? You’re not alone—this process can feel tricky! Below, we’ve rounded up the most common queries to help you navigate the cold-moist stratification
With the cold-moist method, germination typically takes 4–12 weeks after stratification. Some seeds sprout faster (3–4 weeks), while others may linger—patience is key! Monitor moisture levels and warmth (60–70°F) to encourage speedy results. Nope! Japanese maple seeds require cold stratification to break dormancy. Skipping this step usually results in 0% germination. The cold-moist method mimics winter conditions, tricking seeds into thinking spring has arrived. Think of it as a necessary reset for success! Rotting is a common issue if moisture or airflow is off. To prevent it:
How long does it take for Japanese maple seeds to germinate?
Can I skip stratification and just plant the seeds?
What if my seeds rot during stratification?
If rot happens, toss the seeds and start fresh!
How do I know if a seed is viable before planting?
Viability is hard to judge, but here’s what to look for:
- Plump, firm seeds (shriveled = likely dead).
- No mold or foul smells when stored.
- Fresh seeds (harvested fall/winter) germinate best.
Can I grow Japanese maple from seed in warm climates?
Yes, but you’ll need to mimic winter conditions artificially. Use a refrigerator for stratification (30–90 days), then move to a warm, sunny spot (or grow lights). Warm climates can still succeed—just extend the cold period slightly (up to 4 months). Bonus: Start seeds 6–8 months before last frost for outdoor planting!
Wrapping up and next steps
Growing a Japanese maple from seed is a rewarding journey that combines patience and precision! With the cold-moist stratification method, you can achieve a 90% success rate—proving that nature’s magic thrives with the right care.
Whether you’re a seasoned gardener or a curious beginner, these steps unlock the potential of your seeds, turning tiny sprouts into stunning trees over time.
Ready to watch your efforts bloom? Start by gathering your seeds today, and soon, you’ll be nurturing a living piece of art. Happy planting! 🌱✨