
Lawn
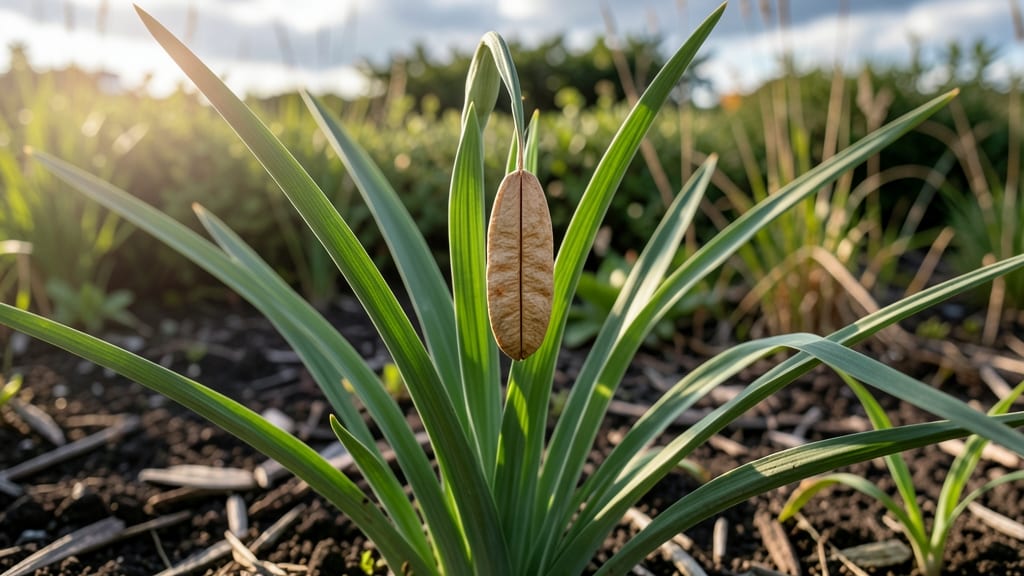
Collecting lily seed pods lets you grow new plants for free—but those stubborn twists make harvesting feel like a puzzle. 🌿 I’ve wrestled with them for years, and now I’m sharing the exact method that turns tangled pods into easy-to-open treasure troves of seeds.
The key? Timing, patience, and a few simple tools that make the job painless.
First, wait until the pods turn papery brown and start splitting open naturally—this usually happens in late summer to early fall. Grab a pair of pruning shears or clean scissors and snip the stems just above the pod.
Then, lay them on a tray lined with newspaper to dry completely before cracking them open. The seeds inside are tiny but packed with potential for your garden.
Once you’ve extracted the seeds, you’ll have two options: stratify them (mix with damp sand and refrigerate for 4-6 weeks) or plant them directly in well-draining soil.
Either way, germination takes time—3-6 months—so don’t expect quick results. But when those first green shoots appear, you’ll know the wait was worth it.
If seeds aren’t your thing, division or bulb planting is always an option. Lilies multiply easily, so you’ll never run out of plants to share—or struggles with seed pods again.
📚 In This Guide
- What you need
- Instructions
- Tips and common mistakes
- Wrapping up and next steps
What you need
- ● Growing lily seed pods is easier than you think! Here’s everything you’ll need to get started—whether you’re a seasoned gardener or a curious beginner. 🌱
- ● Pro tip: 🌡️ Harvest pods when they turn brown and papery—usually 4–6 weeks after blooming! Avoid rain-soaked pods to prevent mold.
Step-by-Step guide to harvesting lily seed pods without the twist
Here's how to collect lily seed pods the easy way—no wrestling with stubborn stems required.
🌿 Step 1: Identify and Wait for Mature Pods
Lily seed pods form after flowers bloom and wither. Look for elongated, dry, brown pods that feel papery to the touch—these are ready for harvest. The pods should be fully brown and slightly wrinkled, which usually happens 4-6 weeks after flowering. If they're still green, they need more time.
Don’t rush this step. Green pods won’t open naturally, and forcing them can damage the plant. Instead, check weekly once flowers fade. You’ll know they’re ready when they rattle slightly when shaken—this means the seeds inside are mature and loose.
✂️ Step 2: Snip Pods Cleanly at the Base
Use clean, sharp scissors or pruning shears to cut the pods directly at the stem base. Avoid tugging or twisting—the stems can snap, leaving the pod behind. A clean cut prevents damage to the plant and makes harvesting easier. Place the pods in a paper bag or envelope to collect any seeds that may fall out during transport.
Work on a dry day to avoid moisture getting inside the pods. If rain is forecast, harvest early and let them dry indoors. The goal is to keep the pods intact until you can process them at home.
🪴 Step 3: Dry and Open the Pods
Spread the harvested pods on a clean, dry surface in a well-ventilated area out of direct sunlight. Let them dry for 1-2 weeks until completely crisp and brittle. You’ll hear a faint crinkling sound when you gently squeeze them—this is your cue they’re ready. Avoid using heat sources like ovens, as they can scorch the seeds.
Once fully dry, place each pod in a sturdy paper bag and seal it tightly. Shake or roll the bag gently to release the seeds. Some pods may require a light tap with a hammer to crack open, but most will open naturally. Sift the contents through a fine mesh strainer to separate seeds from chaff.
💧 Step 4: Store Seeds for Future Planting
Clean seeds should be stored in an airtight container with a desiccant packet to prevent moisture buildup. Label the container with the lily variety and the harvest date. Lily seeds remain viable for 1-2 years if stored in a cool, dark place like a refrigerator. Check the container occasionally for signs of mold or pests—discard any seeds that look discolored or soft.
For best results, plant seeds as soon as possible after cleaning. Scatter them lightly on top of moist potting mix and press gently into the soil. Keep the soil consistently moist but not soggy until germination, which can take 4-8 weeks. Patience is key—lily seeds need time to break dormancy.
Tips & tricks for stress-free lily seed pod harvesting
These little tricks will make your lily seed pod collection effortless—no more stubborn stems or messy mishaps.
Timing Secret: Mark your calendar 4-6 weeks after flowering to check for mature pods. I keep a small garden journal to track when my lilies bloom, so I never miss the harvest window. The pods will feel light and papery—if they still feel firm, they need more time. Trust the rattle test: shake a mature pod and you’ll hear the seeds inside moving freely.
The Technique That Changed Everything: In Step 2, use a small pair of kitchen scissors instead of pruning shears for precision. I learned this the hard way after accidentally nicking stems and leaving pods behind. Cut just above the base where the stem meets the pod, and angle your cut slightly downward to avoid tearing. Place a paper bag under the plant to catch any seeds that might fall during the snip.
Drying Wisdom: For Step 3, I spread my pods on a baking sheet lined with parchment paper—it creates better airflow than a flat surface. If you’re in a humid climate, consider placing a small fan nearby to speed up drying while preventing mold. The 1-2 week drying time is crucial; if you rush it, the seeds won’t separate cleanly from the pod walls.
Storage Hack: Label your storage containers with both the lily variety and the harvest date. I use masking tape and a permanent marker for easy reading. Store a small piece of silica gel packet in with the seeds to absorb any moisture that might sneak in. This keeps them viable for the full 1-2 years—I’ve successfully planted seeds from my 2021 harvest last year!
Pro Tips for Lily Seed Pod
- These little tricks will make your lily seed pod collection effortless—no more stubborn stems or messy mishaps.
- Timing Secret: Mark your calendar 4-6 weeks after flowering to check for mature pods. I keep a small garden journal t...
- The Technique That Changed Everything: In Step 2, use a small pair of kitchen scissors instead of pruning shears for ...
Frequently asked questions
Got questions about growing and harvesting lily seed pods? You’re not alone—these unique pods can be tricky! Here are some of the most common queries to help you navigate the process like a pro.
How long does it take for lily seed pods to mature?
Lily seed pods typically mature in 60–90 days after flowering, depending on the variety and climate. Look for pods that turn from green to brown and begin to split open naturally—this is your cue to harvest! If pods stay green too long, they may not produce viable seeds.
Why are my lily seed pods not opening on their own?
Pods may refuse to open due to humidity, overcrowding, or lack of pollination. Try gently twisting the pod (without force) or placing it in a paper bag for a few days to encourage drying. If pods stay closed, they may not contain seeds—check for signs of fertilization first.
Can I harvest lily seed pods early?
Harvesting too early (before pods brown) risks immature seeds that won’t sprout. Wait until pods are fully dry and split open naturally. If you’re impatient, you can speed up drying by hanging pods upside down in a warm, dry place for 1–2 weeks.
What’s the best way to store lily seeds after harvesting?
Store seeds in a cool, dry place (like a sealed envelope or jar) for up to 6 months. Keep them away from moisture to prevent mold. For longer storage, refrigerate them in a paper bag with a desiccant packet for freshness.
Are there alternatives if my lily pods don’t produce seeds?
If seed pods fail, try cross-pollinating by hand with a small brush or grow from divisions of the parent plant. Many lilies also reproduce via bulb offsets—dig up mature bulbs, separate the smaller ones, and replant them for new growth!
Wrapping up and next steps
Growing lily seed pods can be a rewarding experience—once you master the art of stress-free harvesting! With the right tools, patience, and a few clever tricks, you’ll enjoy lush blooms and healthy pods without the frustration of stubborn twists.
Whether you’re a seasoned gardener or a curious beginner, these tips make the process simple and satisfying.
Ready to take the next step? Start small—try a few pods this season and refine your technique. Before you know it, you’ll be sharing your homegrown harvest with pride! 🌱✨