
Lawn
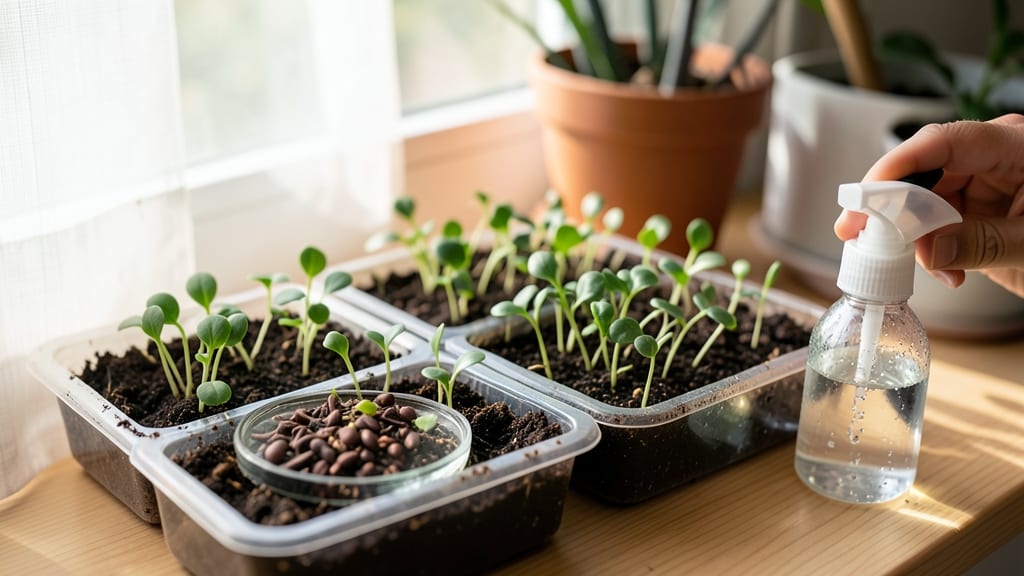
Your tiny balcony or windowsill could become a year-round bloom factory with little seed gardens—no yard required. 🌱 I started mine in a 12-inch square planter and now have cascading petunias, snapdragons, and even dwarf tomatoes all summer long, with cool-season greens in winter.
The secret is right-sizing everything: small containers, fast-growing seeds, and smart spacing. You’ll skip the weeding wars of traditional gardens while still getting that "I grew this!" satisfaction. My 6-inch deep pots hold enough soil for radishes and lettuce, while vertical pockets on my wall frame delicate alyssum.
By midseason, you’ll have a lush, low-maintenance display that changes with the seasons—no replanting needed. The best part? These gardens stay productive even when you’re traveling, thanks to self-watering tricks like pebble trays and mulch. Works for renters, urbanites, or anyone tired of fighting for space in a big garden.
Let’s get those seeds sprouting!
📚 In This Guide
- What you need
- Instructions
- Tips and common mistakes
- Wrapping up and next steps
What you need
- ● Containers: 3–10 small planters (6–12" in diameter or depth) – terracotta, fabric grow bags, or recycled containers (ensure drainage holes!)
- ○ 1–2 hanging baskets (optional, for trailing plants like nasturtiums or strawberries)
- ● Growing Medium: 2–3 bags of lightweight potting mix (avoid garden soil—it’s too dense!)
- ● Perlite or vermiculite (1 small bag, for aeration)
- ● Seeds: Choose fast-growing, compact varieties like: Leafy greens (lettuce, spinach, kale – 5–10 seeds per pot)
- ● Herbs (basil, thyme, chives – 3–5 seeds per pot)
- ● Flowers (pansies, marigolds, nasturtiums – 2–4 seeds per pot)
- ● Microgreens (broccoli, radish – 1 tbsp seeds per container)
- ● Tools: Small hand trowel or spoon
- ● Spray bottle (for gentle watering)
- ● Measuring cup (for soil and amendments)
- ● Twine or plant ties (if using hanging baskets)
- ● Slow-release fertilizer (granules mixed into soil)
- ● Organic compost (1 cup per container for nutrient boost)
- ● Self-watering trays or saucers (to catch runoff)
- ● Grow lights (LED, 6–12" above plants for low-light spots)
- ● Decorative pebbles or mulch (for aesthetics + moisture retention)
- ● Plant labels (to track varieties)
Step-by-Step instructions for creating little seed gardens
Here's how to transform small spaces into vibrant, year-round blooms using clever planter designs.
🪴 Step 1: Select and Prepare Your Containers
Choose containers with drainage holes—terracotta pots, window boxes, or even repurposed wooden crates work beautifully. I like to use 6-8 inch deep planters for single blooms and 12-14 inch wide troughs for cascading varieties. Clean each container thoroughly with soapy water to remove any residue that could inhibit root growth.
Line the bottom with 1-2 inches of gravel or broken pottery shards to improve drainage. This prevents soggy roots, which is especially critical for delicate seedlings. If your containers lack drainage holes, drill them yourself—just be sure to place a mesh screen over them to keep soil from washing out.
🌱 Step 2: Layer Soil for Optimal Drainage and Nutrition
Fill the bottom third of each container with a lightweight potting mix blended with 20% perlite or vermiculite for aeration. This layer ensures excess water drains away while still holding enough moisture for tender roots. I like to add a slow-release fertilizer here—just follow the package instructions for the correct ratio.
Top this with 2-3 inches of high-quality seed-starting mix for the top layer. Press it down gently but firmly so it's compact enough to support seedlings without being so dense that roots struggle to penetrate. Moisten this top layer until it feels like a damp sponge—you should see water bead on the surface but not pool.
☀️ Step 3: Plant Seeds for Continuous Blooms
For year-round blooms, stagger your planting by selecting varieties with different bloom cycles. Start with fast-growing annuals like nasturtiums or marigolds, which sprout in 7-10 days, then follow with slower germinators like snapdragons or petunias. Plant seeds ¼ inch deep, spacing them ½ inch apart—crowding leads to weak, leggy seedlings.
Cover the seeds lightly with additional mix, then mist the surface with a spray bottle until evenly damp. Place each container in a warm, bright spot (ideally 70-75°F) and cover with a clear plastic dome or plastic wrap to retain moisture. Check daily for condensation—if you see water droplets on the plastic, remove it for 30 minutes to prevent fungal issues.
💧 Step 4: Manage Light and Water for Healthy Growth
Once seedlings emerge, remove the plastic cover immediately to prevent damping-off. Place containers under grow lights or in a south-facing window where they receive 6-8 hours of direct light daily. You'll know they're getting enough light when leaves are dark green and compact—pale, stretched seedlings mean it's time to move them closer.
Water from the bottom by placing containers in a tray of ½ inch of water for 15-20 minutes. This encourages roots to grow downward while preventing soil-borne diseases. After the first true leaves appear (usually 2-3 weeks), reduce watering to every 2-3 days, allowing the top inch of soil to dry between waterings. Overwatering is the fastest way to kill delicate seedlings.
✂️ Step 5: Thin and Transplant for Full, Lush Blooms
When seedlings reach 2 inches tall and have 2-3 sets of true leaves, thin them to 2-3 inches apart in the container. Use sharp scissors to snip unwanted seedlings at soil level—this prevents disturbing roots of remaining plants. If your container is too small, transplant the strongest seedlings into larger pots or share extras with fellow gardeners.
Pinch back the tips of leggy seedlings to encourage bushier growth. This is especially important for varieties like petunias or geraniums, which can become top-heavy without support. Once flowers begin to bud, feed plants with a balanced liquid fertilizer every 2 weeks to promote continuous blooming. Deadhead spent flowers regularly to encourage more blooms and prevent self-seeding where you don't want it.
Tips & tricks for perfect space-saving planters
Here's what nobody tells you about creating thriving little seed gardens that actually last all year.
Container Selection: Repurposed containers like old rain gutters or wooden pallets can work brilliantly for cascading varieties, but always prioritize depth over width. Shallow containers (less than 6 inches) are perfect for herbs and lettuce, while deeper ones (8-12 inches) support root vegetables and flowering perennials. For maximum drainage, consider adding a coffee filter over drainage holes before adding your gravel layer—this keeps soil from escaping while still allowing water to flow freely.
Soil Layering Strategy: The 20% perlite-to-potting-mix ratio in Step 2 is non-negotiable for aeration, but here's the secret: mix in 1 tablespoon of worm castings per quart of soil. This boosts microbial activity without overwhelming delicate seedlings. For containers without drainage holes, create a false bottom using a plastic mesh bag filled with gravel—this gives roots room to grow downward while preventing waterlogging.
Seed Staggering: When planning your year-round bloom cycles, consider planting fast growers like radishes (5-7 days to sprout) alongside slower varieties. This creates a natural succession where you're always harvesting something fresh. For maximum efficiency, mark your planting schedule on a calendar and note which varieties need the 70-75°F warm spot versus those that tolerate cooler temperatures (like spinach or kale).
Light Management: If your space only gets 4-6 hours of direct light, supplement with a full-spectrum LED grow light placed 6-12 inches above plants. These lights are energy-efficient and can run on timers for 12-14 hours daily. For window gardening, rotate containers weekly to ensure even light exposure—you'll notice plants leaning toward the light within days, and this simple rotation keeps them growing straight and strong.
Pro Tips for Little Seed Gardens
- Here's what nobody tells you about creating thriving little seed gardens that actually last all year.
- Container Selection: Repurposed containers like old rain gutters or wooden pallets can work brilliantly for cascading...
- Soil Layering Strategy: The 20% perlite-to-potting-mix ratio in Step 2 is non-negotiable for aeration, but here's the...
Frequently asked questions
What’s the best time to start a little seed garden?
For most veggies and flowers, sow seeds indoors 6-8 weeks before the last frost (check your local frost dates!). Leafy greens like lettuce or herbs can go straight into containers outdoors in early spring or late summer. If you’re growing warm-season crops (tomatoes, peppers), wait until soil is at least 60°F (15°C)—usually after Memorial Day in many regions.
How do I maximize space in a small seed garden?
Use vertical gardening (trellises for cucumbers, beans, or morning glories) and interplanting—pair fast growers (radishes) with slow ones (carrots). Opt for compact varieties (e.g., ‘Tiny Tim’ peas or ‘Patio’ tomatoes) and rotate crops yearly to prevent disease. Dwarf or bush types are your best friends!
Why are my seeds not sprouting in my little seed garden?
Check these first:
- Moisture: Keep soil consistently damp (not soggy) with a spray bottle or misting.
- Depth: Most seeds need 2-3x their width of soil coverage (check seed packet!).
- Light: Seeds need warmth (70–80°F) and light to germinate—use a grow light if indoors.
- Age: Old seeds (over 1 year) may fail—test viability by soaking in water.
Can I use regular potting soil for my little seed garden?
Not ideal! Seed-starting mixes are lighter and sterile, preventing mold and compaction. For containers, blend 50% potting soil + 50% perlite/vermiculite for drainage. Add a slow-release fertilizer (like 5-10-5) or compost at planting time. Avoid garden soil—it’s too heavy and may harbor pests.
How do I keep pests away from my tiny garden?
Start with prevention: Use row covers for young plants, plant pest-repelling herbs (basil, marigolds), and rotate crops. For bugs, try
- Neem oil (spray on leaves).
- Handpick larger pests (like cabbage worms).
- Beneficial insects (ladybugs, lacewings) for organic control.
What can I do if my plants outgrow their containers?
Don’t panic! Transplant seedlings to slightly larger pots (add 2–3 inches of depth) or upcycle containers (hanging baskets, fabric grow bags). For root-bound plants, prune roots before moving them to loosen the soil ball. If space is tight, harvest early (e.g., pick leafy greens from the base) or thin seedlings to give remaining plants room.
Wrapping up and next steps
Starting a little seed garden is one of the most rewarding ways to bring life, color, and freshness to your space—no matter how small!
Whether you’re growing herbs on a sunny windowsill, vibrant flowers in a hanging planter, or crisp veggies in a vertical tower, these tiny gardens prove that bigger isn’t always better. 🌱
Now that you’ve got the tools and answers to common questions, it’s time to roll up your sleeves and sow those seeds.
Begin with one or two easy-to-grow plants, track your progress, and soon, you’ll be harvesting blooms or homegrown snacks year-round. Your green thumb is closer than you think—just start small and enjoy the journey!