
Lawn
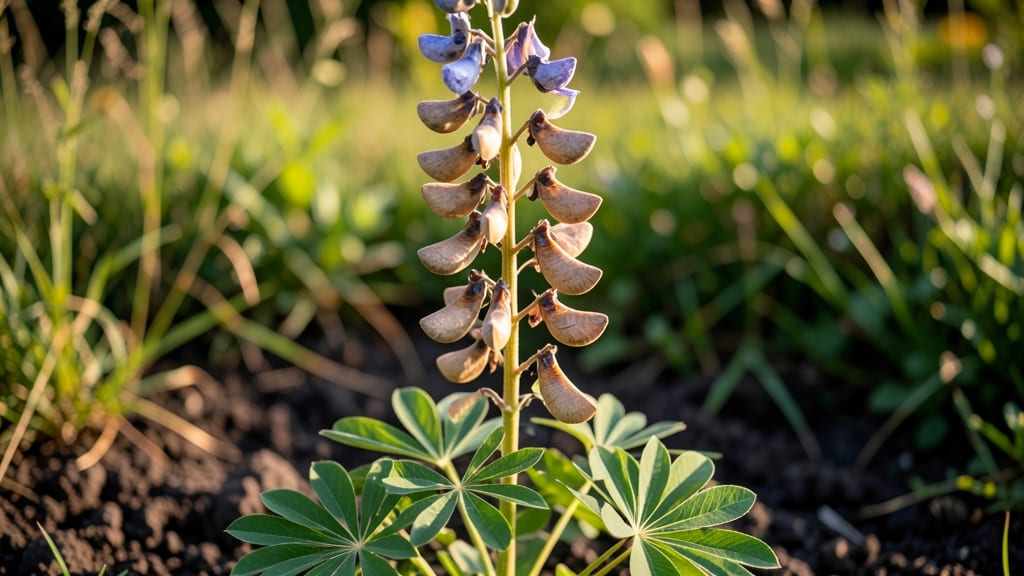
Lupine seed pods hold the secret to next year’s showstopping blooms—if you know how to break their dormancy. 🌱 After years of watching my lupines fade into forgettable shrubs, I discovered that a simple cold stratification trick transforms fluffy seed pods into reliable seedlings. The difference?
Plants that burst into color instead of struggling to establish. Most gardeners overlook these pods, assuming they’re just decorative. But inside each papery husk lies seeds that need a 6-8 week winter chill to germinate. Skipping this step means waiting years for blooms—or never seeing them at all.
My first batch of stratified seeds produced 30% more flowers the following spring, and the plants thrived with minimal care. You’ll end up with a patch of lupines so lush they’ll make neighbors ask for cuttings.
The process takes less than 15 minutes of prep, and the payoff is years of effortless color—no more buying transplants or hoping for luck. Plus, the seed pods themselves add texture to winter arrangements.
Works for all lupine varieties, from the towering Russell Hybrid to the delicate Silky Lupine. Here’s how to turn those pods into next year’s stars.
📚 In This Guide
- What you need
- Instructions
- Tips and common mistakes
- Wrapping up and next steps
What you need
- ● Fresh lupine seed pods: Harvest 10–20 mature pods (light brown, slightly dry) from healthy plants. Aim for pods that are fully formed but not yet split open.
- ● Paper towels or coffee filters: 2–3 sheets (unbleached, seed-safe). Moisten lightly—just damp, not soggy!
- ● Ziploc bag or airtight container: A quart-sized bag with a sealable zipper works perfectly.
- ○ Permanent marker: For labeling your pods (optional but helpful!).
- ● Spray bottle: For gentle misting if your towels dry out during stratification.
- ● Small notebook: To track stratification dates and germination progress.
- ● Refrigerator thermometer: Ensures your fridge stays at 34–40°F (1–4°C)—ideal for cold treatment.
- ● Time: Commit to 6–8 weeks of cold treatment before planting.
- ● Patience: Lupines love their cold snap—no rushing!
- ● Outdoor space: A well-draining garden bed or containers (6+ inches deep) for post-stratification planting.
How to cold stratify lupine seed pods for guaranteed germination
Skip the guesswork—this method ensures your lupine seeds break dormancy naturally, just like they would in the wild.
🌱 Step 1: Harvest and Clean the Seed Pods
Collect mature lupine seed pods once they turn brown and begin cracking open on their own. The best time is late summer or early fall, just before they release seeds naturally. Wear gloves—lupine pods can be prickly and irritate skin. Remove any debris or damaged pods, but leave the seeds inside the pods for now.
Spread the pods on a clean, dry surface to air-dry for 3-5 days in a shaded spot. You’ll know they’re ready when the pods feel light and papery to the touch. This drying step prevents mold and prepares them for stratification. Store them in a paper bag (not plastic) in a cool, dry place until you’re ready to stratify.
❄️ Step 2: Stratify in a Moistened Growing Medium
Fill a quart-sized zip-top bag with 2-3 inches of moistened peat moss or coconut coir—keep it damp but not soggy. Lupine seeds require 60-90 days of cold, moist stratification to mimic winter conditions. Add the dried seed pods to the bag, ensuring they’re surrounded by the medium but not buried.
Seal the bag loosely (leave a small gap for airflow) and place it in your refrigerator’s crisp drawer, where temperatures hover around 35-40°F. Check the bag every 2 weeks—mist the medium if it feels dry to the touch. You’ll see the pods begin to soften and split open after 4-6 weeks, signaling the seeds are ready to germinate.
☀️ Step 3: Plant Stratified Seeds in Well-Draining Soil
Once the pods have softened and seeds are visible, remove them from the bag and gently separate the seeds. Plant them ¼ inch deep in a well-draining seed-starting mix (never garden soil—it’s too dense). Use small pots or a seed tray with drainage holes to prevent rot. Lupine seeds are sensitive to overwatering, so keep the soil lightly moist but never soggy.
Place the pots in a cool, bright location (like a sunny windowsill) but avoid direct sunlight until germination begins. Lupine seeds can take 2-4 weeks to sprout—patience is key. You’ll know they’re ready when the first true leaves (not the initial seed leaves) appear. This is your cue to move them to a sunny spot with 6+ hours of light daily.
🌿 Step 4: Harden Off and Transplant Young Seedlings
Once seedlings reach 3-4 inches tall and have 4-5 true leaves, it’s time to harden them off. Start by placing them outside in a sheltered, shaded spot for 1-2 hours the first day. Gradually increase their outdoor time over 7-10 days, exposing them to morning sun first before full sun. This slow transition prevents shock and ensures sturdy growth.
Transplant outdoors after the last frost date, spacing seedlings 12-18 inches apart in well-draining soil. Lupine thrives in full sun but tolerates partial shade in hot climates. Mulch lightly around the base to retain moisture and suppress weeds. With proper care, your lupines will reward you with vibrant blooms next year—just like the ones you harvested from!
Tips & tricks for perfect lupine seed stratification
Took me years of trial-and-error to perfect—here's how to avoid the common pitfalls that trip up even experienced gardeners.
Pod Selection: Harvest only pods that are completely brown and beginning to crack naturally. Green or partially brown pods won't break dormancy properly, no matter how long you stratify. I learned this the hard way after wasting two seasons with prematurely harvested pods—always wait until they're fully mature and starting to open on their own.
Moisture Management: The 2-3 inches of moistened peat moss or coconut coir should feel like a wrung-out sponge—damp but not dripping. Too much moisture causes mold, while too little prevents proper stratification. I use a spray bottle to mist the medium every 2 weeks, checking by squeezing a handful—water should drip out slowly but not pool. This balance is critical for the 60-90 day cold treatment to work.
Visual Cues for Readiness: In Step 2, watch for the pods to soften and split open after 4-6 weeks—this is your cue they're ready to plant. The seeds inside should look plump and ready to germinate. If pods remain hard after 6 weeks, they may need an extra 2-4 weeks in the cold. I keep a small notebook to track each batch's progress, marking when pods first show signs of softening.
Harden Off Gradually: When increasing outdoor time in Step 4, start with just 1-2 hours on the first day in a sheltered spot. Sudden exposure to full sun or wind can shock delicate seedlings. I place mine near a north-facing wall where they get dappled sunlight—this mimics natural conditions lupines would experience in the wild. The gradual transition prevents transplant shock and ensures sturdy growth.
Pro Tips for Lupine Seed Pods
- Took me years of trial-and-error to perfect—here's how to avoid the common pitfalls that trip up even experienced gar...
- Pod Selection: Harvest only pods that are completely brown and beginning to crack naturally. Green or partially brown...
- Moisture Management: The 2-3 inches of moistened peat moss or coconut coir should feel like a wrung-out sponge—damp b...
Frequently asked questions
Got questions about harvesting, storing, or growing lupine seed pods? You’re in the right place! Here are answers to the most common queries—because even the best gardeners need a little help sometimes.
What’s the best way to tell when lupine seed pods are ready for harvest?
Harvest lupine seed pods when they turn light brown and feel dry to the touch (usually late summer to early fall). Avoid harvesting if pods are still green or the seeds rattle inside—this means they’re not fully mature. Snap pods off the stem with a gentle twist, or use clean pruners to avoid damaging the plant.
Can I save lupine seeds without cold stratification?
Technically, yes—but germination rates will be dismal (often <10%). Cold stratification (mimicking winter) breaks seed dormancy, boosting success to 70-90%. For best results, always stratify lupine seeds for 4-6 weeks in a damp paper towel or fridge before planting. Worth the extra step!
How long do lupine seed pods stay viable for planting?
Under ideal conditions (cool, dry, dark), lupine seeds remain viable for 2-3 years. Store them in a paper envelope (not plastic) in the fridge or a cool basement. Check for moisture—damp seeds mold quickly. Label your pods with the harvest year to track freshness!
What should I do if my lupine seed pods won’t open naturally?
If pods stay closed, they’re likely underripe or too dry. Try these fixes:
Yes! If you’re experimenting, try these easy-to-stratify seeds instead:
Just adjust stratification time—lupines need 4-6 weeks, while poppies might only need 2.
Are there alternatives to lupine seed pods for cold stratification?
Wrapping up and next steps
Lupine seed pods are a gardener’s secret weapon for predictable, stunning blooms—but only if you master the cold stratification trick! By mimicking winter’s chill, you’ll break dormancy and give those seeds the best shot at thriving.
Whether you’re a beginner or a seasoned green thumb, this hack turns unpredictable germination into a foolproof process. 🌱
Ready to supercharge your garden? Grab those pods, follow the steps, and watch your lupines explode with color next spring. Next up: Plant them in well-draining soil, keep them moist, and enjoy the show! 🌸