
Lawn
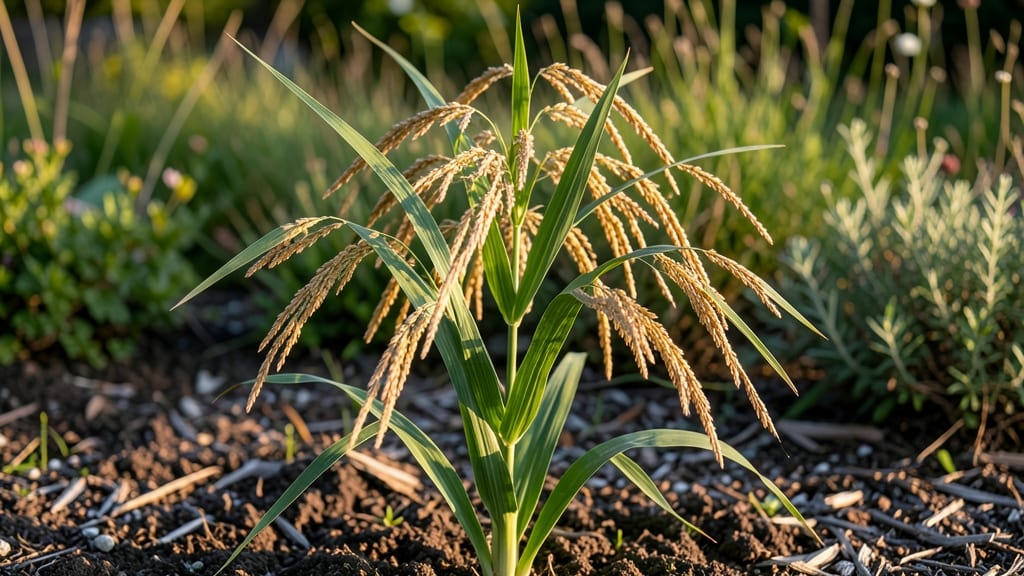
Millet seed heads are nature’s hardy solution for gardeners who want reliable, drought-tolerant seeds that thrive even when conditions are less than perfect. 🌾 I’ve grown millet for years, and once you try it, you’ll never go back to fussing over finicky plants—these stalks practically grow themselves, producing fluffy seed heads that feed birds, fill vases, or become next year’s garden starters.
The secret to stress-free millet is simple: full sun, minimal water, and patience. Plant seeds in spring after the last frost, spacing them 6-12 inches apart in well-draining soil.
They’ll shoot up in weeks, reaching heights of 3-6 feet, and those iconic feathery seed heads will form within 8-12 weeks. Unlike many crops, millet doesn’t demand constant attention—just let it grow, and it’ll reward you with seeds that stay viable for years.
Harvesting is effortless: snip the seed heads when they’re fully dry and brown, then rub them between your hands to release the seeds. Store them in a cool, dry place, and you’ll have fresh planting material anytime.
The seeds are also edible (nutty, like corn), and the dried heads make stunning dried arrangements that last all winter.
Perfect for beginners, drought-prone areas, or anyone tired of high-maintenance crops. Once you see millet’s resilience firsthand, you’ll wonder why you didn’t try it sooner—it’s the ultimate low-effort, high-reward plant.
📚 In This Guide
- What you need
- Instructions
- Tips and common mistakes
- Wrapping up and next steps
What you need
- ● Millet plants – Mature, fully grown (preferably Pennisetum glaucum or Sorghum varieties) with visible seed heads (ready when they turn golden-brown and dry).
- ● Pruning shears or sharp scissors – Heavy-duty, sterilized (70% isopropyl alcohol wipe recommended).
- ● Large breathable bags or paper sacks – 2–3 1-gallon capacity (to prevent moisture buildup).
- ● Drying tray or screen – Flat, elevated surface (e.g., window screen or wire mesh) for airflow.
- ● Fine mesh sieve or colander – 1/8-inch or smaller holes to separate seeds from chaff.
- ● Air-tight storage containers – 1-quart glass jars with tight lids (or food-grade buckets with oxygen absorbers).
- ● Labeling supplies – Masking tape + marker (to note harvest date/variety).
- ● Gloves – Thin gardening gloves to protect hands from prickly seed heads.
- ● Fan or dehumidifier – Speeds up drying in humid climates.
- ● Food dehydrator – For faster seed drying (set to 120°F for 6–8 hours).
- ● Seed testing kit – Ensures viability before storage (e.g., paper towel germination test).
- ○ Vacuum sealer – Extends seed shelf life (optional for long-term storage).
Step-by-Step guide to harvesting millet seed heads
Here’s how I harvest millet seed heads with minimal fuss—ensuring you get plump, viable seeds every time.
🌾 Step 1: Identify and Wait for Peak Maturity
Millet seed heads are ready when the panicles turn a golden-brown color and the seeds feel firm when pressed between your fingers. I check daily during the last week of growth—this is the moment that matters. If seeds are still white or soft, they need more time on the stalk. Overripe seeds shatter easily, so timing is everything.
Harvest on a dry morning after the dew has evaporated. This prevents moisture from promoting mold during storage. I like to work early because the cooler temperatures slow seed shattering. If rain is forecast, harvest a day early—wet seed heads are a nightmare to process.
✂️ Step 2: Cut Seed Heads Cleanly and Dry Properly
Use clean, sharp scissors or pruning shears to snip the seed head about 2-3 inches below the base. This prevents the stalk from breaking and leaves room for regrowth if you’re saving the plant. Lay the cut heads on a clean, dry surface—like a mesh screen or old window screen—to air-dry in a shaded spot.
Keep the drying area well-ventilated but protected from direct sunlight. Too much sun can scorch the seeds, while poor airflow risks mold. I flip the heads daily to ensure even drying. They’re ready when the seeds rattle loudly inside the panicle and feel dry to the touch—usually 7-10 days depending on humidity.
🌾 Step 3: Thresh and Clean the Seeds
Once fully dry, rub the seed heads between your hands or use a clean cloth to gently thresh the seeds out. I place the panicles in a paper bag and shake them vigorously—this separates the seeds from the chaff. For larger batches, a clean towel works too, but avoid anything that might leave residue.
Sift the threshed seeds through a fine mesh strainer or sieve to remove debris. Discard any discolored or damaged seeds—they won’t store well. Store the clean seeds in an airtight container, like a glass jar with a tight lid, in a cool, dark place. Properly stored millet seeds stay viable for 1-2 years.
🌱 Step 4: Test Germination (Optional but Recommended)
Before storing seeds long-term, I test a small batch to confirm viability. Place 10 seeds between damp paper towels in a sealed plastic bag. Keep them in a warm spot (70-75°F) and check daily. If 80% or more sprout within 7-10 days, your seeds are ready for storage. If fewer sprout, dry the remaining seeds longer or harvest fresh next season.
This step saves headaches later—you’ll know exactly what to expect when planting. If germination is poor, consider reharvesting or sourcing new seeds. Millet is resilient, but freshness matters for strong starts.
Tips & tricks for perfect millet seed head harvesting
Here’s how to turn a simple harvest into a foolproof process—because even the best millet seeds won’t save you if they’re collected wrong.
Timing is Everything: Those golden-brown panicles in Step 1? That’s your target. I learned the hard way—harvesting too early means underdeveloped seeds, while waiting too long means they’ll shatter at the slightest touch. Check daily during that last week of growth, and press a seed between your fingers: firm means ready, soft means wait.
Drying Done Right: The 7-10 days of drying in Step 2 can feel like forever, but rushing it risks mold. I flip my seed heads daily—this ensures even airflow and prevents any one side from staying damp. Place them in a shaded spot (direct sun scorch seeds) but somewhere with good ventilation (stagnant air breeds mold). Pro tip: If humidity’s high, add a fan on low to speed things up safely.
Threshing Without the Mess: When it’s time to separate seeds from chaff in Step 3, I use a clean pillowcase instead of a paper bag—it’s more durable and catches finer debris. Shake vigorously, but don’t overdo it: you’re not trying to pulverize the seeds, just coax them free. For stubborn seed heads, a rubber mallet (gentle taps!) works wonders without damaging the seeds.
Germination Test Savior: That optional Step 4 test isn’t just a formality—it’s your quality control. If fewer than 80% of those 10 seeds sprout in 7-10 days at 70-75°F, you’ve got two choices: dry the remaining seeds longer or accept that this batch might not be your best. Trust me, this small effort prevents future disappointment.
Pro Tips for Millet Seed Head
- Here’s how to turn a simple harvest into a foolproof process—because even the best millet seeds won’t save you if the...
- Timing is Everything: Those golden-brown panicles in Step 1? That’s your target. I learned the hard way—harvesting to...
- Drying Done Right: The 7-10 days of drying in Step 2 can feel like forever, but rushing it risks mold. I flip my seed...
Frequently asked questions
Got questions about harvesting millet seed heads? You’re not alone! Here are some of the most common queries—plus straightforward answers to help you crush your harvest like a pro.
When is the best time to harvest millet seed heads for viable seeds?
The ideal time is when 70-80% of the seed heads have turned golden-brown and are starting to shatter naturally. Check by gently rubbing a few heads—if seeds easily fall out, it’s harvest time. Morning harvests reduce moisture loss and preserve quality.
How do I know if my millet seed heads are ready for drying?
Look for dry, crisp seed heads where seeds rattle when shaken. If they’re still green or damp, they need more time on the stalk. Once fully dry, cut and bundle them in a well-ventilated area (like a barn or mesh bag) for 1-2 weeks to finish drying.
Can I harvest millet seed heads if rain is forecasted?
Yes, but act fast! Harvest before rain hits to avoid mold or sprouting. If caught in the rain, spread seed heads in a dry, shaded spot immediately. Use a fan or dehumidifier to speed up drying if needed—never store damp seeds.
What’s the easiest way to separate seeds from millet seed heads?
Once dry, thresh the seed heads by rubbing them between your hands or using a clean cloth over a bucket. For larger batches, a flail thresher or even a wooden mallet works. Sift through a mesh screen to remove chaff and debris.
Can I save millet seed heads for next year, or do I need to replant?
Store cleaned seeds in airtight containers (like glass jars) in a cool, dark place (50–60°F). Label with the harvest year—seeds stay viable for 2–3 years. For best results, test germination by planting a few seeds before full-scale sowing.
What should I do if my millet seed heads are attracting pests?
Prevent pests by harvesting early (before bugs notice!). Store seeds in pest-proof containers (e.g., metal or thick plastic) with silica gel packets. If pests are already present, freeze seeds for 48 hours to kill eggs/larvae before storing.
Wrapping up and next steps
Harvesting millet seed heads doesn’t have to be a chore—it’s an opportunity to secure nutrient-rich, year-round seeds with minimal stress! Whether you’re a gardener, farmer, or homesteader, mastering the timing, tools, and techniques ensures a bountiful yield. Your efforts today could mean a sustainable food source tomorrow.
Ready to take the next step? Start small—try harvesting a single batch to refine your process, then scale up as confidence grows. Share your millet adventures with fellow growers or experiment with new recipes! 🌾✨