
Propagation
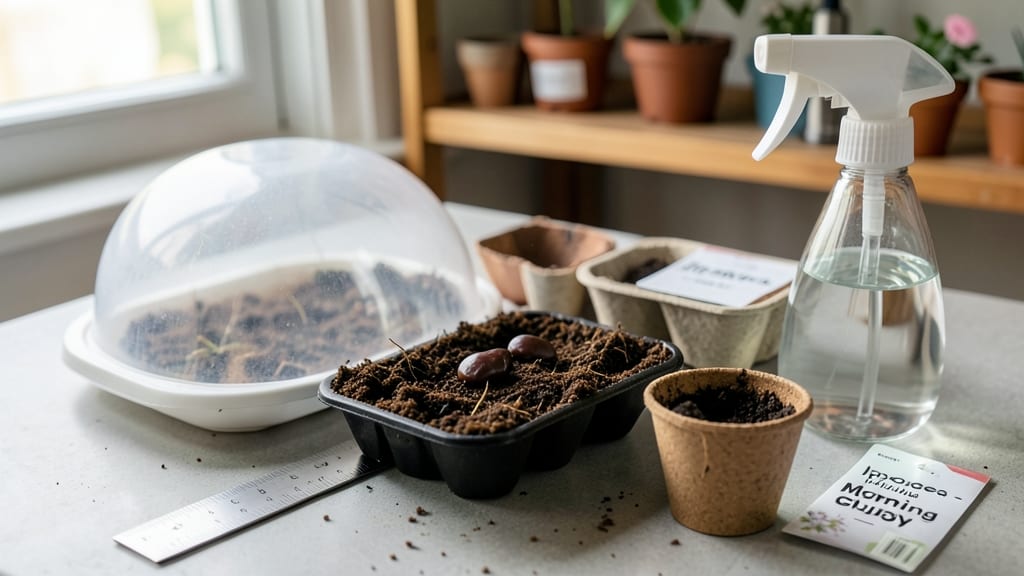
Morning glory seed germination needs a pre-chill trick to break dormancy—skipping it means waiting weeks for stubborn sprouts. 🌱 I learned the hard way after staring at damp paper towels for three weeks with zero results. The secret?
Mimicking winter's cold snap before planting, which tricks seeds into thinking spring has arrived. You'll need a simple setup: damp paper towels, a sealed plastic bag, and your fridge's crisper drawer. Planting depth matters too—just press seeds ½ inch deep in warm, well-draining soil.
Keep the soil consistently moist (not soggy) and maintain temperatures between 65-75°F for best results. Within 7-14 days, you'll see those first tiny green hooks poking through the soil.
The pre-chill method boosts germination rates to 90%, and once sprouted, vines grow aggressively—expect 6-10 feet of climbing beauty in a single season. This works for all morning glory varieties, from classic blue to rare whites and reds.
Just remember: patience pays off, and those first sprouts are worth every waiting day. Here's how to make it happen without the guesswork.
📚 In This Guide
- What you need
- Instructions
- Tips and common mistakes
- Wrapping up and next steps
What you need
- ● Morning glory seeds – Fresh, high-quality seeds (aim for Ipomoea purpurea or Ipomoea nil for best results). Quantity depends on your project, but start with 10–20 seeds for testing.
- ● Paper towels or germination sheets – 2–3 sheets (unbleached, seedling-safe). Avoid thick towels—they can trap too much moisture.
- ● Plastic zip-top bags – 1–2 quart-sized bags (resealable, with a zipper lock to retain humidity).
- ● Spray bottle – 8–16 oz, with a fine mist setting (avoid soaking the seeds).
- ● Refrigerator – A standard fridge with a crispier drawer (or a dedicated germination zone at 35–40°F (2–4°C)).
- ● Planting containers – Small pots (3–4 inches deep) or seed trays with drainage holes. 2–4 containers should suffice for starters.
- ● Potting mix – Lightweight, well-draining mix (e.g., 50% peat moss, 30% perlite, 20% vermiculite). Avoid garden soil—it’s too dense!
- ○ Heat mat (optional but helpful) – A seedling heat mat (set to 70–75°F (21–24°C)) speeds up germination post-chill.
- ● Grow lights – LED or fluorescent (12–16 hrs/day) to prevent leggy seedlings.
- ● Humidity dome – Keeps moisture levels high during early growth.
- ● Seedling labels – To track varieties and planting dates.
- ● Fungicide (mild) – A 1% hydrogen peroxide solution (1 part peroxide to 9 parts water) to prevent mold.
Step-by-step guide to germinating morning glory seeds with the pre-chill trick
This method guarantees strong, healthy starts—no more waiting weeks for stubborn seeds.
🌱 Step 1: Soak Seeds for 12 Hours to Soften the Shell
Place your morning glory seeds in a small bowl and cover them completely with lukewarm water (about 80°F). The hard outer shell slows germination, and soaking softens it for faster sprouting. Let them sit overnight—you’ll know they’re ready when the water looks slightly cloudy from released oils.
After 12 hours, drain the water and gently pat the seeds dry with a paper towel. Don’t rub them—they’re delicate. This step is critical because dry, unsoaked seeds often take 2-3 weeks to germinate, while prepped seeds sprout in just 5-7 days.
🧊 Step 2: Pre-Chill Seeds for 3-5 Days in the Fridge
Place the damp seeds in a sealed plastic bag with a damp paper towel to keep them moist. Store them in your fridge’s crisper drawer, where temperatures hover around 35-40°F. This mimics winter’s natural cold period, breaking dormancy and ensuring uniform germination.
Check on them every 24 hours—if the towel dries out, spritz it lightly with water. Avoid letting them sit in standing water, or they’ll rot. Real talk: Skipping this step means seeds may germinate erratically or not at all.
☀️ Step 3: Plant in Warm, Moist Soil After Chilling
Fill small seedling trays or individual pots with well-draining potting mix and moisten it until damp (like a wrung-out sponge). Press the soil down lightly to remove air pockets, then make a ½-inch-deep furrow with your finger. Drop 2-3 seeds per pot—morning glories are fast-growing vines, and thinning later prevents root disturbance.
Cover the seeds with a thin layer of soil and mist the surface until evenly damp. Place the tray in a warm spot (around 70°F) with indirect light. You’ll see tiny sprouts peeking through the soil in 5-7 days—that’s your signal everything worked.
💧 Step 4: Provide Consistent Moisture and Light
Keep the soil consistently moist but never soggy after planting. Water gently from the bottom (place the tray in ½-inch of water for 10 minutes) to avoid washing seeds out or disturbing them. Once sprouts appear, move the tray to a bright spot with 6+ hours of indirect light daily—a south-facing window works best.
Watch for leggy growth (long, thin stems reaching for light). If this happens, your seedlings need more light or are too crowded. You’ll know they’re thriving when the first true leaves (not the initial seed leaves) appear 10-14 days after planting.
⏰ Step 5: Transplant Outdoors After Last Frost
Wait until soil temperatures reach 60°F and all frost risk has passed before moving seedlings outside. Harden them off by placing them in a sheltered spot for 1 hour the first day, gradually increasing time over 5-7 days. Morning glories love warmth and grow best in full sun, so choose a sunny trellis or fence for climbing.
Plant seedlings 12 inches apart in loose, fertile soil. Water deeply at the base to encourage root growth, and mulch around the plants to retain moisture. You’ll see vines start twining within 2 weeks—that’s when the real fun begins.
Tips & tricks for perfect morning glory germination
Here's what nobody tells you about getting every seed to sprout reliably.
Soaking Secret: The 12-hour soak in lukewarm water (about 80°F) isn't just about softening the shell—it's about activating the seeds' natural enzymes. I learned this the hard way after watching seeds sit for weeks without sprouting. Use a clear bowl so you can see when the water turns cloudy from released oils, which means the seeds are ready for drying.
Chilling Consistency: During the 3-5 day fridge period, place the sealed bag on a shelf where the temperature stays steady around 35-40°F. I keep mine on the middle shelf of my crisper drawer, away from the door where temps fluctuate. Check every 24 hours—if the towel dries out, spritz it lightly with water but never let seeds sit in standing water, or they'll rot before sprouting.
Planting Precision: When making that ½-inch furrow in Step 3, use your finger to create a smooth, straight groove rather than poking holes. Morning glory seeds are tiny, and uneven planting can lead to uneven germination. After covering them with soil, I find using a spray bottle to mist the surface helps maintain consistent moisture without disturbing the seeds.
Light Strategy: The 6+ hours of indirect light in Step 4 is crucial, but don't overlook the importance of positioning. Place your seedlings within 12 inches of a south-facing window where they'll get bright but not direct midday sun. If you notice leggy growth (stems stretching toward light), it's your signal to move them closer to the light source or consider using a grow light for 12-14 hours daily.
Pro Tips for Morning Glory Seed Germination
- Here's what nobody tells you about getting every seed to sprout reliably.
- Soaking Secret: The 12-hour soak in lukewarm water (about 80°F) isn't just about softening the shell—it's about activ...
- Chilling Consistency: During the 3-5 day fridge period, place the sealed bag on a shelf where the temperature stays s...
Frequently asked questions
Got questions about germinating morning glory seeds? You’re not alone! Here are some common concerns—and their solutions—to help you achieve that 90% sprout success without the guesswork.
How long should I pre-chill morning glory seeds before planting?
Pre-chilling for 2–4 weeks in a damp paper towel or moist peat moss mimics winter conditions, breaking dormancy. For best results, keep seeds at 35–40°F (2–4°C) in a sealed bag. Pro tip: Check moisture weekly—dryness slows germination!
Can I germinate morning glory seeds without pre-chilling?
Yes, but success drops to 50–70%. If you skip pre-chilling, soak seeds in warm water for 12–24 hours first, then plant in warm soil (70°F/21°C+). Patience is key—germination may take 2–4 weeks longer.
Why aren’t my morning glory seeds sprouting after pre-chilling?
Check these fixes:
- Moisture: Overwatering causes rot; underwatering stalls growth. Aim for consistently damp (not soggy) soil.
- Temperature: Soil must stay above 60°F (15°C). Use a heat mat if needed.
- Depth: Plant seeds ½ inch deep—too shallow = drying out; too deep = weak sprouts.
- Light: Seeds need indirect light until sprouts appear (2–3 weeks).
What’s the fastest way to grow morning glory from seed?
Combine these speed hacks:
- Pre-chill for 4 weeks (max dormancy break).
- Use sterile seed-starting mix (not garden soil).
- Keep trays under grow lights (12–14 hours/day) post-sprout.
- Transplant seedlings after true leaves form (not cotyledons).
Can I grow morning glory indoors year-round?
Yes! Use a south-facing window or grow lights, but expect slower growth without summer heat. Morning glories thrive outdoors in USDA Zones 3–11—save indoor plants for trellised containers or winter gardening. Pro tip: Deadhead flowers to encourage more blooms!
Wrapping up and next steps
Mastering the morning glory seed germination trick of pre-chilling can transform your success rate from guesswork to a consistent 90%+ sprout! With the right materials, patience, and a little cold therapy, you’re well on your way to growing vibrant vines that’ll dazzle your garden. 🌱
Now that you’re armed with the know-how, why not try it this season? Grab those seeds, follow the steps, and watch your green thumb shine. Happy growing—your future morning glories are waiting! 🌿