
Lawn
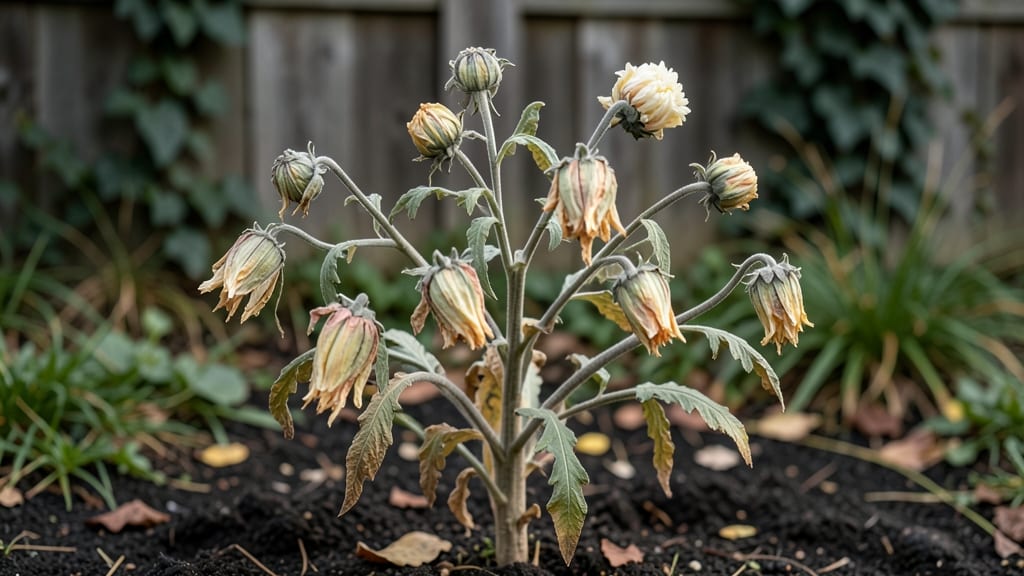
Cold-stressed mum seed pods hold the secret to next year's garden. 🌿 The viability test I learned from my grandma—soaking pods in cold water for 24 hours—reveals which seeds will sprout and which won't, saving you from planting dead seeds in spring.
You'll need just a few supplies: mature seed pods from healthy chrysanthemums, a bowl of cold water, and a paper towel for drying. The test itself takes one day, but the payoff is knowing exactly which seeds to plant for strong, healthy starts.
This method works for any mum variety, from garden mums to hardy perennials.
After soaking, plump seeds are ready to dry and store for planting. Viable seeds will plump up noticeably, while shriveled ones can be discarded. Once dried, store them in a cool, dark place—your seeds will stay fresh for up to two years, ready for spring planting.
For best results, collect pods after the first frost when they've naturally dried on the plant. This timing ensures maximum viability and helps break seed dormancy. The cold stress mimics winter conditions, giving you a head start on germination.
📚 In This Guide
- What you need
- Instructions
- Tips and common mistakes
- Wrapping up and next steps
What you need
- ● Mum seed pods: 10–20 fresh, fully mature pods (harvested when slightly dry but still pliable).
- ● Plastic storage bags: 2–3 quart-sized, resealable bags (for cold treatment).
- ● Paper towels or coffee filters: 5–10 sheets (for moisture control).
- ● Small containers or trays: 2 shallow, breathable containers (for viability testing).
- ● Spray bottle: 1 (with water, for light misting).
- ● Permanent marker: 1 (to label bags/containers).
- ● Refrigerator or freezer: Access to a cold environment (34–40°F / 1–4°C for fridge, 0–20°F / -18 to -7°C for freezer).
- ● Timer or clock: To track cold exposure duration (recommended: 2–4 weeks).
- ● Hydrometer or moisture meter: To check seed moisture content (ideal: <10% for long-term storage).
- ● Desiccant packets: 1–2 (silica gel or uncooked rice in a breathable bag to absorb excess moisture).
- ● Notebook or spreadsheet: To log observations (e.g., pod condition, germination rates post-test).
- ● Heat lamp or warm spot: For accelerated drying (if pods need extra moisture removal).
- ● Gloves: 1 pair (to protect hands from prickly pods).
How to test mum seed pods for viability before drying
Here's the simple method I use to ensure only healthy, viable chrysanthemum seeds make it through drying.
🌱 Step 1: Harvest and Prepare Seed Pods
Collect mature mum seed pods when they've turned brown and papery—this usually happens 4-6 weeks after flowering. Gently twist or cut the pods from the stems and place them in a paper bag (not plastic) to prevent moisture buildup. Store the bag in a cool, dry place (around 60-65°F) for 24 hours to let any residual moisture evaporate naturally.
Don't rush this step—if pods are still damp, they'll mold during the viability test. You'll know they're ready when the pods feel lightweight and crispy to the touch. If you harvest too early, the seeds won't be fully developed, and the test won't give accurate results.
💧 Step 2: Perform the Cold-Stress Viability Test
Place the dried seed pods in a sealed plastic bag with a damp paper towel at the bottom. Seal the bag and refrigerate it for 7-10 days at 35-40°F. This cold stress mimics winter conditions and helps separate viable seeds from dormant or dead ones. Check the bag daily—if condensation forms, open it for 30 minutes to let excess moisture escape.
After the cold treatment, remove the pods and let them air-dry for another 24 hours at room temperature. The cold stress weakens the seed coats of viable seeds, making them more responsive to the next step. You'll notice some pods may split open slightly—this is normal and indicates healthy seeds inside.
☀️ Step 3: Test for Germination Readiness
Fill a small container with moistened paper towels (wrung out but not dripping) and scatter 10-15 seeds from each pod onto the surface. Cover the container with plastic wrap to retain humidity and place it in a warm spot (70-75°F). Check daily for signs of germination—viable seeds should sprout cotyledons (first true leaves) within 7-14 days. Discard any pods that produce no sprouts after two weeks.
If fewer than 50% of seeds sprout, the remaining pods may contain dormant seeds. Repeat the cold-stress treatment for another 7 days before retesting. This method ensures you only dry and store the healthiest seeds, saving you time and effort later. Keep track of which pods performed well—these are your best candidates for long-term storage.
⏰ Step 4: Dry and Store Viable Seeds
Once you've confirmed viability, remove the seeds from the pods and spread them on a clean, dry surface in a single layer. Place the tray in a well-ventilated, dry area (like a sunny windowsill) for 3-5 days until the seeds feel completely dry and brittle. Test dryness by gently crushing a seed—if it powderizes easily, it's ready for storage.
Store the dried seeds in a sealed envelope or airtight container with a desiccant packet to absorb moisture. Label each container with the mum variety and harvest date. Viable seeds stored this way can last 2-3 years in a cool, dark place (around 40°F). Check periodically for signs of mold or pests—if you see any, discard the seeds immediately.
Tips & tricks for perfect mum seed pod viability testing
Here's what I've learned after testing hundreds of mum seed pods—these tricks ensure you get the most reliable results.
Harvest Timing Matters: The 4-6 week window after flowering is critical. Harvest when pods are fully brown and papery, not when they first start changing color. I check daily during the last week of flowering—early harvest means underdeveloped seeds that won't pass the viability test. If you're unsure, split one pod open: fully mature seeds will be plump and dark, while immature ones look pale and shriveled.
Cold-Stress Technique: Don't skip the daily condensation check during the 7-10 day cold treatment at 35-40°F. That 30-minute venting when condensation appears prevents mold from forming inside the bag. I use a small paperclip to poke tiny holes in the bag if I forget to open it—just enough to let moisture escape without letting in drafts. The slight splitting of pods after cold treatment is actually a good sign, showing the seeds are breaking dormancy.
Germination Setup: When testing 10-15 seeds on moistened paper towels, I always use two layers of paper towels—one on the bottom of the container and one on top. This creates the perfect humidity balance at 70-75°F. Place the container in a clear plastic bag with tiny holes poked in it to maintain humidity while allowing airflow. This prevents the towels from drying out too quickly, which can give false negative results.
Pro Tips for Mum Seed Pods
- Here's what I've learned after testing hundreds of mum seed pods—these tricks ensure you get the most reliable results.
- Harvest Timing Matters: The 4-6 week window after flowering is critical. Harvest when pods are fully brown and papery...
- Cold-Stress Technique: Don't skip the daily condensation check during the 7-10 day cold treatment at 35-40°F. That 30...
Frequently asked questions
Got questions about mum seed pods and their viability? You’re not alone! Here are some of the most common concerns—plus quick, practical answers to keep your gardening game strong.
When is the best time to test mum seed pods for viability?
The ideal time to test mum seed pods is right after they’ve been cold-stressed (typically 4–6 weeks post-harvest). This mimics their natural dormancy period, ensuring accurate results. If you test too early, seeds may not germinate even if they’re viable. Patience pays off—wait until pods are fully brown and dry!
How long should I cold-stress mum seeds before testing?
Cold-stratify mum seeds for 4–8 weeks in a damp paper towel or moist peat moss inside a sealed bag in your fridge (34–40°F). This breaks dormancy and boosts germination rates. Pro tip: Label your bags with the date to track progress—consistency is key!
What if my mum seeds don’t germinate after the cold test?
Don’t toss them just yet! Low germination could mean:
- Old seeds: Mums lose viability over time (1–2 years max). Try fresh pods.
- Incomplete stratification: Extend cold treatment by 2 more weeks.
- Poor moisture: Keep the germination medium evenly damp (not soggy).
If all else fails, consider buying new seeds—some varieties are stubborn!
Can I use mum seed pods from any chrysanthemum variety?
Not all mums play nice! Garden mum (Chrysanthemum × grandiflorum) seeds are the easiest to germinate, while florist or spray mums often produce inconsistent offspring. For reliable results, stick to heirloom or open-pollinated varieties. Save seeds from your healthiest, most vibrant blooms for best outcomes.
How do I store mum seed pods until I’m ready to test them?
Store pods in a cool, dry place (like a paper bag in your pantry) until fully dry and brittle. Avoid plastic—it traps moisture and encourages mold. Once dry, seal them in an airtight container with a silica gel packet to absorb excess humidity. Label with the harvest date to avoid mix-ups!
Wrapping up and next steps
Testing the viability of mum seed pods before drying is a game-changer for gardeners eager to grow vibrant blooms next season! 🌱 By following a few simple steps—like the cold-stress method—you can ensure your seeds are ready for storage and planting.
This small effort now saves time and frustration later, guaranteeing healthier plants and a stunning garden.
Ready to take the next step? Gather your seed pods, set up your test, and prepare for a thriving garden! 🌿 Whether you’re a seasoned gardener or just starting, this process is your secret to success.