
Propagation
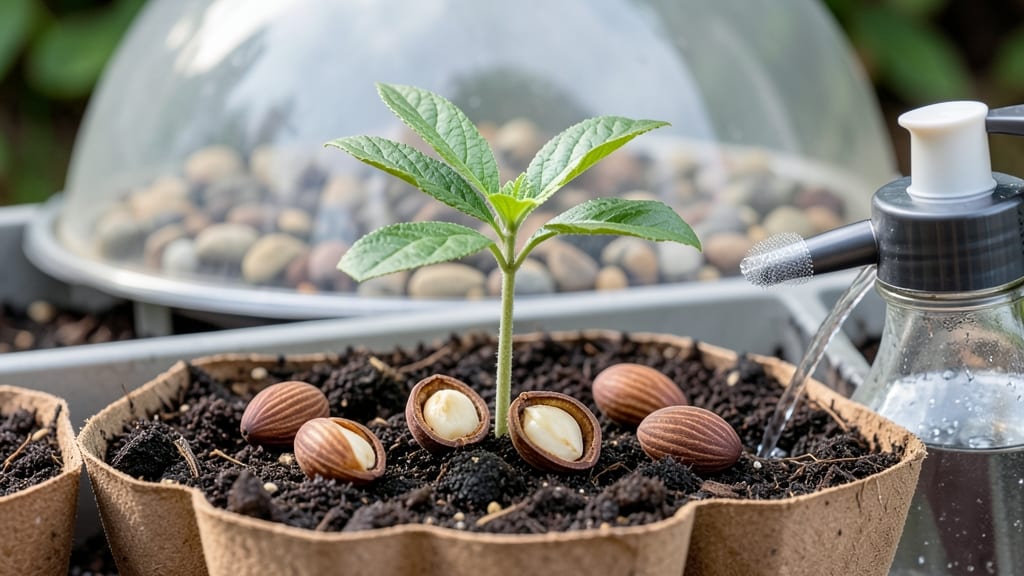
Watching the germination of plum seeds requires patience and precise moisture control—but the thrill of those first sprouts pushing through is worth every day. 🌱 The key isn’t just planting; it’s mimicking nature’s winter-to-spring cycle with stratification, a process that tricks seeds into thinking they’ve survived a cold snap.
Without it, you might wait months (or never see) germination when a little planning could have you growing strong seedlings in 60 days instead.
Start by collecting seeds from ripe plums, cleaning off the flesh, and letting them dry completely before storing in a sealed container in the fridge for 4-6 weeks. This cold treatment breaks dormancy—no fancy equipment needed.
Once stratified, plant them in a moist, well-draining mix (equal parts peat and sand works well) and keep the soil damp but never soggy. A clear plastic bag over the pot creates a mini greenhouse, trapping humidity while allowing light to filter through.
You’ll know it’s working when tiny white roots appear in 2-3 weeks, followed by shoots breaking the surface in another 4-6 weeks.
The seedlings won’t look like fruit trees yet—they’ll be leggy and weak—but with proper light (bright indirect or a grow bulb) and occasional pinching, they’ll thicken up. Here’s the catch: these trees won’t produce fruit true to the parent.
For edible plums, you’ll need to graft later, but the rootsystem you’re building now is the foundation of a strong tree.
Troubleshooting is simple: if mold appears, reduce moisture and improve airflow; if seeds rot, they were too wet. Slow germination? Check your stratification time—some varieties need longer.
Once you’ve mastered this, you’re ready to transplant outdoors after the last frost, where your seedling will grow into a sturdy framework for future grafting. The real magic happens in the waiting—every sprout is a promise of what’s to come.
📚 In This Guide
- What you need
- Instructions
- Tips and common mistakes
- Wrapping up and next steps
What you need
- ● Plum seeds: 5–10 fresh, viable seeds (harvested from ripe, organic plums for best results). Pro tip: 💡 Soak seeds in warm water for 24 hours before planting to soften the hard outer shell!
- ● Germination medium: Peat moss or coconut coir (1 small bag, ~1 quart)
- ● OR a mix of perlite and vermiculite (1:1 ratio, ~1 pint)
- ● Containers: Small seedling trays (with drainage holes, 4–6 inch depth)
- ● OR plastic cups with drainage holes (punched with a nail)
- ● Watering tools: Spray bottle (with fine mist setting)
- ● Small watering can (with a gentle stream nozzle)
- ● Plastic wrap or humidity dome: Clear plastic wrap or a propagator lid to maintain moisture.
- ○ Heating mat (optional but helpful): A seedling heat mat (set to 70–75°F/21–24°C) to speed up germination.
- ● Location: A warm, bright spot (indirect sunlight or grow lights). Avoid direct sunlight until sprouts emerge!
- ● Temperature: Ideal range: 65–75°F (18–24°C). Use a thermometer to monitor.
- ● Patience: Germination can take 30–60 days—stay consistent with moisture checks!
Step-by-Step guide to germinating plum seeds
Here’s how to break dormancy and coax those stubborn plum pits into sprouts—without the guesswork.
🌱 Step 1: Stratify Seeds to Simulate Winter
Plum seeds need 60-90 days of cold stratification to mimic natural winter conditions. Place seeds in a ziplock bag with a damp paper towel—just enough moisture to feel damp, not dripping. Seal the bag and refrigerate at 34-40°F for 8-12 weeks. Check weekly: if the towel dries, mist lightly and reseal.
This cold treatment tricks the seed into thinking winter’s over. You’ll know it’s working when the seed coat softens slightly—no sprouts yet, just readiness. If seeds sprout during stratification, plant them immediately in moist soil.
💧 Step 2: Sow Stratified Seeds in Moisture-Controlled Soil
Fill a 4-inch pot with well-draining potting mix (avoid garden soil—it’s too dense). Plant stratified seeds ½ inch deep, spacing them 2 inches apart. Water gently until the soil feels evenly damp—no puddles, just consistent moisture. Place the pot in a warm, bright spot (65-75°F) with indirect light. A seedling heat mat helps if your home runs cooler.
Moisture is critical now. Keep the soil consistently damp (not soggy) by checking the top inch daily. Overwatering causes rot; underwatering stalls germination. A clear plastic dome or wrap helps retain humidity while preventing mold.
☀️ Step 3: Provide Warmth and Light for Germination
Once seeds sprout (usually 2-4 weeks after sowing), move them to bright, indirect light for 14-16 hours daily. A grow light 2-3 inches above seedlings prevents leggy growth. You’ll see first true leaves (not the initial seed leaves) in 4-6 weeks. This is your cue to thin seedlings—keep only the strongest one per pot.
Watch for yellowing leaves, a sign of overwatering or poor drainage. If seedlings stretch toward light, raise the grow light or rotate pots daily. Strong plum seedlings have thick stems and deep green leaves—never pale or wilted.
⏰ Step 4: Transplant Seedlings After True Leaves Form
When seedlings have 3-4 true leaves (about 6-8 weeks total), transplant them into 6-inch pots with fresh potting mix. Handle roots gently—plums hate root disturbance. Water deeply after transplanting to settle soil around roots. Place in full sun (6+ hours daily) outdoors or under a grow light.
Hardening off takes 1-2 weeks: start with 1 hour outside on day one, gradually increasing time. By day 10, seedlings should tolerate full sun. Prune leggy stems by ¼ inch above a leaf node to encourage bushier growth.
Tips & tricks for perfect plum seed germination
These moisture-controlled strategies will help you break dormancy and nurture those stubborn plum pits into thriving sprouts.
Cold Stratification Precision: The 8-12 week cold treatment at 34-40°F is non-negotiable—this mimics winter's natural dormancy break. I place my ziplock bags on a refrigerator shelf (not the crisper drawer) where temps stay most consistent. If your fridge fluctuates, use a temperature-controlled seed stratification chamber for more reliable results. The key is patience: those 90 days might feel long, but rushing this step often leads to failed germination.
Soil Moisture Mastery: In Step 2, your goal is "consistently damp" soil—not soggy, not bone-dry. I use a spray bottle to mist the soil daily rather than watering from above, which prevents disturbing the delicate seeds. A moisture meter helps here—aim for 40-50% moisture content. If condensation forms on the plastic dome, lift it briefly to air out; if the soil feels dry within an inch, water lightly. Overwatering at this stage is the #1 killer of plum seedlings.
Lighting Strategy: That 14-16 hours of bright, indirect light in Step 3 is critical for preventing leggy seedlings. I position my grow light 2-3 inches above the pots and set a timer to automatically turn it on at 6am and off at 8pm. If using natural light, rotate pots daily so all sides get equal exposure. Watch for seedlings stretching toward the light source—this is your signal to either raise the light or supplement with a grow bulb. The first true leaves should appear within 4-6 weeks, signaling successful germination.
Pro Tips for Plum Seed Germination
- These moisture-controlled strategies will help you break dormancy and nurture those stubborn plum pits into thriving ...
- Cold Stratification Precision: The 8-12 week cold treatment at 34-40°F is non-negotiable—this mimics winter's natural...
- Soil Moisture Mastery: In Step 2, your goal is "consistently damp" soil—not soggy, not bone-dry. I use a spray bottle...
Frequently asked questions
Got questions about germinating plum seeds? You’re not alone—this process can feel tricky at first! Below, we’ve rounded up the most common queries to help you navigate moisture control, timing, and troubleshooting like a pro.
How long does it take for plum seeds to germinate?
With the right moisture-controlled setup (like our 60-day method), plum seeds typically sprout in 4–8 weeks. Patience is key—some seeds may take longer, especially if they’re older or stored improperly. Keep the soil consistently damp (not soggy) and warm (around 70–75°F) to speed things up.
What happens if my plum seeds rot instead of sprouting?
Overwatering or poor drainage is the usual culprit! If your seeds turn mushy or develop mold, stop watering immediately and let the soil dry out slightly. For future attempts, use a well-draining mix (like perlite + peat) and a container with drainage holes. If all else fails, try a fresh batch—some seeds just aren’t meant to sprout.
Can I speed up plum seed germination?
Yes! Cold stratification (mimicking winter) can cut germination time. Place your seeds in a damp paper towel, seal them in a plastic bag, and refrigerate for 4–6 weeks before planting. This tricks them into thinking they’ve survived winter, often leading to faster (and more reliable) sprouts.
What’s the best soil mix for germinating plum seeds?
A lightweight, airy mix works best. Combine 50% peat moss or coconut coir (for moisture retention) with 50% perlite or vermiculite (for drainage). Avoid garden soil—it’s too dense and can compact around tiny seeds. A shallow tray or seed-starting kit keeps things simple!
Will a plum seed grown from a store-bought fruit actually bear fruit?
Probably not—store-bought plums are often hybrids or grafted varieties, meaning their seeds won’t reproduce the same fruit. For edible plums, save seeds from homegrown or heirloom varieties. If you’re just experimenting or growing for fun (like a bonsai!), store-bought seeds work fine.
Wrapping up and next steps
Germinating plum seeds is a rewarding journey that unlocks the potential of growing your own fruit tree from scratch! 🌱 By mastering moisture control, temperature, and patience, you can successfully sprout healthy seedlings in just 60 days.
Whether you’re a gardening enthusiast or a curious beginner, this process is well within reach with the right tools and techniques.
Now that you’re armed with the knowledge, why not take the next step? Start with a few seeds, experiment with different conditions, and watch your little plum saplings grow. Happy planting—your future orchard awaits! 🌳