
Propagation
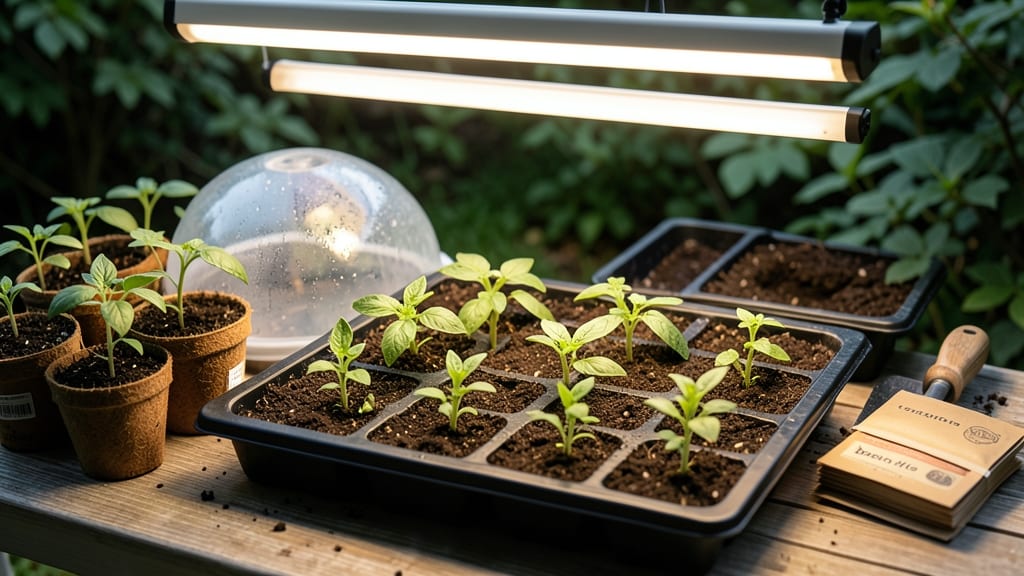
The right potting soil for seed starting makes all the difference between seedlings that pop up in days and ones that rot in the dark. ✨ I’ve wasted weeks waiting for stubborn seeds to germinate—until I learned that a lightweight, sterile mix with perfect moisture retention is the secret weapon for fast root development.
Most commercial seed-starting mixes already contain perlite, vermiculite, or coconut coir to balance aeration and moisture, but homemade blends of peat moss, compost, and sand can work just as well. The key is avoiding garden soil (it’s too dense) and anything with fertilizer (it burns tender seedlings).
You’ll see those first green hooks break through the soil in 3-7 days instead of weeks, and the roots will be strong enough to handle transplanting without shock. That’s the difference between a thriving seedling tray and a sad, moldy mess.
Avoid common mistakes like reusing last year’s soil (disease risk!) or skipping sterilization (fungal spores wait for their chance). With the right mix, your germination rates will skyrocket—no more guessing games.
📚 In This Guide
- What you need
- Instructions
- Tips and common mistakes
- Wrapping up and next steps
What you need
- ● Potting soil mix: 1 part peat moss or coco coir (for moisture retention and aeration)
- ● 1 part perlite or vermiculite (to improve drainage and lighten the mix)
- ● 1 part compost or worm castings (for nutrients and microbial activity)
- ● Containers: Seed-starting trays or small pots (4–6 inches deep) with drainage holes
- ○ Optional: Biodegradable peat or coconut fiber pots (eliminates transplant shock)
- ● Tools: Gloves (to protect your hands from soil and sharp perlite)
- ● Small hand trowel or spoon (for mixing and filling containers)
- ● Spray bottle (for gentle watering to avoid compacting soil)
- ● Prerequisites: Clean workspace (a table or tray to contain mess)
- ● Access to clean water (room temperature or slightly warm)
- ● Soil amendments: Slow-release fertilizer (like osmocote) for extra nutrients
- ● Mycorrhizal fungi (boosts root growth and disease resistance)
- ● Tools: Soil pH test kit (to ensure your mix is in the ideal 5.8–6.2 range for seeds)
- ● Humidity dome or plastic wrap (to retain moisture in early stages)
- ● Safety: Dust mask (if mixing large batches to avoid inhaling perlite/soil particles)
Step-by-step guide to selecting and using potting soil for seed starting
Fast root development starts with the right soil—here's how to choose and use it properly.
🌱 Step 1: Choose a Sterile, Lightweight Seed-Starting Mix
Never use garden soil for seeds—it's too dense and packed with pathogens that can rot tender seedlings before they even sprout. Look for a sterile seed-starting mix labeled specifically for germination. These blends contain 50-70% peat or coconut coir, 20-30% perlite or vermiculite, and a small amount of compost or fertilizer. The goal is a fluffy, airy texture that lets roots spread quickly without compacting.
I like to test the mix by squeezing a handful—it should hold its shape when pressed but crumble easily when released. If it sticks together like wet clay, it's too dense. If it falls apart like dust, it lacks the moisture retention seeds need. The right mix feels like damp sponge cake: firm enough to support seeds but light enough to let air reach roots.
💧 Step 2: Prepare the Mix for Optimal Moisture and Warmth
Fill your seed trays or small pots with the mix, leaving about ½ inch from the top. Gently press down to remove air pockets but don't compact it—you want roots to push through easily. Now comes the key prep: water the mix until it's evenly moist but not soggy. I use a spray bottle for fine control, misting until water runs out the bottom drainage holes.
Let it sit for 10-15 minutes to settle, then check moisture by squeezing a handful. It should feel like a wrung-out sponge—damp through the center but not dripping. This pre-moistening ensures seeds stay in consistent contact with water during germination. Pro tip: Warm the mix slightly by placing the tray on a seedling heat mat for 24 hours before planting. Warm soil speeds germination by 30-50%.
☀️ Step 3: Plant Seeds at the Correct Depth for Fast Germination
Most seeds germinate best when planted at a depth of 2-3 times their diameter. Tiny seeds like lettuce go just ¼ inch deep, while larger ones like beans need 1 inch. Press each seed gently into the moist mix—don't drop them in or they'll sink too deep and struggle to reach light. I use a toothpick to make small holes for precision planting.
After planting, cover seeds with a fine mist of water to settle the soil around them. Place the tray in a warm, dark spot (like a closed cabinet with a heat mat) until sprouts appear. The warmth and consistent moisture create perfect conditions for fast germination. Watch for the first signs of life—tiny green hooks breaking through the soil surface—in as little as 3-5 days for quick germinators like radishes.
🌿 Step 4: Transition to Light and Maintain Ideal Conditions
The moment you see the first true leaves (not the initial seed leaves), move seedlings to bright, indirect light immediately. Too much direct sun at this stage will scorch delicate seedlings. I use a grow light on a timer set for 14-16 hours daily, keeping it 2-3 inches above the plants. Raise it gradually as seedlings grow to prevent legginess.
Keep the soil consistently moist but never soggy—top inch dry to touch is the perfect checkpoint. Water from the bottom by placing trays in ¼ inch of water for 10 minutes, then drain. This method prevents fungal diseases that thrive on wet foliage. Within 2-3 weeks, you'll see strong, stocky seedlings ready for transplanting—proof your lightweight mix did its job.
✂️ Step 5: Harden Off and Transplant with Minimal Root Disturbance
When seedlings have 2-3 sets of true leaves, it's time to harden them off. Gradually introduce them to outdoor conditions over 7-10 days by placing them outside for 1 hour daily, increasing time each day. Choose an overcast day for the first transplant to avoid shock. The lightweight mix makes this transition easier because roots aren't bound tightly in compacted soil.
To transplant, water the seedlings thoroughly 1 hour before moving to reduce stress. Gently remove each seedling, keeping the root ball intact—your loose, airy mix should allow roots to slide out with minimal resistance. Plant at the same depth they grew in containers, then water deeply. Within 3-5 days, you'll see new growth signaling successful establishment in their permanent home.
Tips & tricks for perfect seed starting soil
These little-known tricks will help your seedlings grow faster and stronger from the very first day.
Mix Composition Matters: If you're making your own seed-starting mix, balance is everything. For the 50-70% organic component (peat or coconut coir), I recommend using 60% coconut coir—it holds moisture better than peat and won't compact over time. For the 20-30% amendment, use 25% perlite for drainage and 5% worm castings instead of regular compost (they're sterile and packed with gentle nutrients). The worm castings give your seedlings a tiny nutritional boost without overwhelming them.
Warmth Acceleration: That 24-hour warm-up on a heat mat is your secret weapon for speed. I've found that placing a small bowl of warm water near the tray during this time creates a microclimate that maintains consistent warmth. This isn't just about speed—it's about creating the perfect conditions for those first critical root hairs to develop. For extra insurance, cover the tray with a clear plastic dome or plastic wrap during this period to trap warmth and humidity.
Precision Planting Technique: When planting seeds at 2-3 times their diameter, here's my pro move: Use a pencil to make tiny holes, then gently press each seed in with a toothpick. This gives you perfect depth control without disturbing the surrounding soil structure. For seeds smaller than ¼ inch, I sprinkle them directly on the surface and press lightly with my finger—no need to bury them at all. The key is keeping the soil surface just barely disturbed so seeds stay in contact with moisture.
Light Transition Strategy: Moving seedlings to light at the right moment is crucial. I recommend placing your grow light on a timer set for 14 hours initially, then gradually increasing to 16 hours as seedlings grow. The gradual increase prevents shock and helps seedlings adjust naturally. Watch for that first set of true leaves—those are your signal to make the move. If you don't have a grow light, place seedlings near an east-facing window where they'll get gentle morning light without harsh afternoon sun.
Pro Tips for Potting Soil For Seed Starting
- These little-known tricks will help your seedlings grow faster and stronger from the very first day.
- Mix Composition Matters: If you're making your own seed-starting mix, balance is everything. For the 50-70% organic c...
- Warmth Acceleration: That 24-hour warm-up on a heat mat is your secret weapon for speed. I've found that placing a sm...
Frequently asked questions
Got questions about potting soil for seed starting? You’re not alone! Here are some of the most common concerns—plus quick, actionable answers to help you get those seeds sprouting strong and fast.
What’s the best potting soil mix for seed starting?
A lightweight, sterile blend with 50% peat moss or coconut coir, 30% perlite or vermiculite, and 20% compost or worm castings works best. Avoid garden soil—it’s too dense and may harbor pests or diseases. Pre-mixed seed-starting mixes (like FoxFarm or Black Gold) are convenient and optimized for germination.
When is the right time to transplant seedlings into regular potting soil?
Wait until seedlings have 2–3 true leaves and the first set of roots (or cotyledons) are visible through the bottom of the cell. Typically, this happens 2–4 weeks after sowing, depending on the plant. Harden off seedlings for 5–7 days before transplanting to prevent shock.
Can I reuse potting soil for seed starting?
Reusing soil isn’t recommended unless you sterilize it first. Pathogens, fungal spores, and leftover seeds can cause mold or stunted growth. If you must reuse, bake the soil at 200°F (93°C) for 30 minutes or microwave it in small batches (test a sample first!). Fresh soil is always safer.
What if my seeds aren’t germinating in the potting mix?
Check these first:
- Moisture: Keep soil consistently damp (not soggy). Use a spray bottle for delicate seeds.
- Temperature: Most seeds need 65–75°F (18–24°C). Use a heat mat if germination is slow.
- Depth: Follow seed packet instructions—some need light to sprout (plant shallowly or press into the surface).
- Freshness: Old seeds may have low viability. Test with a paper towel germination test if unsure.
Are there budget-friendly alternatives to commercial potting soil?
Yes! Mix equal parts of:
- Coconut coir or shredded peat moss (cheaper than bags)
- Perlite or coarse sand (for drainage)
- Compost or well-aged manure (for nutrients)
Wrapping up and next steps
Choosing the right potting soil for seed starting sets the stage for vibrant, healthy seedlings ready to thrive! A lightweight, sterile mix with proper drainage and nutrients ensures fast root development and strong growth. Don’t overcomplicate it—focus on quality, adjust as needed, and watch your little plants flourish.
Now that you’re equipped with the know-how, roll up your sleeves and start sowing! 🌱 Ready to dive deeper? Try experimenting with organic amendments or explore seed-starting schedules for your favorite plants. Happy gardening!