
Lawn
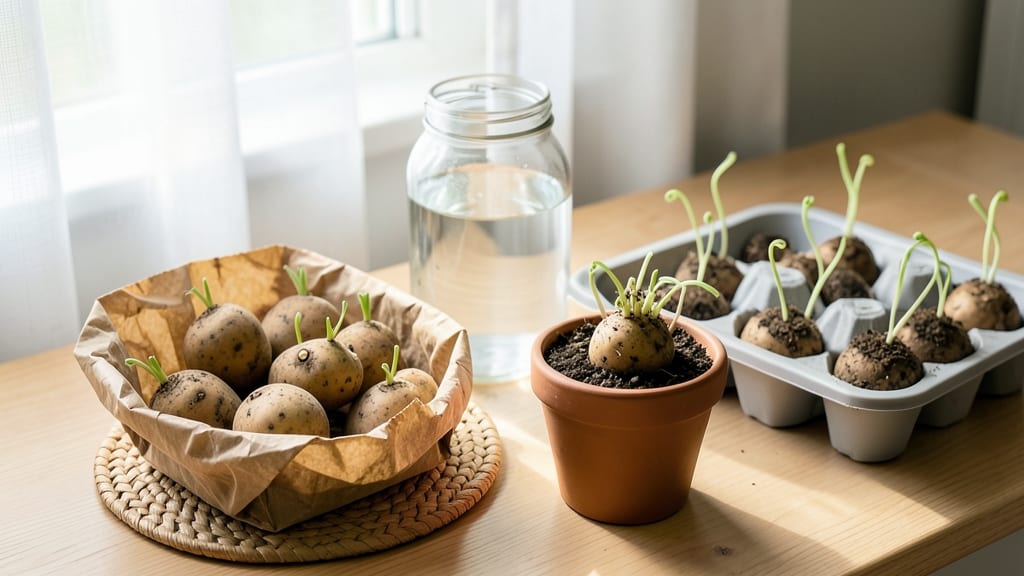
Pre-sprouting seed potatoes gives you a head start on the growing season—weeks ahead of planting bare tubers. 🌱 I learned the hard way that chitting (that’s the fancy term for pre-sprouting) transforms weak store-bought potatoes into sturdy, early producers.
The secret lies in timing, light, and patience—no fancy equipment needed. You’ll need your seed potatoes, a cool but bright spot (like a sunny windowsill), and about 6-8 weeks before your last frost date.
The magic happens when those tiny "chits" (sprouts) form—proof your potatoes are ready to hit the soil running. Too late, and you’ll lose that critical early growth window. Once those 1-2 inch sprouts appear, plant them gently to avoid damaging the delicate stems. The payoff?
Plants emerge faster, resist frost better, and produce harvests 2-3 weeks earlier than unchitted potatoes. That’s more time for vines to spread and tubers to bulk up before summer heat sets in. This method works for both early and late varieties, though smaller seed potatoes chit faster.
If your sprouts turn green or get leggy, it’s time to plant—they’ll toughen up once in the ground. Here’s how to do it right from start to harvest.
📚 In This Guide
- What you need
- Instructions
- Tips and common mistakes
- Wrapping up and next steps
What you need
- ● Seed potatoes: Certified disease-free, organic or heirloom varieties (e.g., Yukon Gold, Red Pontiac, or Fingerlings). Aim for 2–3 pounds (about 5–10 medium-sized tubers) per 10 sq ft of garden space.
- ● Egg cartons, paper egg cartons, or small pots: 1 carton (30–50 cups) or 6–10 small pots (3–4 inches deep) to hold individual potatoes.
- ● Potting soil or peat moss: Lightweight, well-draining mix (avoid garden soil—it can compact). 1–2 gallons for egg cartons or 1 bag (1–2 cu ft) for pots.
- ● Watering can or spray bottle: For gentle hydration (avoid soaking!).
- ○ Bright, indirect light source: A sunny windowsill (6+ hours of light/day) or a grow light (optional but helpful for low-light spaces).
- ● Sharp knife or garden shears: For cutting seed potatoes (if needed). Sanitize with rubbing alcohol first!
- ● Chitting tray or propagator: A dedicated tray with holes or a DIY setup (e.g., a cardboard box with egg carton slots).
- ● Humidity dome or plastic wrap: To maintain moisture while sprouts emerge (remove once 1-inch sprouts appear).
- ● Plant labels: To track varieties (e.g., popsicle sticks + marker).
- ● Fertilizer (mild): A balanced, low-nitrogen option (e.g., 5-5-5) once sprouts reach 1–2 inches.
Step-by-step instructions for pre-sprouting seed potatoes
Here's how to get a head start on your potato harvest with chit-grown starts that'll give you bigger yields faster.
🌱 Step 1: Select and Prepare Your Seed Potatoes
Start with certified disease-free seed potatoes—those labeled "seed" at garden centers, not grocery store potatoes. Choose medium-sized tubers (about 2-3 inches in diameter) with at least 2-3 eyes (the little dimples where sprouts emerge). Smaller potatoes often yield fewer harvests, while giant ones waste energy growing the tuber itself.
Place your seed potatoes in a bright, cool spot (around 50-55°F) for 2-4 weeks before sprouting. This mimics natural conditions and prevents premature sprouting. I like to set mine on a seedling heat mat on low setting—it keeps them warm enough to wake up but not so hot they sweat.
☀️ Step 2: Encourage Chitting (Sprout Growth)
After 2-4 weeks, your potatoes should have 1-inch-long sprouts (called "chits"). Position them with the sprouts facing upward in a well-ventilated container—I use a cardboard egg carton or paper towel-lined tray to keep them from touching. This prevents rot and encourages straight, strong growth.
Keep them in indirect light (a sunny windowsill with filtered light works best) and maintain 55-60°F temperatures. Too much direct sun now will turn the sprouts green and bitter. You'll know they're ready when the chits reach 1-2 inches long—this usually takes another 2-3 weeks total.
🪴 Step 3: Plant Chit-Grown Potatoes in Containers or Garden
Fill 6-inch-deep containers (or your garden bed) with loose, well-draining soil mixed with compost. Plant each potato 4-6 inches deep, with the longest chits facing upward. Space plants 12 inches apart in rows 30 inches apart—this gives roots room to spread without crowding.
Water deeply right after planting to settle the soil around the tubers. Avoid overwatering now—you want the soil moist but not soggy. Once the first true leaves appear (about 2-3 weeks later), you can increase watering to 1 inch per week. This is when the real growth spurt begins!
⏰ Step 4: Maintain Ideal Growing Conditions
Keep your potatoes in full sun (at least 6-8 hours daily) and warm soil (above 50°F). If nights dip below 40°F, cover plants with frost cloth—potatoes are frost-sensitive once they sprout. I also hill soil around the stems every 2-3 weeks to encourage more tuber formation (just mound soil up to the plant's leaves).
Watch for blossoms—they signal tubers are forming. When flowers fade (about 4-6 weeks after planting), stop watering as much to cure the skins. Harvest when the foliage yellows and dies back, usually 90-120 days after planting. The faster your chits grew, the sooner you'll have harvest-ready potatoes!
Tips & tricks for pre-sprouting seed potatoes
These little tricks will help you grow stronger chits and maximize your potato harvest—without the guesswork.
Selection Tip: Look for seed potatoes with firm, bumpy skin and 2-3 prominent eyes—these will sprout fastest. Avoid potatoes with soft spots, green patches, or excessive sprouting already (those are grocery store rejects). The 2-3 inch size is ideal because smaller tubers yield fewer harvests, while larger ones waste energy growing the tuber instead of roots.
Temperature Matters: The 50-55°F range during the initial 2-4 weeks is crucial for waking up the potatoes without triggering premature sprouting. If your home runs warmer, place them in a cool basement or garage with indirect light. Too much heat can cause the potatoes to "sweat" and develop mold. I've ruined batches by keeping them too warm—trust me, patience pays off!
Lighting Strategy: Once your potatoes have 1-inch sprouts (after the initial 2-4 weeks), move them to bright, indirect light. A north-facing windowsill works best—direct sun now will turn the sprouts green and bitter. If you don't have natural light, a grow light on low setting for 8-10 hours daily works too. The goal is to encourage 1-2 inch chits without stressing the potatoes.
Planting Depth: When it's time to plant, bury your potatoes 4-6 inches deep with the longest chits facing upward. This depth protects them from light (which turns potatoes green and toxic) while allowing the sprouts to grow toward the surface. I've seen beginners plant too shallow—this leads to weak stems that flop over when they hit the soil surface.
Pro Tips for Pre Sprouting Seed Potatoes
- These little tricks will help you grow stronger chits and maximize your potato harvest—without the guesswork.
- Selection Tip: Look for seed potatoes with firm, bumpy skin and 2-3 prominent eyes—these will sprout fastest.
- Temperature Matters: The 50-55°F range during the initial 2-4 weeks is crucial for waking up the potatoes without triggering premature sprouting.
Frequently asked questions
Got questions about pre-sprouting seed potatoes? You’re not alone! Here are answers to the most common concerns—so you can grow confidently and avoid pitfalls.
What’s the best time to start chitting seed potatoes?
Begin pre-sprouting (chitting) your seed potatoes 4–6 weeks before your last frost date. For most U.S. gardeners, this means starting in late February or early March. Early sprouts (chits) give your plants a head start, but don’t rush—wait until the sprouts are 1–2 inches long before planting.
Can I plant chitted potatoes too early?
Yes, but timing matters! Planting too early risks frost damage or stunted growth. Wait until the soil is at least 45°F (7°C) and all frost danger has passed. If you’re unsure, use a lightweight row cover to protect tender sprouts. Pro tip: Mark your calendar based on your zone’s frost dates!
Can I eat the sprouts on chitted potatoes?
No—never eat the sprouts themselves! They’re toxic due to solanine, a natural chemical that protects the potato. However, once the potato is fully grown and cooked, the entire tuber (including eyes) is safe. Toss any green or sprouted potatoes from the grocery store—they’re not safe to eat!
What if my potatoes don’t sprout?
Don’t panic! Common reasons include old seed potatoes (buy certified ones), low light (place them in a bright, cool spot), or high humidity (which can rot them). Try replacing them in a well-ventilated box with fresh seed potatoes. If they’re still dormant after 2 weeks, they may not be viable—swap them out!
Can I use store-bought potatoes for chitting?
Not ideal! Store-bought potatoes are often treated to prevent sprouting and may carry diseases. Instead, use certified seed potatoes from a nursery. They’re disease-free, higher-yielding, and bred for growing—not eating. Think of them as plant babies—give them the best start!
How do I store chitted potatoes until planting?
Keep them in a cool (40–50°F / 4–10°C), dark, and humid spot (like a basement or garage). Avoid refrigeration—it turns starch to sugar, making them sweeter and less ideal for planting. Place them in a paper bag or cardboard box with holes for airflow. Check weekly for mold or rot!
Wrapping up and next steps
Pre-sprouting seed potatoes is a simple yet powerful way to give your garden a head start!
By encouraging those tiny chits to grow indoors, you’ll enjoy faster harvests, healthier plants, and even more potatoes per plant. 🌱 Whether you’re a seasoned gardener or just starting out, this method is a game-changer—so grab those seed potatoes and get sprouting!
Ready to take the next step? Plant your chit-grown potatoes outdoors once the soil warms up (usually after the last frost), and watch your garden thrive! Happy growing! 🌿