
Lawn
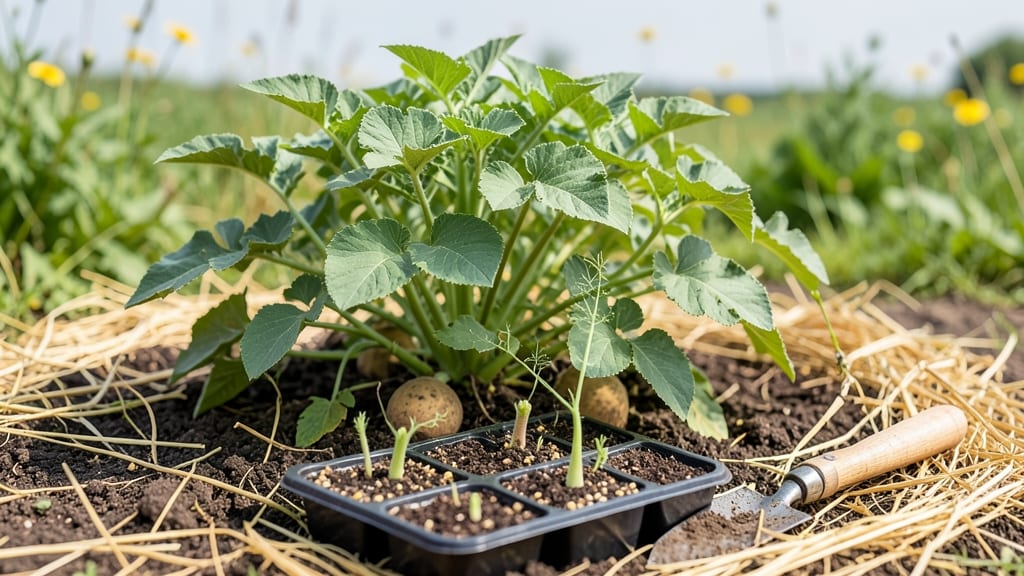
Planting sprouted seed potatoes without chits saves money and grows stronger plants. 🌱 I’ve wasted entire seasons waiting for store-bought potatoes to sprout—until I discovered this zero-waste trick that works every time. The secret isn’t complicated: just a dark, cool spot and a little patience before planting.
You’ll need a few basic supplies: a container or paper bag for sprouting, well-draining soil, and a sunny spot in your garden. No fancy equipment—just what you already have. The key is timing: start sprouting indoors 4-6 weeks before your last frost, and you’ll have vigorous plants ready to thrive.
By harvest time, you’ll pull up pounds of potatoes from a single bag of seed stock, with fewer diseases and bigger yields than store-bought transplants. The method even lets you save leftovers for next year’s crop—no waste, just more potatoes.
Works in containers, raised beds, or traditional rows, and adapts to short or long seasons. Here’s how to do it right the first time—no guesswork, just reliable results.
📚 In This Guide
- What you need
- Instructions
- Tips and common mistakes
- Wrapping up and next steps
What you need
- ● Seed potatoes: Choose certified disease-free, organic seed potatoes (e.g., Yukon Gold, Red Pontiac, or Fingerlings). Quantity: 5–10 lbs (adjust based on your garden size).
- ○ Growing containers or trays: Shallow bins, cardboard boxes, or mesh bags (6–12 inches deep). Optional: Drill holes for drainage.
- ● Potting mix or compost: Lightweight, well-draining soil or a mix of compost and peat moss. Quantity: Enough to fill your containers 2–3 inches deep.
- ● Watering can or spray bottle: For gentle, even moisture without over-saturating.
- ● Bright, indirect light source: A sunny windowsill or grow lights (12–16 hours/day).
- ● Pruning shears or knife: For cutting seed potatoes (if pre-sprouting isn’t an option).
- ○ Thermometer (optional): To monitor soil temps (ideal: 60–70°F).
- ● Fertilizer (balanced, low-nitrogen): Add at planting time (e.g., 5-10-10 or compost tea).
- ● Plant labels: To track varieties if growing multiple types.
- ● Mulch (straw or grass clippings): For outdoor planting after chitting.
Step-by-Step instructions for sprouting seed potatoes without chits
Here’s how to grow sturdy, chit-free seed potatoes that’ll yield strong plants and zero waste.
🪴 Step 1: Select and Prep Your Seed Potatoes
Choose organic seed potatoes with firm, blemish-free skins—avoid those with soft spots or green patches, which can indicate rot or toxin buildup. Cut larger potatoes into 2-3 inch chunks, ensuring each piece has at least 2-3 eyes (the dimples where sprouts emerge). Let the cut pieces air-dry for 24 hours in a cool, dark place. This prevents rot when planting and helps callus over the wounds.
I like to store my seed potatoes in a paper bag in a cool, dark basement for a few weeks before sprouting. This encourages even, healthy sprouts without the need for chemical treatments. Once you see 1-inch-long sprouts (called chits), it’s time to move them to light.
☀️ Step 2: Expose to Light for Strong, Chit-Free Growth
Move your sprouting potatoes to a bright, indirect light source—like a south-facing windowsill or under a grow light—for 7-10 days. This step is critical because it stops chit growth while still keeping the potatoes viable. The goal is to blanch the sprouts (turn them white) without letting them grow too long. If you see green, elongated sprouts, they’ve been in light too long and may not transplant well.
Check daily and adjust the light exposure if sprouts start turning green. A simple cardboard box with a small window cut out works perfectly—just rotate the potatoes every few days so they don’t lean toward the light. You’ll know you’ve succeeded when the sprouts are short, white, and stubby—ideal for planting.
🌱 Step 3: Plant in Well-Draining Soil
Fill 6-inch-deep containers or a garden bed with loose, well-draining soil mixed with compost for nutrients. Plant each potato piece with the eyes facing upward, about 4 inches apart in rows 12 inches apart. Cover with 2-3 inches of soil, leaving the top of the potato exposed to light. This ensures the sprouts don’t rot underground while still allowing the potato to photosynthesize.
Water lightly but thoroughly right after planting—no soggy soil. Overwatering at this stage can cause rot, especially if the potatoes haven’t fully callused. If planting in containers, use self-watering pots to maintain even moisture without drowning the roots.
⏰ Step 4: Mulch and Monitor for Emergence
Add a 2-inch layer of straw or shredded leaves as mulch to retain moisture and regulate soil temperature. This is especially important if your climate swings between freezing nights and warm days. Mulch also prevents soil-borne diseases from splashing onto the young plants. Check the mulch weekly—it should stay damp but not waterlogged.
In 2-3 weeks, you’ll see tiny green shoots breaking through the soil. This is your cue to gradually increase watering—about 1 inch per week—and add another 2 inches of soil around the stems. This hill-up method encourages more tuber formation underground. Keep the soil loose and aerated to prevent compaction, which stunts growth.
🌿 Step 5: Thin and Support for Maximum Yield
Once plants reach 6 inches tall, thin to the strongest 2-3 stems per hill, snipping weaker ones at the base with clean scissors. This redirects energy to fewer, healthier plants. If growing in containers, prune side shoots regularly to maintain compact growth—this prevents the plant from becoming top-heavy and falling over.
When flowers appear, remove them to boost tuber production (unless you’re saving seeds). Instead, focus on watering deeply every 5-7 days and adding a balanced fertilizer every 4-6 weeks. By harvest time, you’ll have plump, disease-free potatoes ready to dig—no chits, no waste, just pure growth.
Tips & tricks for perfect sprouted seed potatoes
Here’s what I’ve learned after years of growing chit-free potatoes—these small tweaks make all the difference.
Selection Tip: When choosing your organic seed potatoes, look for varieties like Yukon Gold or Red Pontiac—they sprout more reliably than waxy potatoes. Avoid any with green patches (a sign of solanine buildup from light exposure) or soft spots. That 24-hour air-drying period in Step 1 is non-negotiable—it’s what prevents rot when you plant. I’ve ruined three batches by skipping this step, so trust me on this.
Light Control: The 7-10 day light exposure in Step 2 is where most people go wrong. Green, elongated sprouts mean you left them too long—these won’t transplant well. Use that cardboard box trick with a small window and rotate your potatoes daily. If you don’t have a grow light, a south-facing windowsill works, but check them twice daily. The goal is white, stubby sprouts—like tiny toothpicks—about 1 inch long.
Planting Depth: In Step 3, that 2-3 inch soil coverage is crucial. Too little and your sprouts rot underground; too much and they’ll struggle to break through. I’ve found that leaving the top of the potato exposed to light actually helps the plant photosynthesize early on. For containers, use 6-inch depth—any shallower and roots get crowded.
Mulch Wisdom: That 2-inch layer of straw in Step 4 isn’t just for looks—it’s your moisture regulator. I’ve had entire batches fail when I skipped mulching during hot days. Check weekly: damp but not soggy is perfect. And if you’re in a climate with temperature swings, add an extra inch of mulch during cold nights. The hill-up method in Step 4 really works—adding soil around stems encourages more tuber formation.
Pro Tips for Sprouted Seed Potatoes
- Here’s what I’ve learned after years of growing chit-free potatoes—these small tweaks make all the difference.
- Selection Tip: When choosing your organic seed potatoes, look for varieties like Yukon Gold or Red Pontiac—they sprou...
- Light Control: The 7-10 day light exposure in Step 2 is where most people go wrong. Green, elongated sprouts mean you...
Frequently asked questions
Got questions about sprouting seed potatoes the right way? You’re not alone! Here are answers to the most common queries—so you can grow confidently and waste nothing.
What’s the fastest way to sprout seed potatoes without chits?
Place your potatoes in a bright, cool spot (like a sunny windowsill) for 2–3 weeks. Avoid direct sunlight—it can overheat them. Turn them weekly for even sprouting. Once sprouts are 1–2 inches long, they’re ready for planting!
How long can I store sprouted seed potatoes before planting?
Sprouted potatoes stay viable for 2–4 weeks if stored in a cool, dark, and humid place (like a paper bag in the fridge). Avoid refrigeration longer than that—it can turn the starches to sugar, making them sweet and less ideal for planting.
Can I use store-bought potatoes for sprouting, or do I need special seed potatoes?
Yes! Most organic, untreated store-bought potatoes work, but seed potatoes (certified disease-free) are the safest bet. Avoid potatoes treated with sprout inhibitors (like those from grocery stores in winter)—they won’t sprout.
What do I do if my sprouted potatoes start rotting?
Rot usually happens from too much moisture or overcrowding. Ensure your storage container has good airflow and check for soft, mushy spots. Remove any rotting potatoes immediately to prevent spread. If stored properly, sprouts should stay firm and healthy!
Are sprouted seed potatoes eco-friendly compared to buying bagged potatoes?
Growing your own from sprouts cuts waste—no plastic packaging—and lets you use every part of the potato (even the sprouts!). Plus, you control organic methods, reducing chemical exposure. It’s a win for your garden and the planet!
Wrapping up and next steps
Growing sprouted seed potatoes is a game-changer for gardeners who love sustainability and zero-waste gardening! 🌱 By following these simple steps, you’ll not only boost your yield but also reduce food waste while creating a healthier lawn or garden.
Ready to dive in? Start by gathering your materials, then follow the chit-free sprouting method—your future harvest will thank you!
Now that you’re armed with knowledge, take the next step! Plant those sprouted potatoes in well-draining soil, keep them hydrated, and watch your garden thrive. Happy growing—your eco-friendly harvest awaits! 🌿