
Lawn
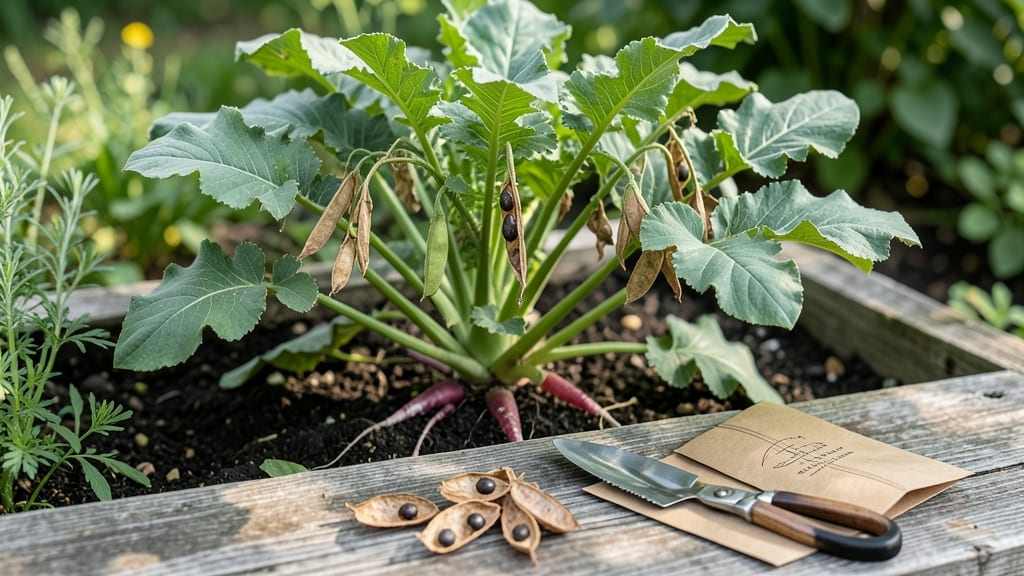
Saving radish seeds turns last year’s scraps into next season’s zero-waste harvest—here’s how to do it right. 🌱 The trick is letting those cold-hardy plants bolt and flower, then collecting the seeds before they scatter.
I’ve saved seeds from my own garden for three years now, and the payoff is fresh radishes that taste exactly like the ones I grew, without the seed packet price tag.
You’ll need just three things: healthy radish plants that bolted naturally (not forced), a dry spot to let the seed pods mature, and a paper bag for storage. The key is patience—wait until the pods turn dry and papery before harvesting, usually 2-3 weeks after flowering.
Rushing it means lower viability, and nobody wants to waste their hard work.
Once you’ve got those crisp, brown pods, crack them open to reveal the seeds inside. Spread them on a tray to dry completely, then store them in a cool, dark place for up to 5 years.
The first batch you save might not be perfect, but every season gets easier—and your garden’s resilience grows with it.
This method works for any radish variety, from quick-growing cherry bells to winter-hardy black Spanish types. Just avoid mixing varieties in the same patch, or you might end up with a confusing (and less predictable) seed mix. Start small, and soon you’ll be the neighborhood expert on cold-stressed radish blooms.
📚 In This Guide
- What you need
- Instructions
- Tips and common mistakes
- Wrapping up and next steps
What you need
- ● Mature radish plants: Allow radishes to bolt (go to seed) in the garden—choose disease-resistant varieties like Daikon or Cherry Belle for best results.
- ● Pruning shears or sharp scissors: 1 pair (for cleanly harvesting seed pods).
- ● Paper bags or breathable mesh bags: 2–3 medium-sized (for drying seed pods—avoid plastic to prevent mold!).
- ● Drying rack or screen: 1 (to elevate pods and improve airflow).
- ● Small paper plates or envelopes: 3–5 (for storing dried seeds).
- ● Permanent marker: 1 (to label seed varieties and harvest dates).
- ○ Gloves (optional but helpful): 1 pair (to protect hands from prickly seed pods).
- ● Seed catalog or notebook: For tracking varieties and notes on performance.
- ● Dehumidifier or fan: To speed up drying in humid climates.
- ● Fine mesh sieve: For separating seeds from chaff efficiently.
- ● Vacuum sealer: To extend seed viability for long-term storage.
Step-by-Step instructions for radish seed saving
Here’s how to turn this year’s radishes into next year’s seeds—no fancy tools needed.
🌱 Step 1: Select and Grow a Few Extra Plants for Seed
Pick a variety you love and plant 4-6 extra radishes alongside your main crop. Let them bolt naturally—don’t rush this. The best seed parents grow in cool weather (50-65°F); hot summers make radishes bitter and less reliable for seed production. Watch for flower stalks to emerge from the center leaves, signaling it’s time to focus on these plants.
Thin the rest of your radish patch to avoid competition. You’ll know these are ready for seed when their leaves yellow and stems elongate—classic signs of bolting. Let 2-3 of the healthiest plants grow tall, while you harvest the others for eating. This ensures you’re saving seeds from strong, disease-free stock.
☀️ Step 2: Encourage Blooms with Strategic Light and Heat
Radishes need full sun (6+ hours daily) and a little warmth to flower well. If your spring was cool, move potted radishes to a bright windowsill or under grow lights for 2-3 weeks to trigger blooming. You’ll see buds form at the top of the stem—this is your cue that the plant is ready for the next step.
Here’s the trick: let some flowers open fully, but pinch off others as they form. This directs the plant’s energy into fewer, stronger seed pods instead of spreading resources thin. Use your fingers to gently crush buds when they’re still small—no need for scissors. You’ll end up with larger, more viable seeds this way.
🌿 Step 3: Cold-Stress Blooms to Boost Seed Viability
This is the zero-waste hack: cold-stressing the flowers ensures better germination. Once 50% of flowers are open, move the plants to a cool, shaded spot (40-50°F) for 3-5 days. A garage, basement, or even a covered porch works. The shock mimics winter conditions, tricking the plant into producing hardier seeds for next year.
Watch for flowers to wilt slightly—this is normal. After the cold treatment, return them to warmth and sun. You’ll see new buds form within 2-3 days. This second flush of flowers is prime for seed production. Keep the soil moist but not soggy; dry soil stresses plants and can drop buds prematurely.
⏰ Step 4: Harvest and Dry Seed Pods Properly
Seed pods form 3-4 weeks after flowering. Wait until they turn brown and papery, then snip the entire stem with 4-6 inches of stalk attached. Lay the stems in a single layer on a mesh screen or paper towel in a dry, dark place (70-75°F). Avoid plastic bags—humidity causes mold.
After 1-2 weeks, the pods will rattle when shaken—your signal that seeds are dry. Rub the pods between your palms to release seeds, then sift through a fine mesh strainer to remove chaff. Store seeds in a paper envelope (not plastic) in a cool, dark spot. They’ll stay viable for 3-4 years if kept dry.
💧 Step 5: Test Germination Before Next Planting
Before you plant saved seeds next spring, do a quick germination test. Moisten a paper towel, place 10 seeds on it, and fold it into a packet. Keep it in a warm, dark place (70°F) for 5-7 days. Count how many sprout—80% or higher means your seeds are ready for planting. If fewer than half sprout, try again with fresh seeds or adjust your drying process.
Real talk: Radish seeds can be finicky. If germination is low, blame immature pods or humidity during drying. Next time, harvest pods when they’re fully brown but still slightly plump—not shriveled. With practice, you’ll nail it every time.
Tips & tricks for perfect radish seed saving
These little tricks will help you turn your radish harvest into reliable seeds for next season—without the guesswork.
Plant Selection Matters: When choosing your 4-6 extra radishes for seed saving, pick the healthiest, most vigorous plants from your patch. Look for deep red color and firm roots—these traits often carry through to the seeds. Avoid any plants showing signs of disease or pest damage, as those flaws can persist in the next generation. I've learned this the hard way after growing bitter seeds from compromised plants!
Light and Heat Hack: For the 2-3 weeks of supplemental light in Step 2, position your plants within 6 inches of the grow lights. Radishes are sensitive to light intensity—too far away and they won't bloom properly. A simple LED bulb works perfectly for this purpose. The key is consistency: maintain the same light schedule daily to trigger reliable flowering.
Cold-Stress Timing: When you move your blooming radishes to that 40-50°F cool spot, time it right after 50% of flowers have opened. This is when the plant's energy shifts from blooming to seed production. I've found that a covered porch with afternoon shade works best in my climate—just avoid direct drafts that could stress the delicate flowers. The 3-5 day window gives you flexibility without risking bud drop.
Drying Secret: For the drying process in Step 4, I recommend using a small fan on low setting near your drying area. This creates gentle airflow that prevents mold while maintaining the 70-75°F temperature. The goal is to dry the pods evenly without creating hot spots. Watch for that telltale rattle—it's your confirmation that the seeds are ready. Store your paper envelopes in a sealed container with a silica gel packet to absorb any remaining moisture.
Pro Tips for Radish Seed Saving
- These little tricks will help you turn your radish harvest into reliable seeds for next season—without the guesswork.
- Plant Selection Matters: When choosing your 4-6 extra radishes for seed saving, pick the healthiest, most vigorous pl...
- Light and Heat Hack: For the 2-3 weeks of supplemental light in Step 2, position your plants within 6 inches of the g...
Frequently asked questions
How do I know when radishes are ready for seed saving?
Radishes are ready for seed saving when they bolt (send up flowering stalks) and the flowers fade to yellow or brown. Harvest seeds when seed pods turn dry and papery—usually 4–6 weeks after flowering. Pro tip: Wait until pods split open naturally to avoid premature seed loss!
Can I save seeds from store-bought radishes?
Unfortunately, no! Store-bought radishes are often hybrid varieties, meaning their seeds won’t grow true to type. For reliable seed saving, grow open-pollinated or heirloom radishes from saved seeds or trusted seed sources.
𨟌 Why did my radishes bolt before producing seeds?
Bolting often happens due to heat stress, poor soil, or overcrowding. For next year, try succession planting in cooler weather, mulch to regulate soil temps, and space plants properly. Pro tip: Some varieties (like Daikon) are more bolt-resistant!
Can I save seeds from radishes grown in containers?
Yes! Container-grown radishes can produce seeds just like in-ground plants. Ensure containers are large enough (at least 6 inches deep) and provide support for tall flowering stalks. Just follow the same harvesting and drying steps!
Wrapping up and next steps
Saving radish seeds is a rewarding way to embrace sustainability and enjoy fresh, homegrown produce year after year! By following these steps—from selecting healthy plants to properly drying and storing your seeds—you’re not just cutting waste, you’re building a self-sufficient garden legacy. 🌱
Ready to take the next step? Start small this season by saving seeds from just a few radishes, then expand your efforts as you gain confidence. Share your zero-waste wins with fellow gardeners or even gift seeds to friends—because the best harvests are the ones we grow together!